Quick start guide to using Reduct
Welcome to Reduct! This short guide will provide you with everything you need to get started in just a couple of minutes.
If you have access, open Reduct in another tab and follow along. If you don't... grab a free trial!
If you'd prefer to watch a video instead of reading, we have you covered with a video overview.
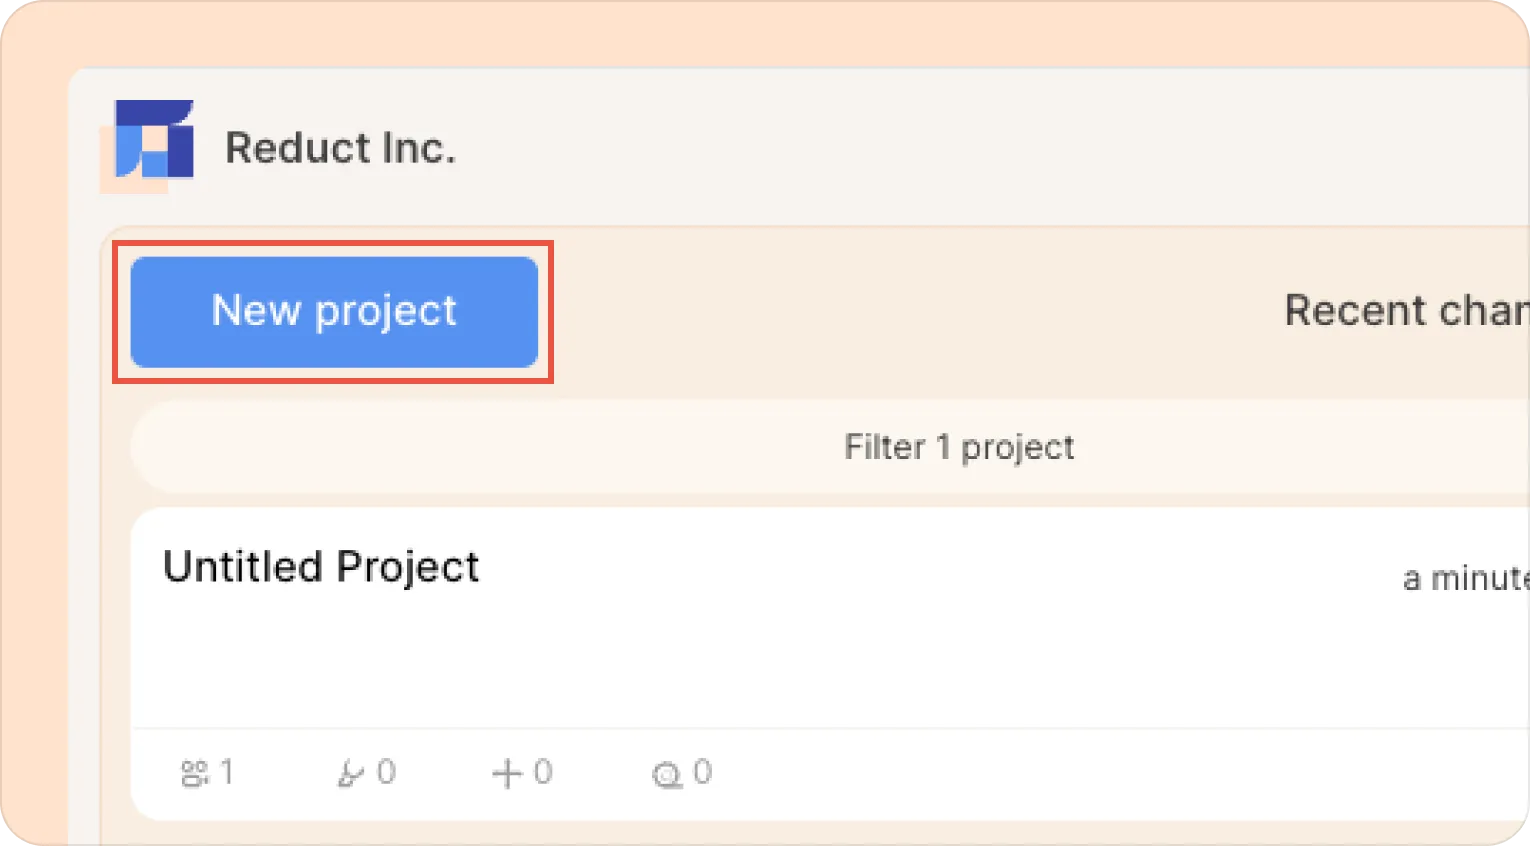
Create or join a project
Work in Reduct is organized into projects.
Create a new project, or join one that somebody else has already set up in your organization. If you just signed up for a free trial, you will begin a new empty project.
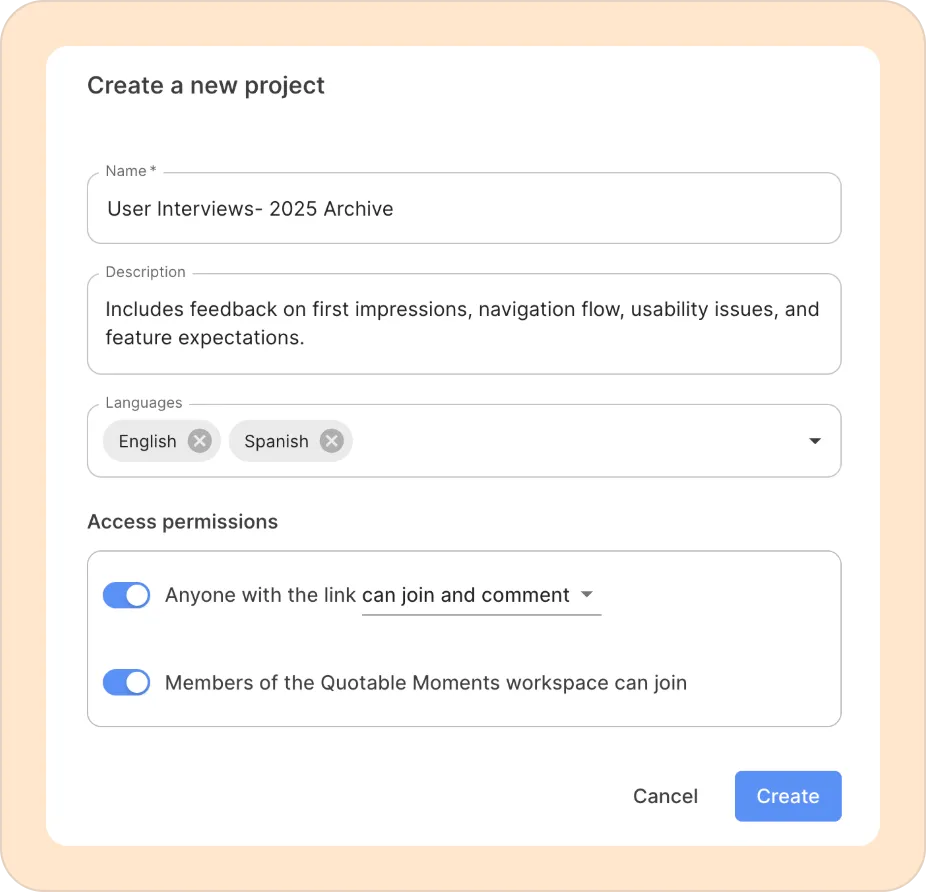
If you're setting up a new project, give your project a name and a description, select your default transcription language, and set appropriate access permissions. You can adjust these settings at any time.
Navigating Reduct with the sidebar
Once you are in a project, you'll see a sidebar on your left. This is where you can create new recordings, and find recordings you've previously uploaded, your highlights, your labels, videoboards, and reels.
The icons along the top are tabs, which let you navigate to and access the different types of things that live in Reduct. Switching tabs will not impact what is currently open in the central panel.
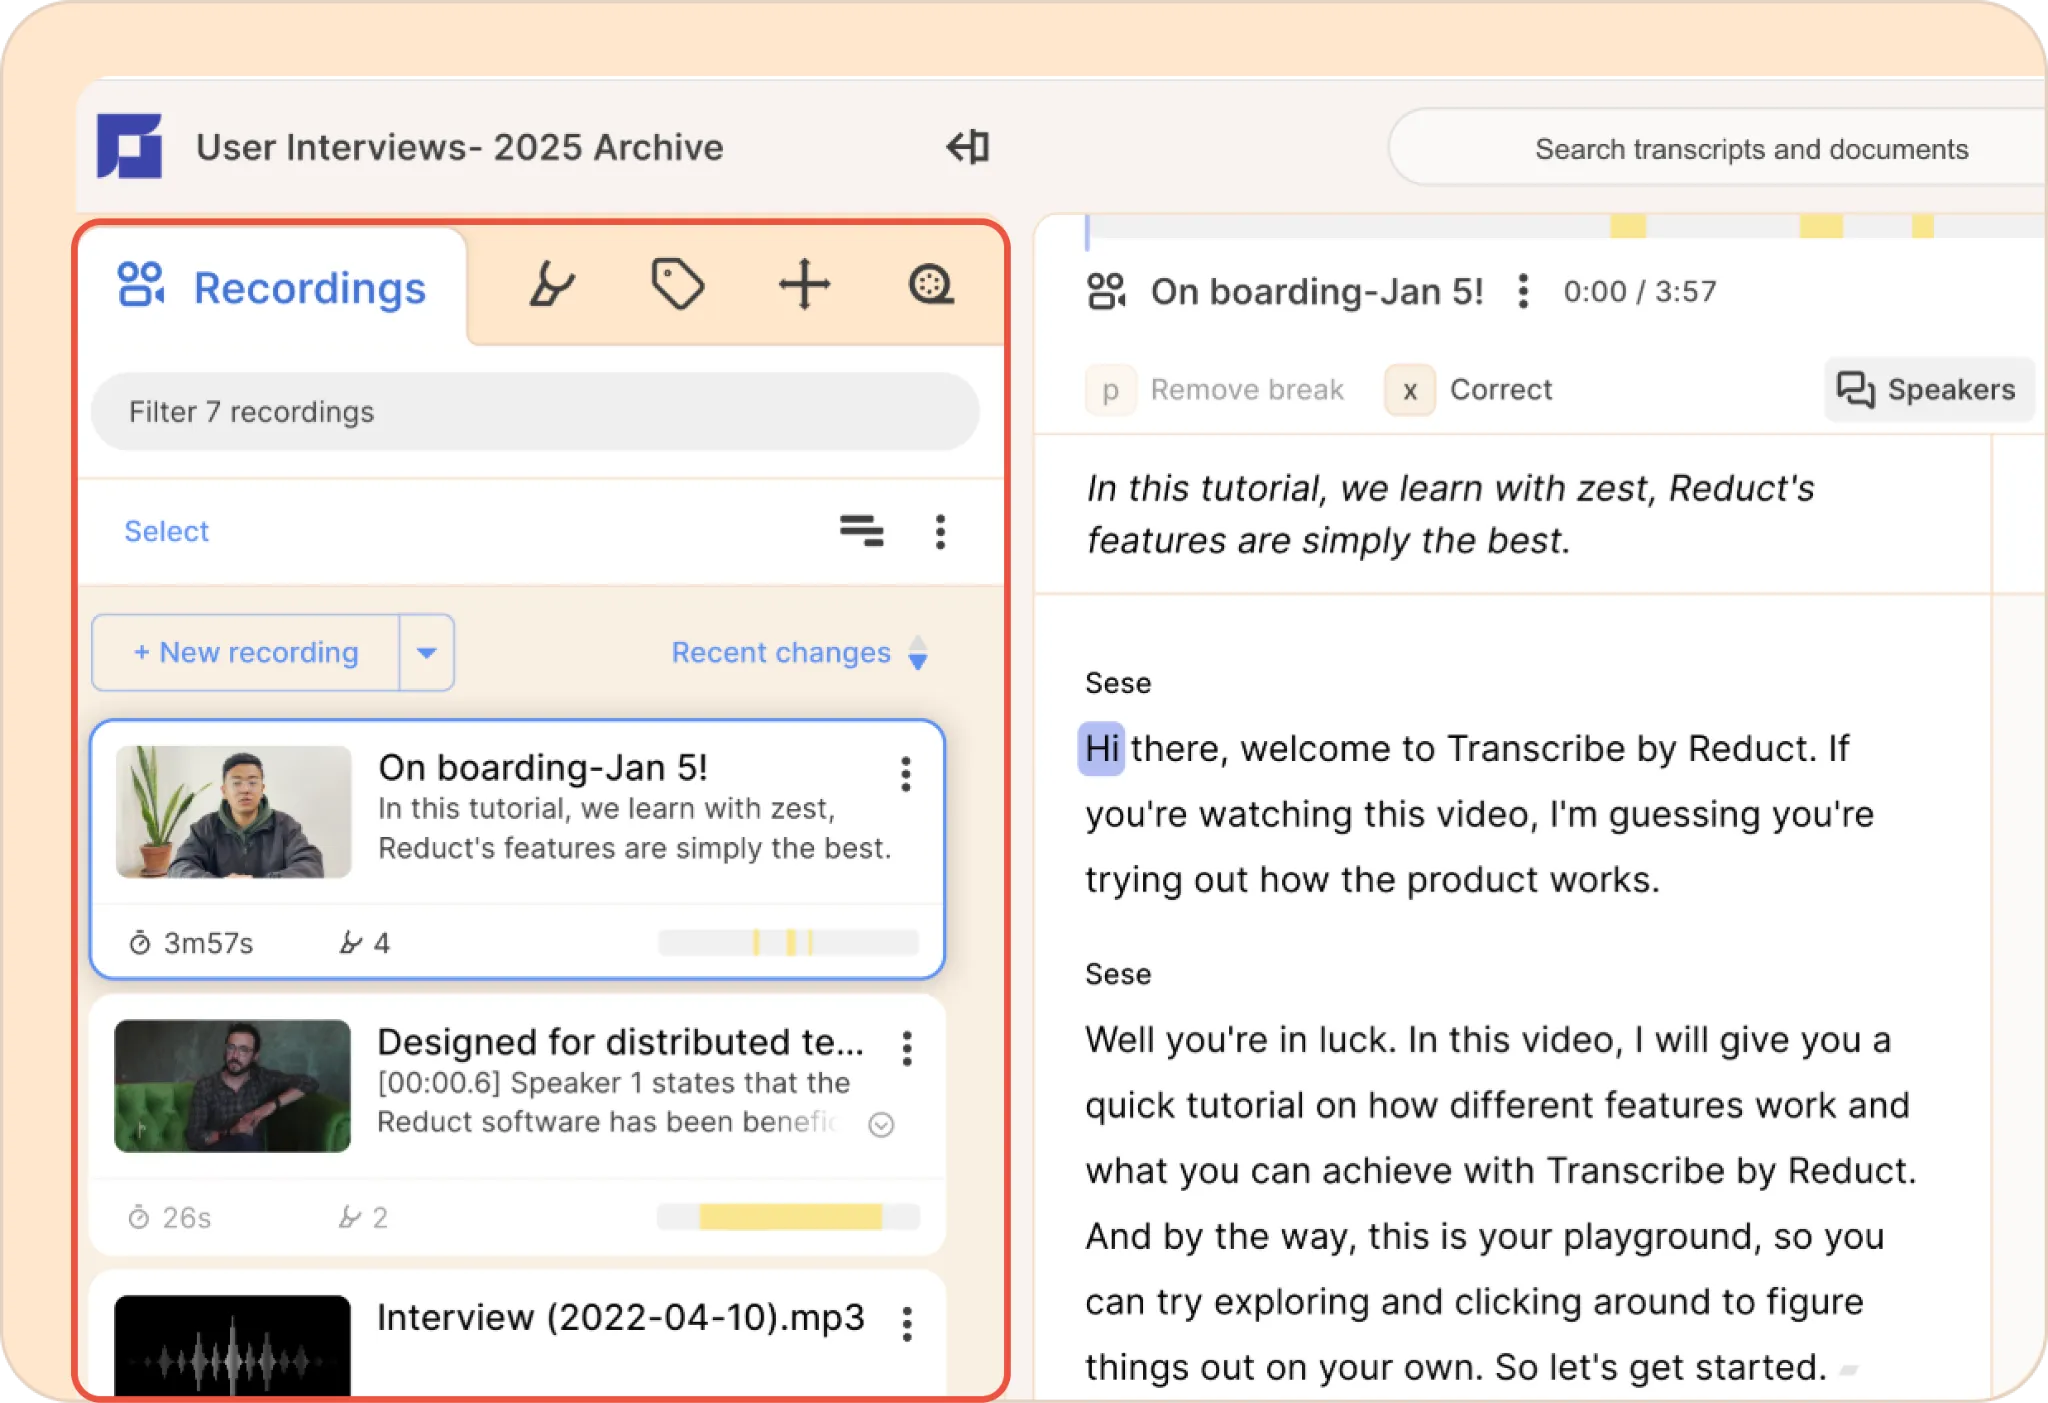
Clicking on one of the items within a tab will generally open it in the central panel. If you have a videoboard or reel open, you can drag items from the sidebar into it.
Getting files into Reduct
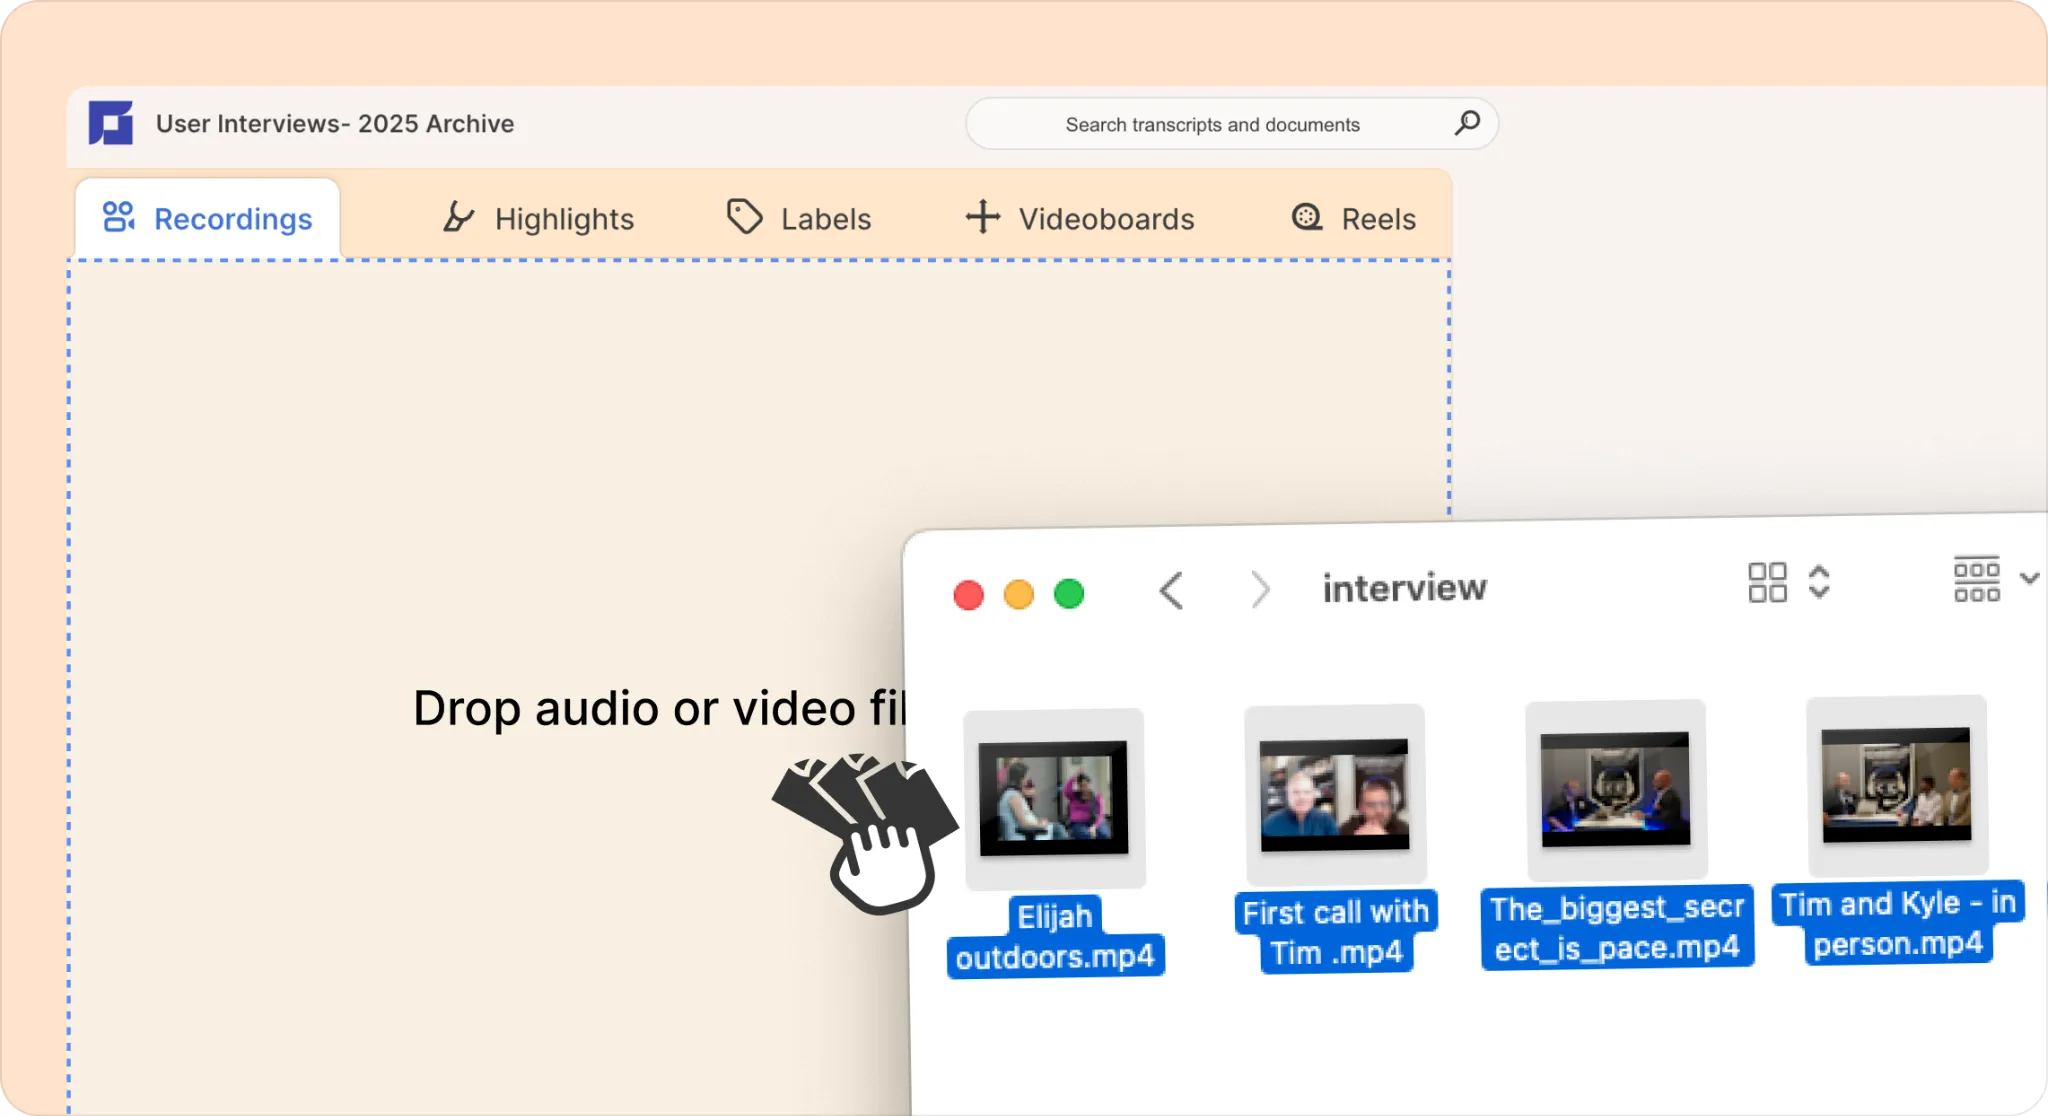
Drag and drop
You can upload your recordings in bulk with a simple drag and drop. Just open your folder, select the files that you want to upload and drag and drop them onto the left-hand side panel (sidebar) in Reduct.
One recording at a time
There are also other ways to get your recordings into Reduct using the New Recording button:
- You can upload your recordings directly from your computer. (More here)
- You can connect your Zoom account to Reduct to directly import cloud recordings.
- You can also import media from different third-party services such as Google Drive, Dropbox, UserTesting, and more, using a web link. (More here)
- You can use the live capture functionality to connect to an in-progress Zoom or Google Meet call and see the transcript rolling out while the call is ongoing. (More here)
You can also add a description or upload other files as attachments to the recording at any time.
Ingest process
As soon as you upload or import your recording, Reduct automatically starts to generate machine transcripts. The generated machine transcript syncs to your media word for word and syllable for syllable to the millisecond.
If you use live capture, you'll see a live transcript continually updating as the call continues, which will be further refined once the call has finished and the recording is automatically imported.
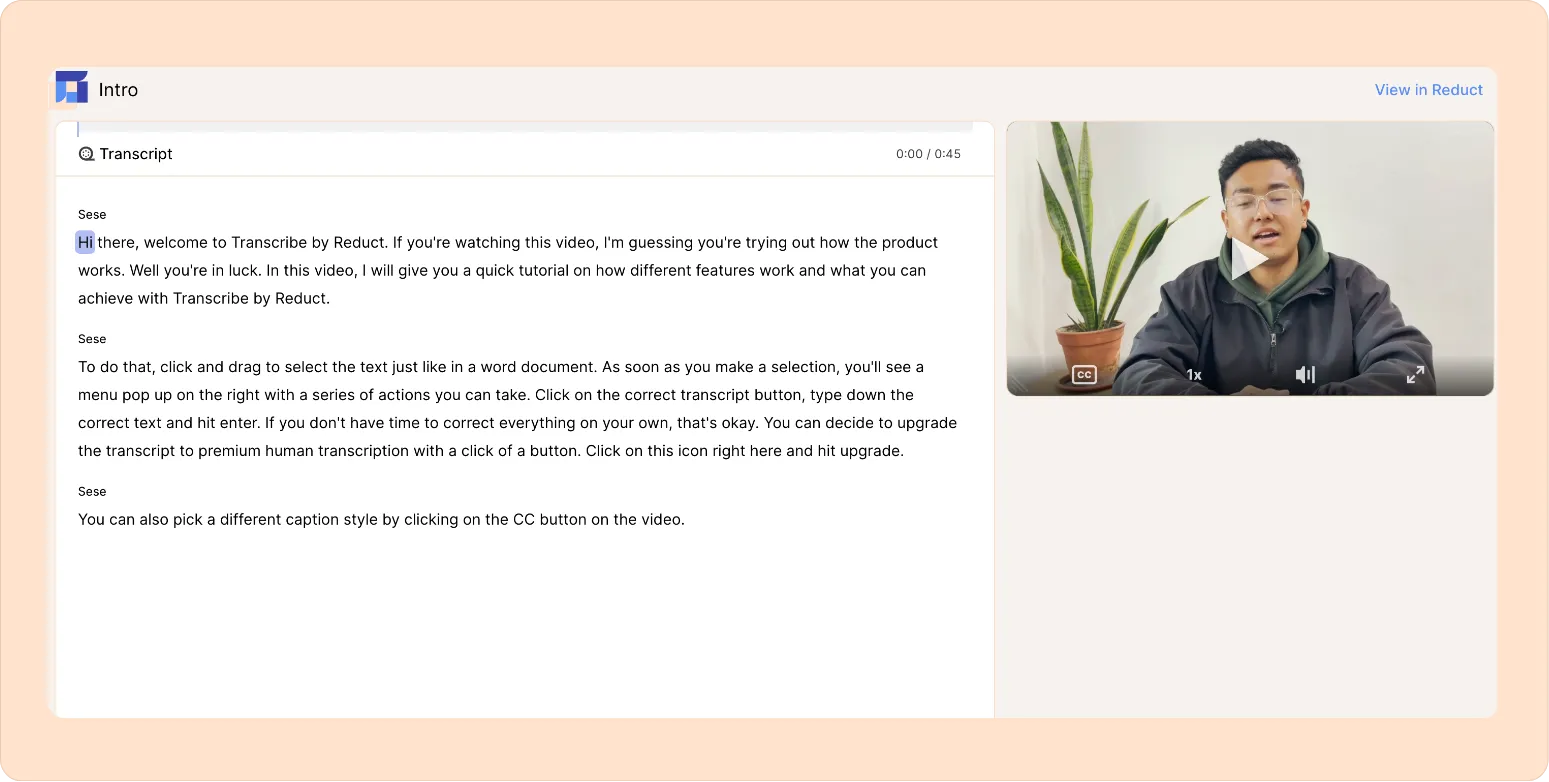
Creating highlights
Highlights are snippets you select from your recordings to save for later, organize, review, and share.
- Click and drag on the transcript to select text you want to highlight.
- Using the menu that appears next to your transcript, either click Highlight or hit the h key on your keyboard.
- Optional: choose a color for your highlight to help categorize it.
Creating a highlight makes that clip easy to find again, work with, and share in the future.
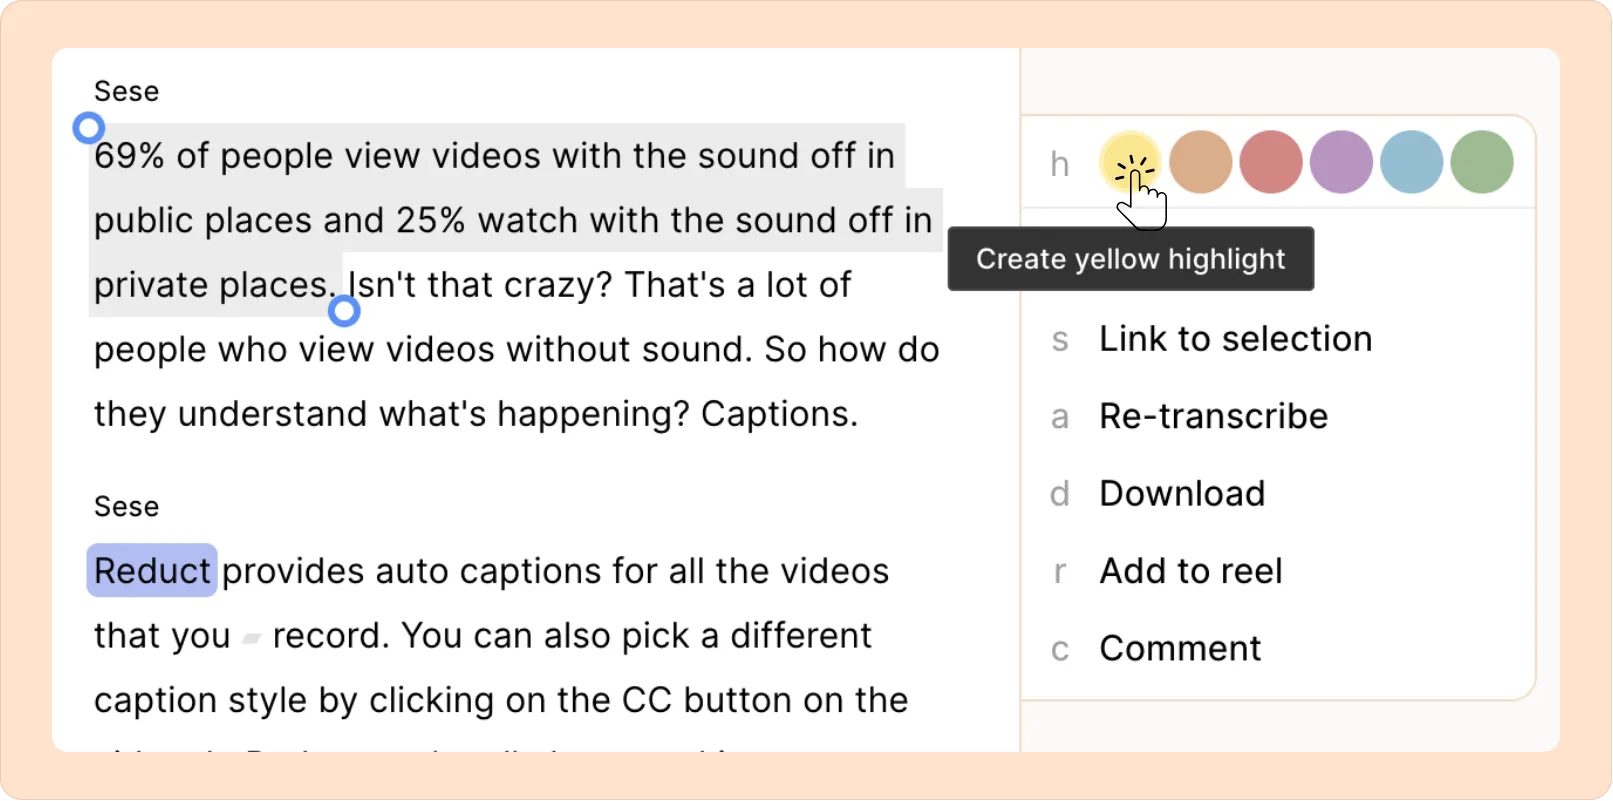
Use color-coding and labels to organize your highlights.
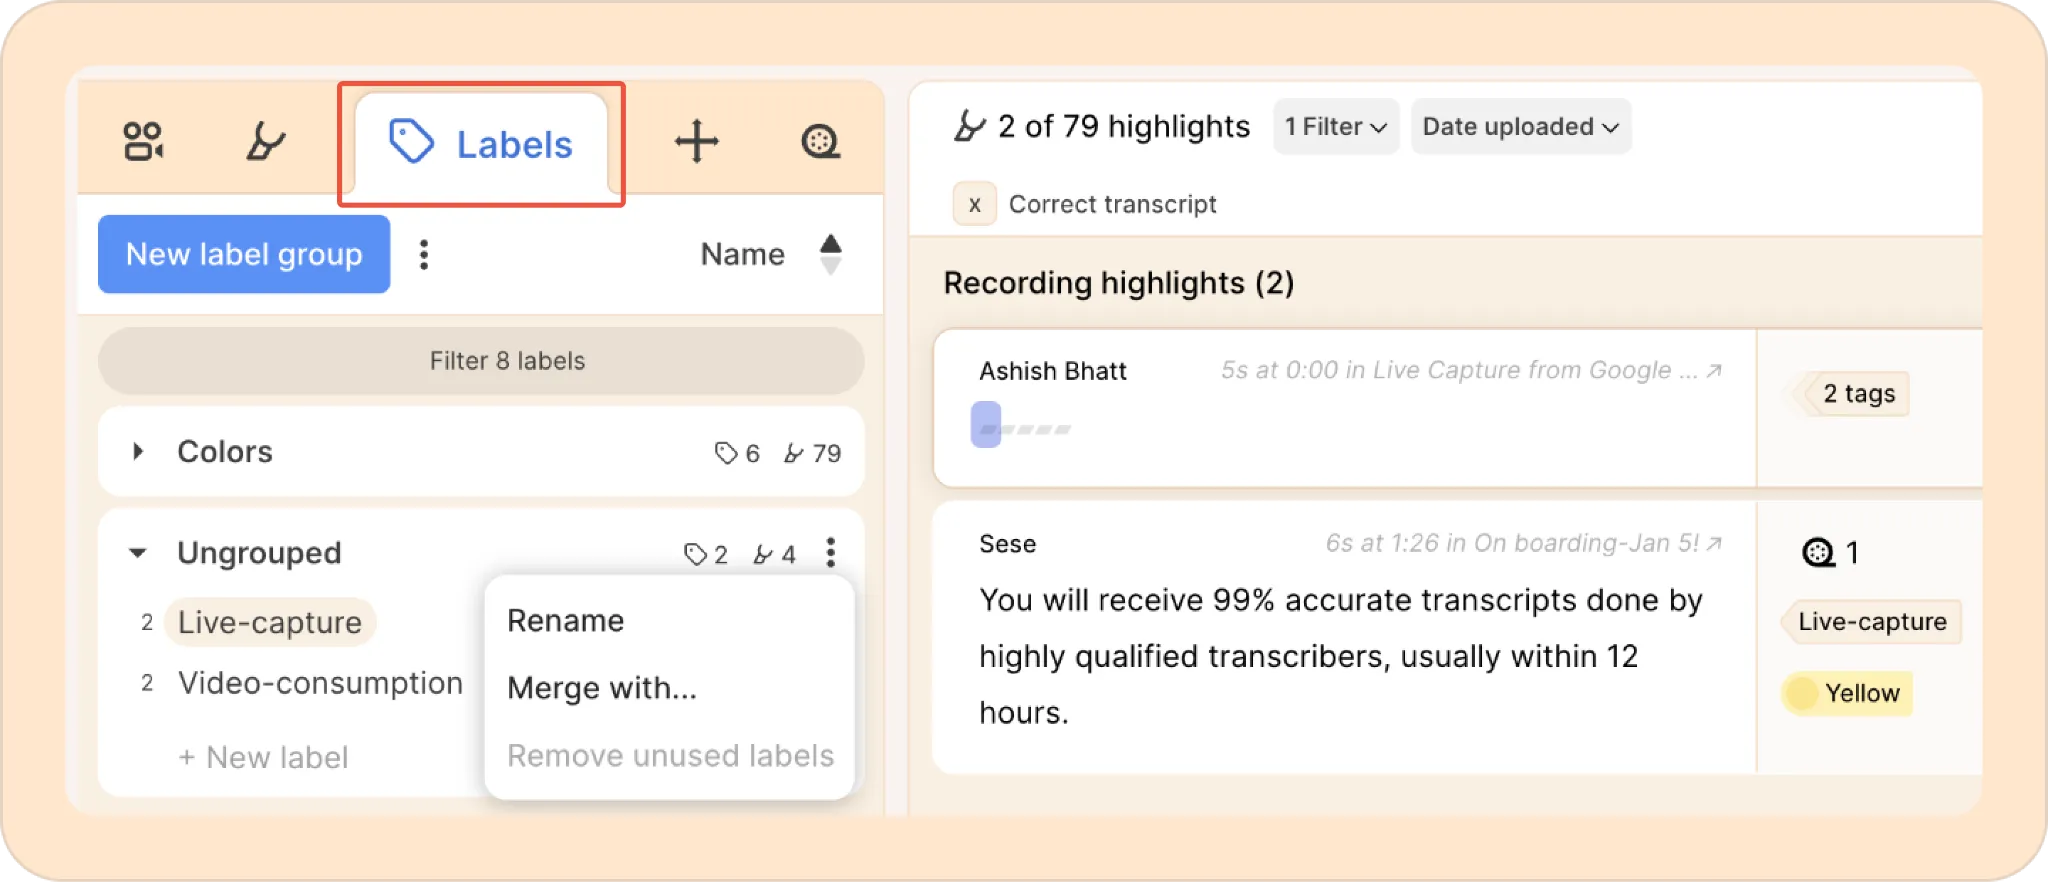
Creating tags or labels
You can also label your highlights as part of your synthesis process, or simply to easily find it again later.
Click on Highlight and label and start typing to either use labels that already exist in your project, or to create a new one.
- You can add multiple labels to the same highlight.
- You can also choose from the AI-generated label suggestions relevant to your selection.

If you switch the left sidebar to Labels, you’ll see all the labels currently in your project. From there, you can manage them: rename, group, merge, and more.
Search through your transcripts
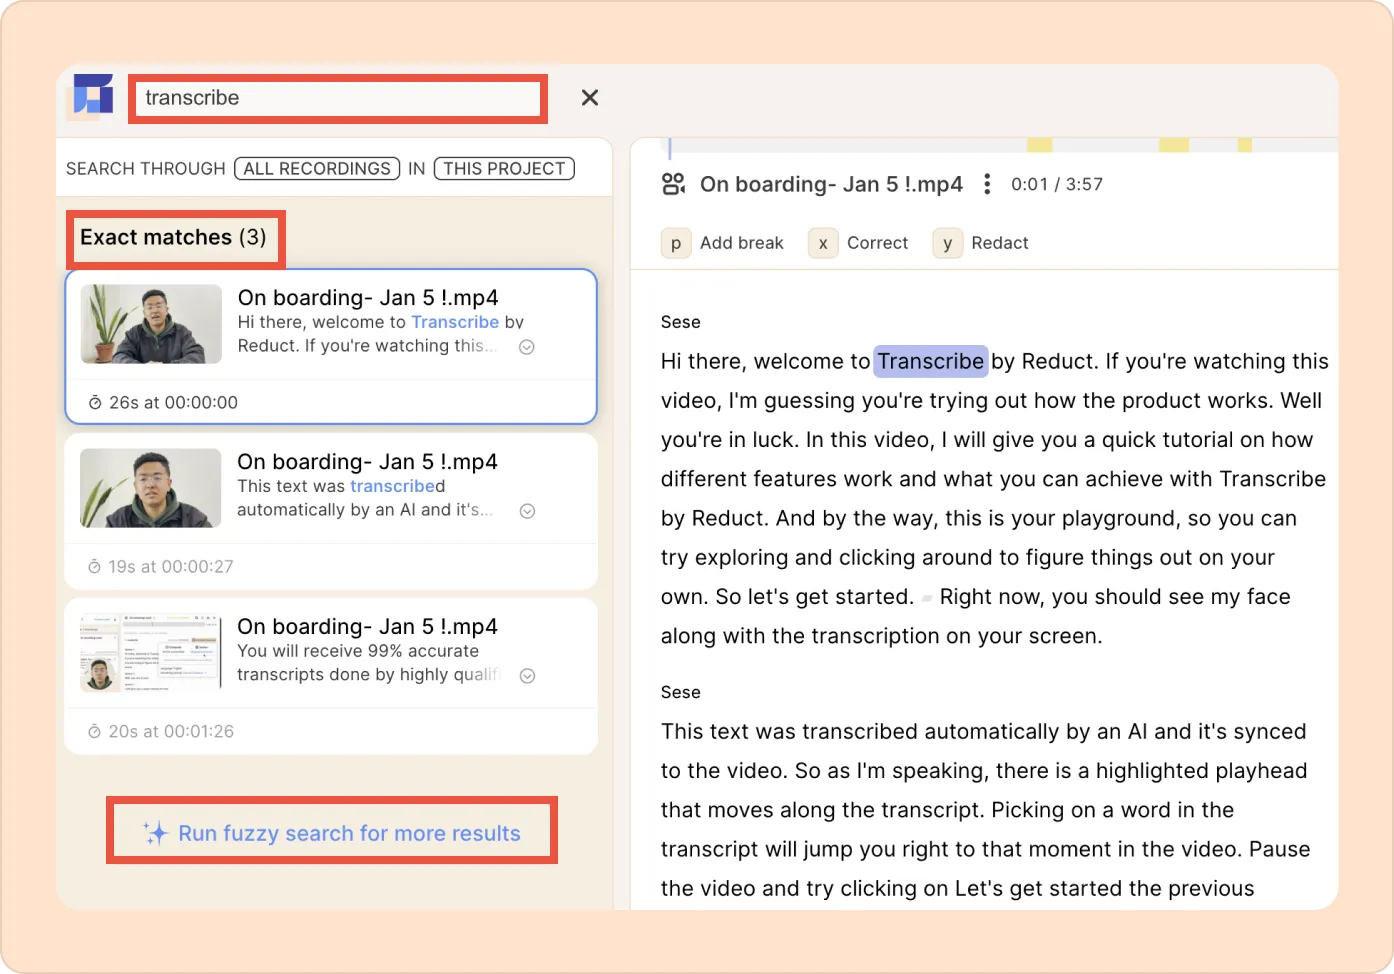
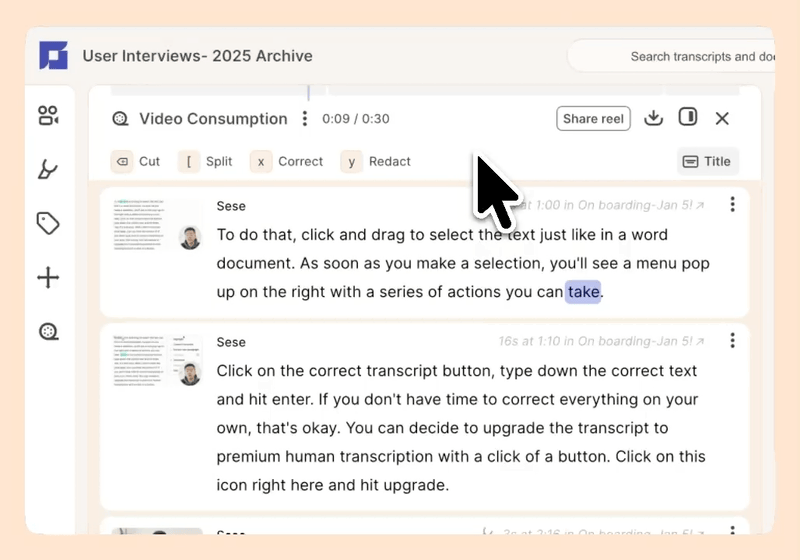
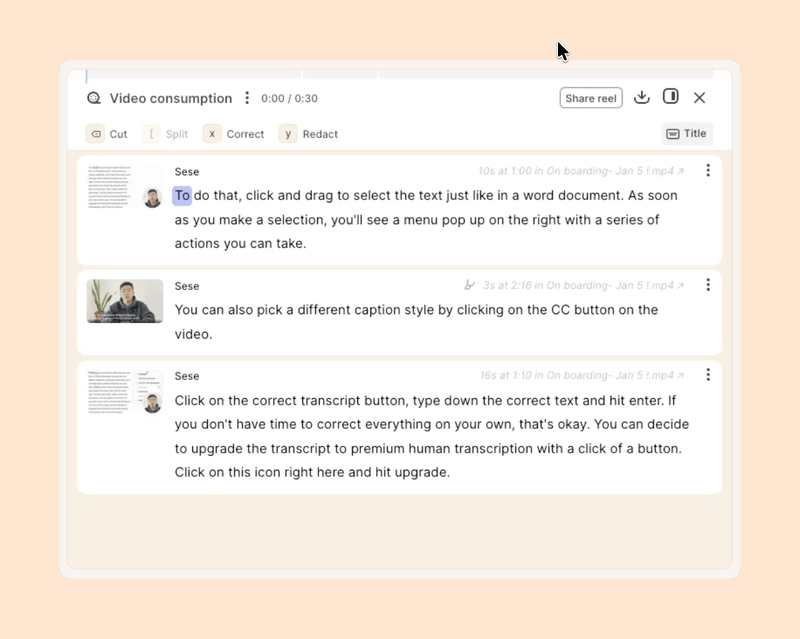
Use the search bar at the top of the screen to search for the full text of your transcripts.
- Use the search icon ( 🔎) next to the recording's name to initiate a search within it.
- Enter your desired search term, and Reduct will display the exact match or run fuzzy search to discover related words and phrases for your search term.
To search through your transcripts across multiple recordings and projects, use the search bar at the top of the screen.
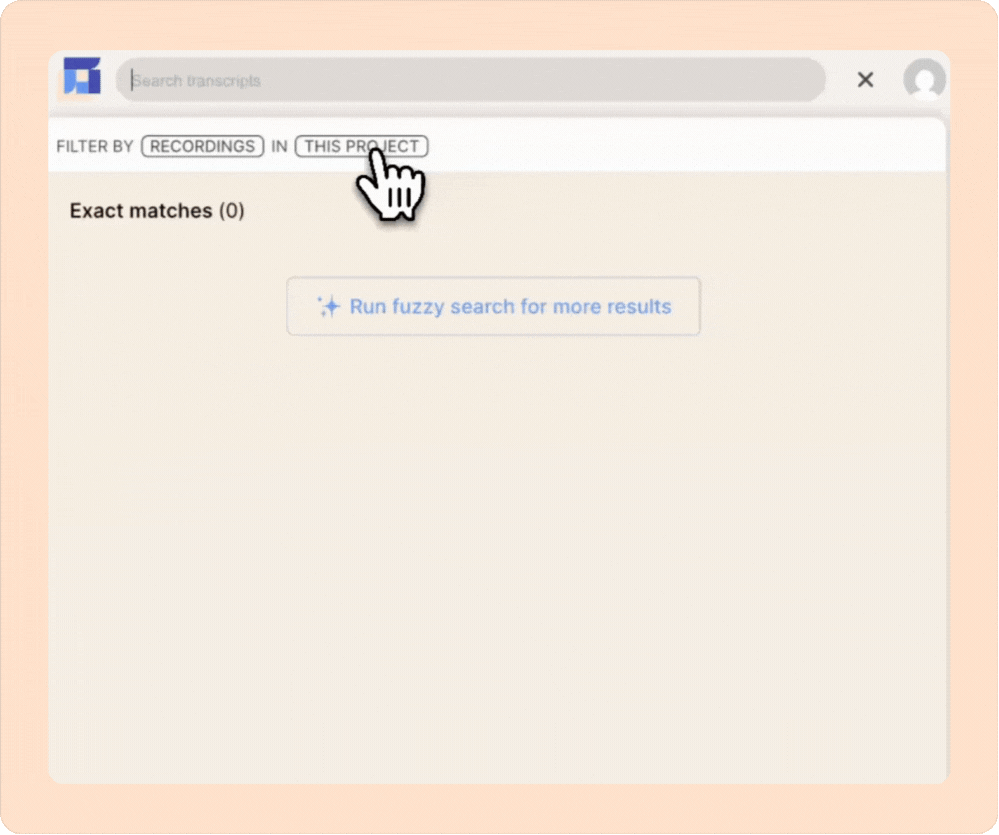
Our search will show the exact matches for the term you put in, followed by fuzzy matches. Reduct's NLP-based AI will find all relevant and related terms in each recording within this project.
Click on any search result to jump to that specific part of the recording's transcript, with the text from your search selected so that you can take action (such as highlight, label, or add to a reel).

Enclose your search term in quotation marks to get back only exact matches. Use the filters to widen your search to other projects, or to limit your search to specific recordings.
Complex analysis and synthesis
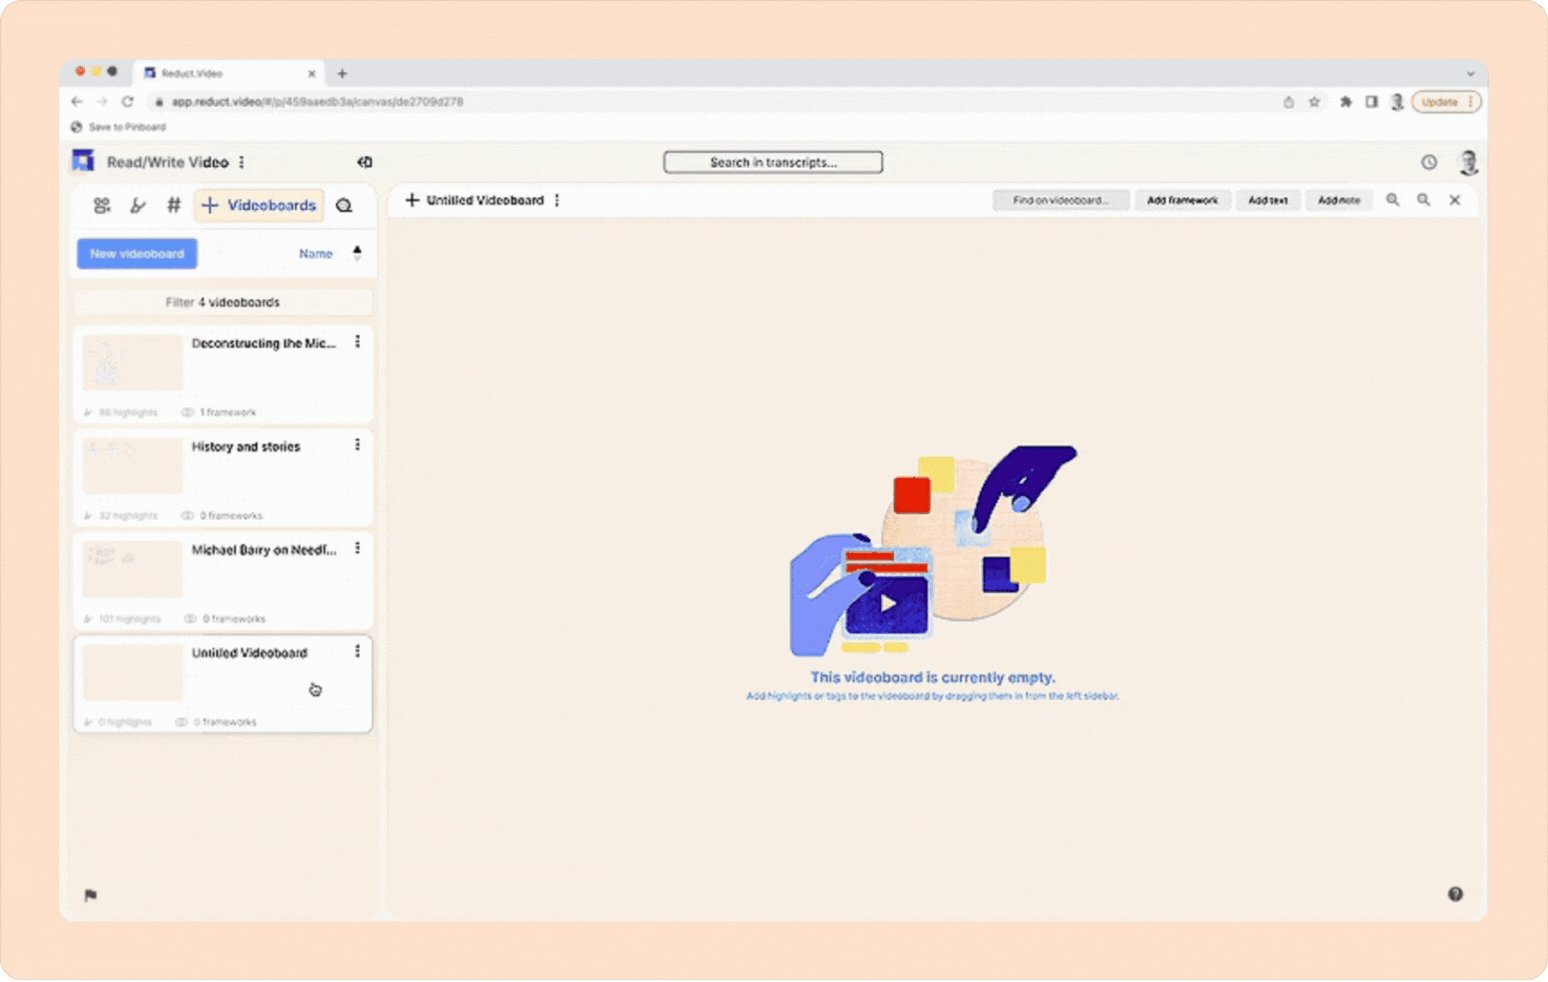
If your project demands more nuanced analysis, synthesis, or narrative flow than you can keep track of mentally, you can bring your highlights into a videoboard, where you can think and collaborate spatially.
- On the left sidebar, click the Videoboards tab.
- Click New videoboard if you want to create a new one, or select an existing one to open it.
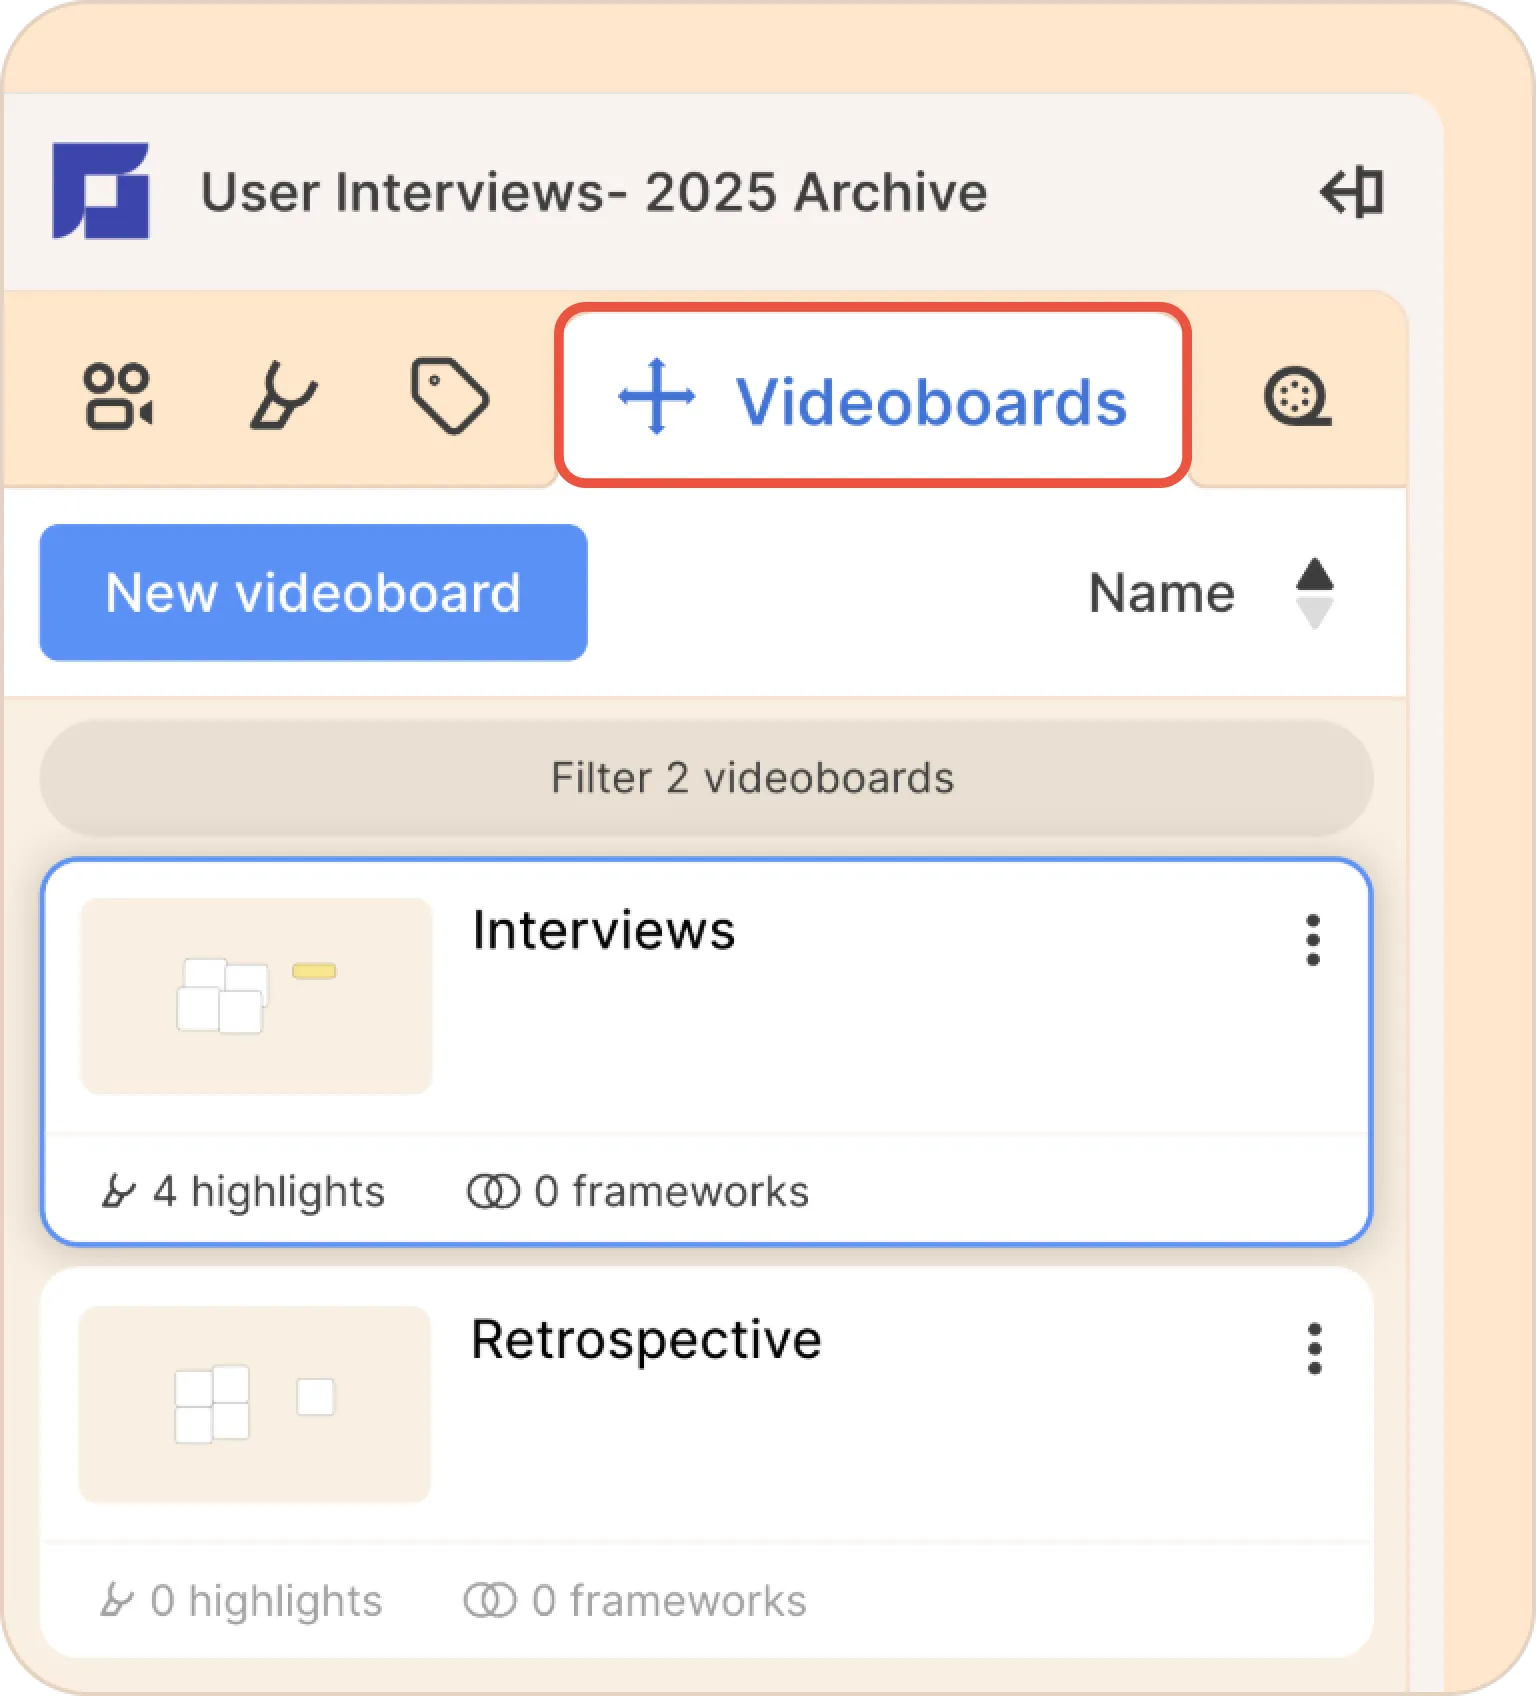
- Once you've created or opened a videoboard, switch the left sidebar to highlights, recordings, or labels, and drag and drop items onto the canvas.
Crafting reels
Assemble a narrative by bringing together multiple items into a reel to rapidly communicate with the emotional heft and nuance of video.
- Click Reels at the top of the left-hand panel (the rightmost tab).
- Click New reel to create a new one, or select an existing reel to open it in the central panel.
- Switch the sidebar to Highlights to drag and drop highlights into your reel.
- Use filters to narrow down the list.

You're not limited to highlights—you can also bring an entire label's worth of highlights into your reel by switching to that tab and dragging in a label or label group, or drag in entire recordings, or even other reels.
Drag and drop items in the reel to rearrange them into the order of your desired narrative.

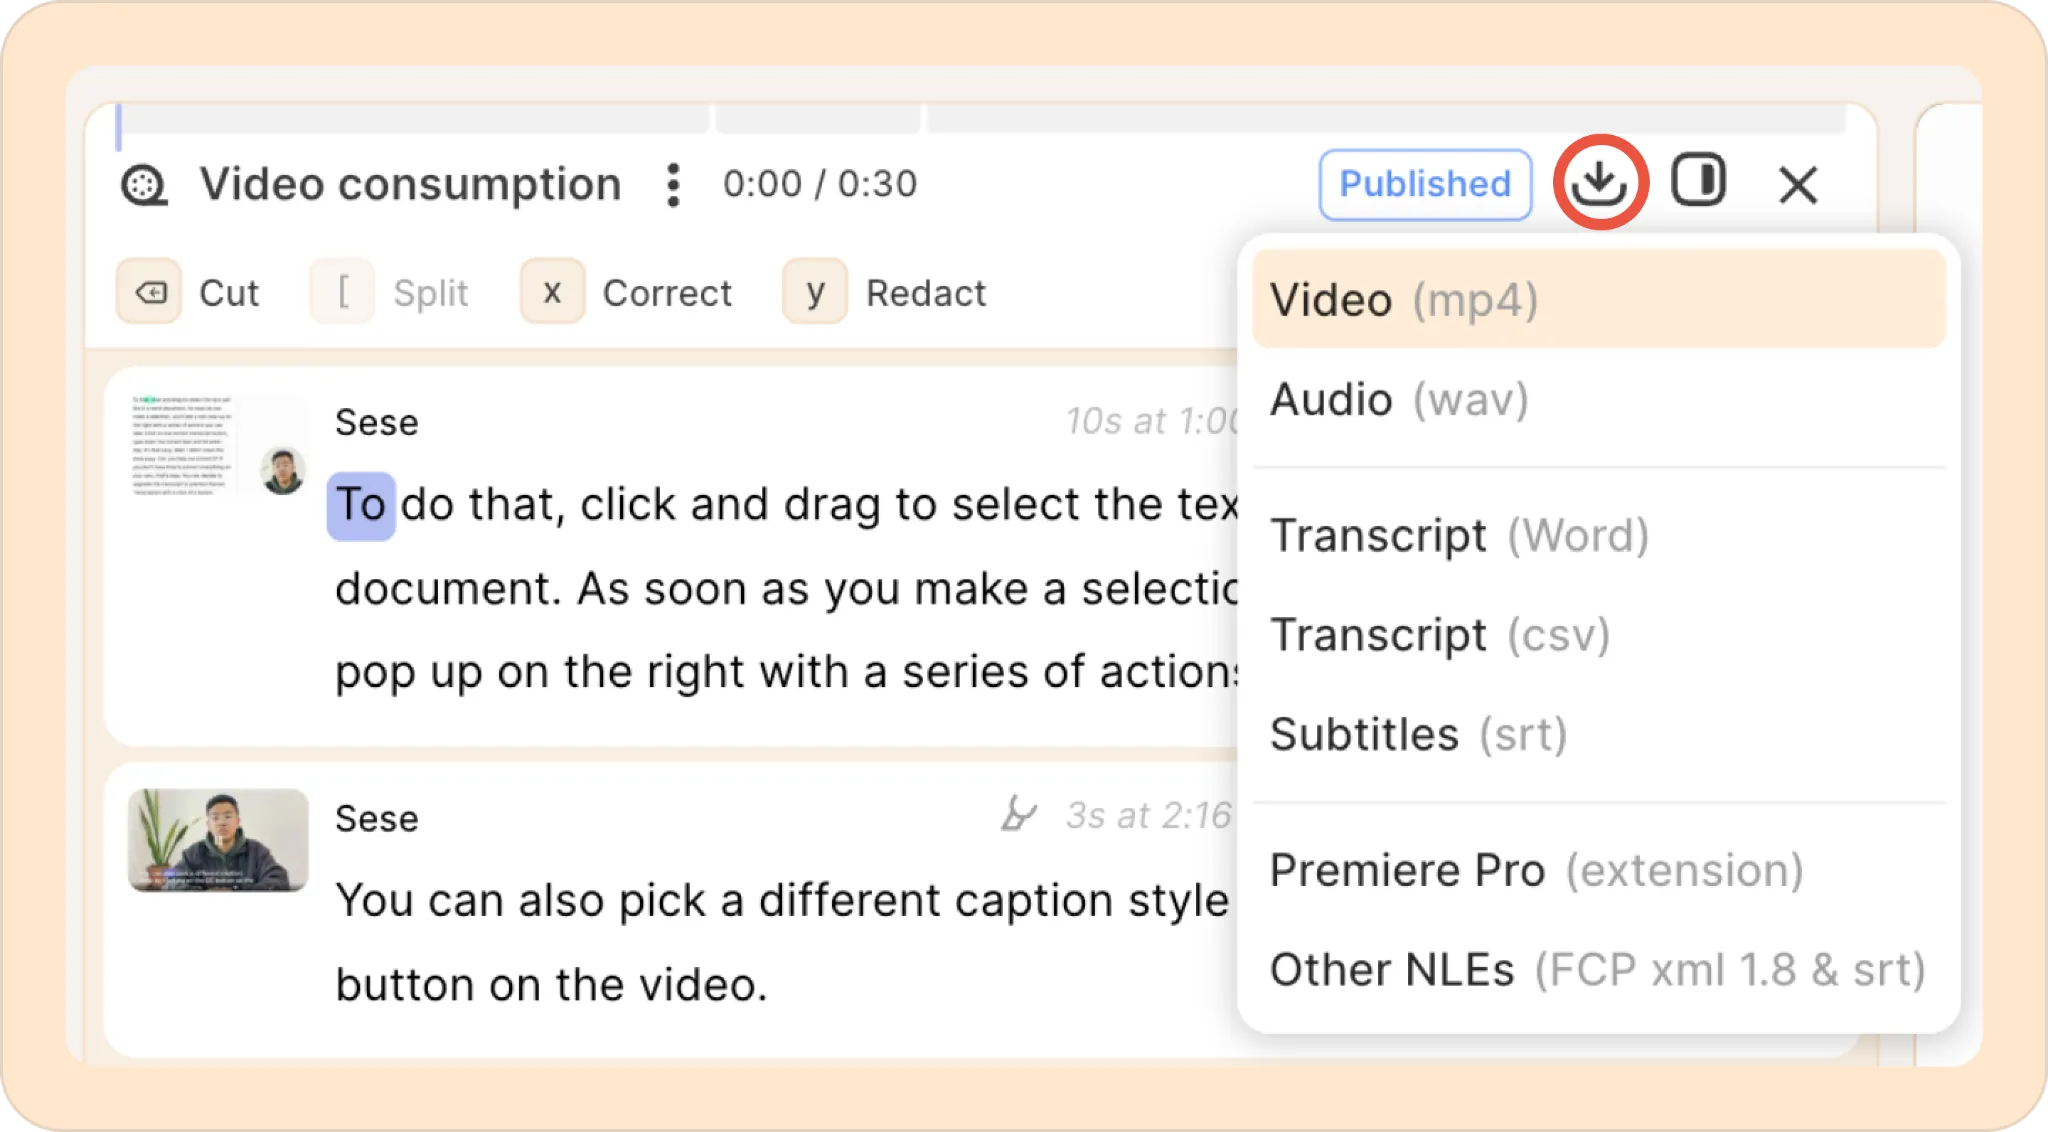
Editing in a reel
Striking through transcript text in a reel also edits your video.
- Drag your cursor over the bits you don’t need.
- Click Cut and the portion will be skipped during playback.
You can always change your mind - just select the portion of dialogue that was cut and click Restore.
Share your work!
Click the Share reel button to share your reel; this will let you create a link that you can share via Slack, email or any other channel. In many platforms, a preview of the transcript and a thumbnail of the video will be displayed.
Viewers who click your link will see your story on a page like this.
With Reduct, you can export your reels in multiple formats. Click the Export icon to download the video, audio, subtitles or a transcript file with just the parts you've included in your reel.
Reels can also be exported directly to Final Cut Pro, or to Adobe Premiere via our plug-in.
There's plenty more, but we hope that gives you enough to get going, and a solid foundation.
Need more than a reel?
You can also: