Organizing and controlling access
Managing project permissions
Projects in Reduct can act as permission boundaries - ie, you can control which users have access to a given project. In the project listing page, you’ll see profile pictures next to each project, on the right. These represent users who are currently members of that project; hover over them to see more details. As an editor, you can add or remove members and decide who can view or edit your project.
There are 4 types of user permission in Reduct: editors and commenters, either of which can be members of the entire workspace or have project-specific access.
Refer to this article to learn more ->
Making a project unlisted
By default, projects are visible to your entire team; individual users can choose to join a project. However, we also have the concept of “unlisted” projects, if you want to limit who can see not only the contents, but also the existence of a project.
Here’s how to make a project unlisted so no one else can access it without being explicitly added:
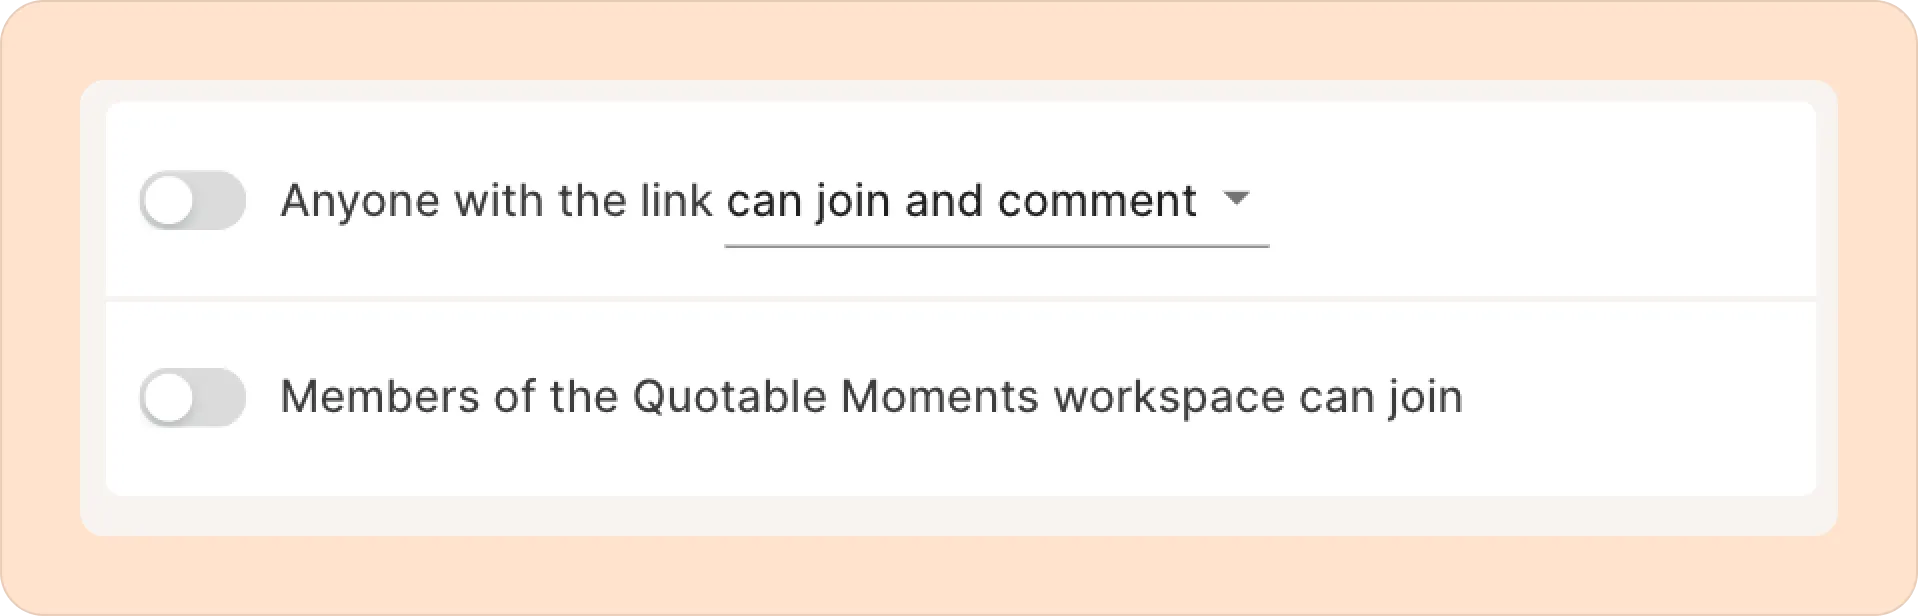
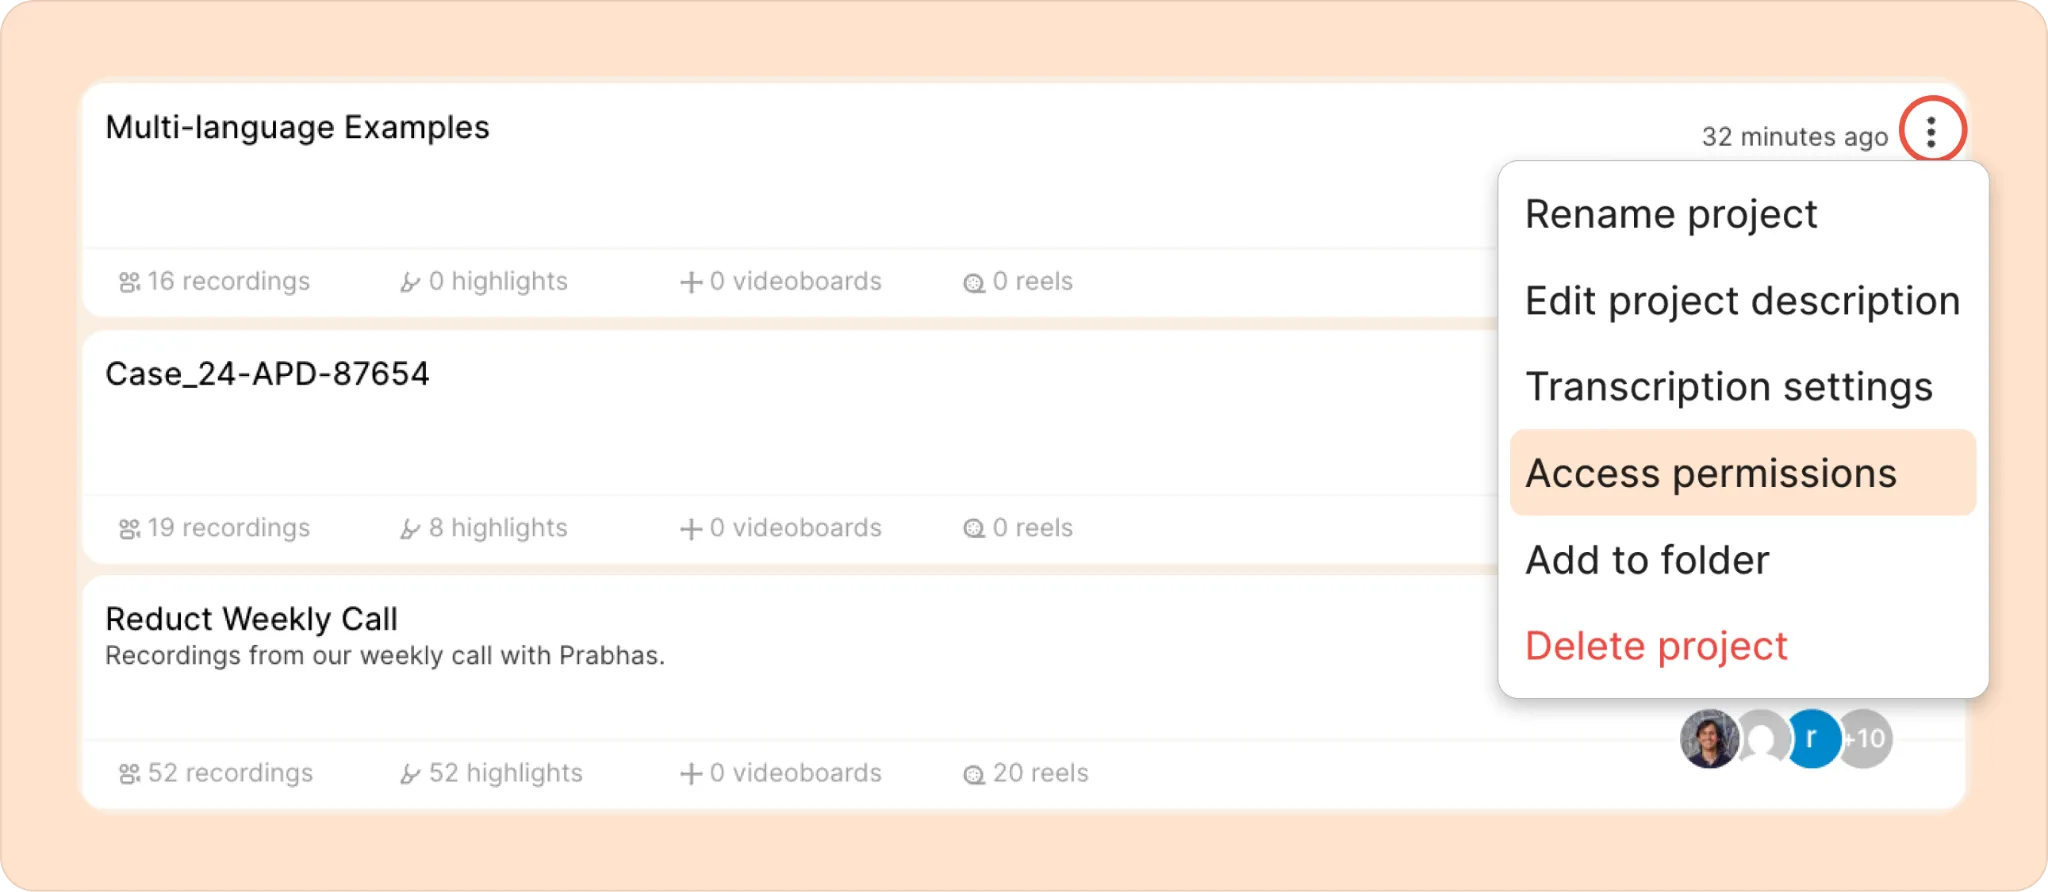
- Click the three-dot kebab (︙) menu next to the project and select Access permissions.
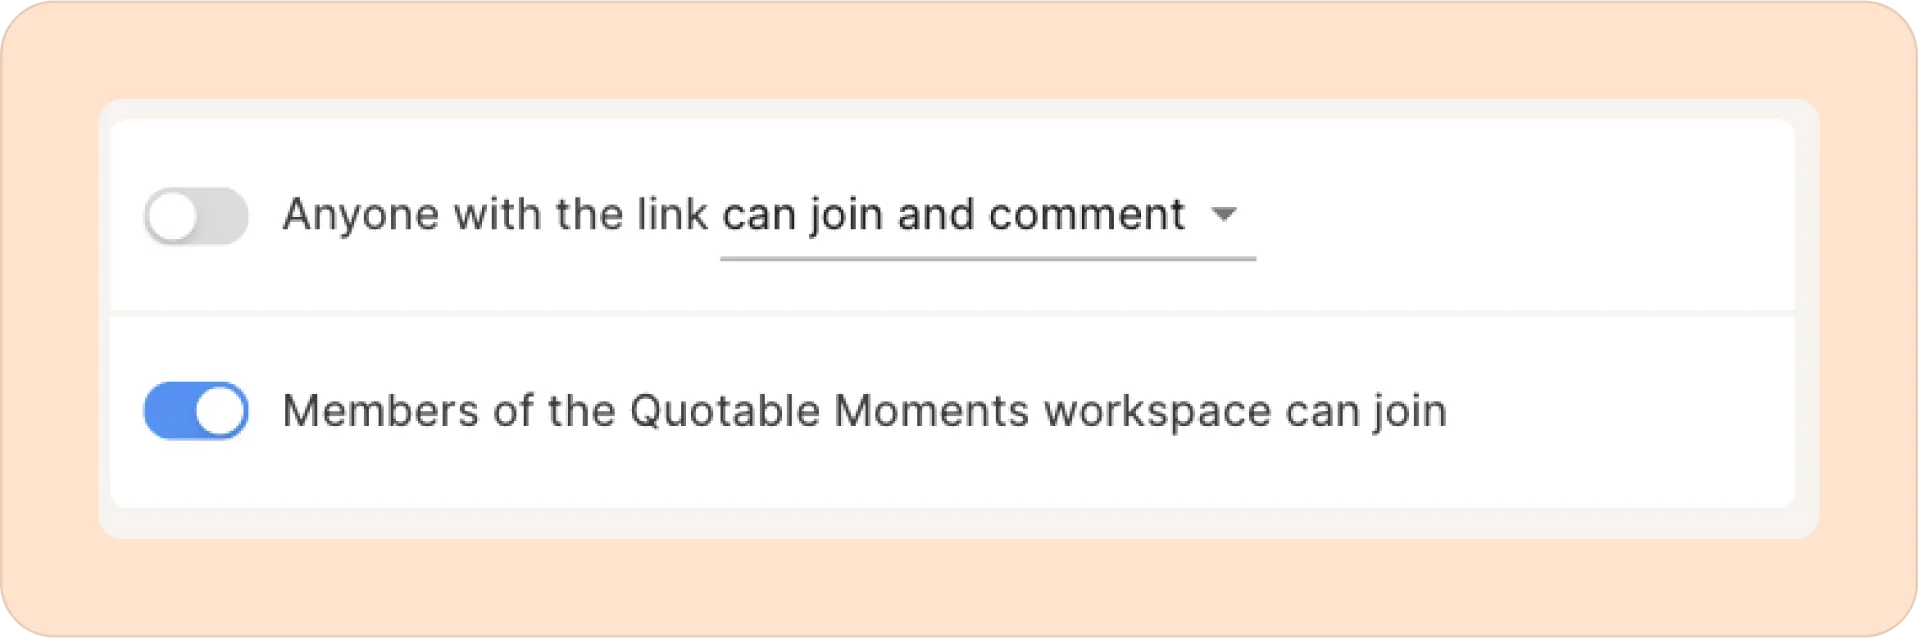
- Turn off both of these toggles:
- Anyone with the link can join and comment
- Members of [Name of your org] workspace can join
Giving view access
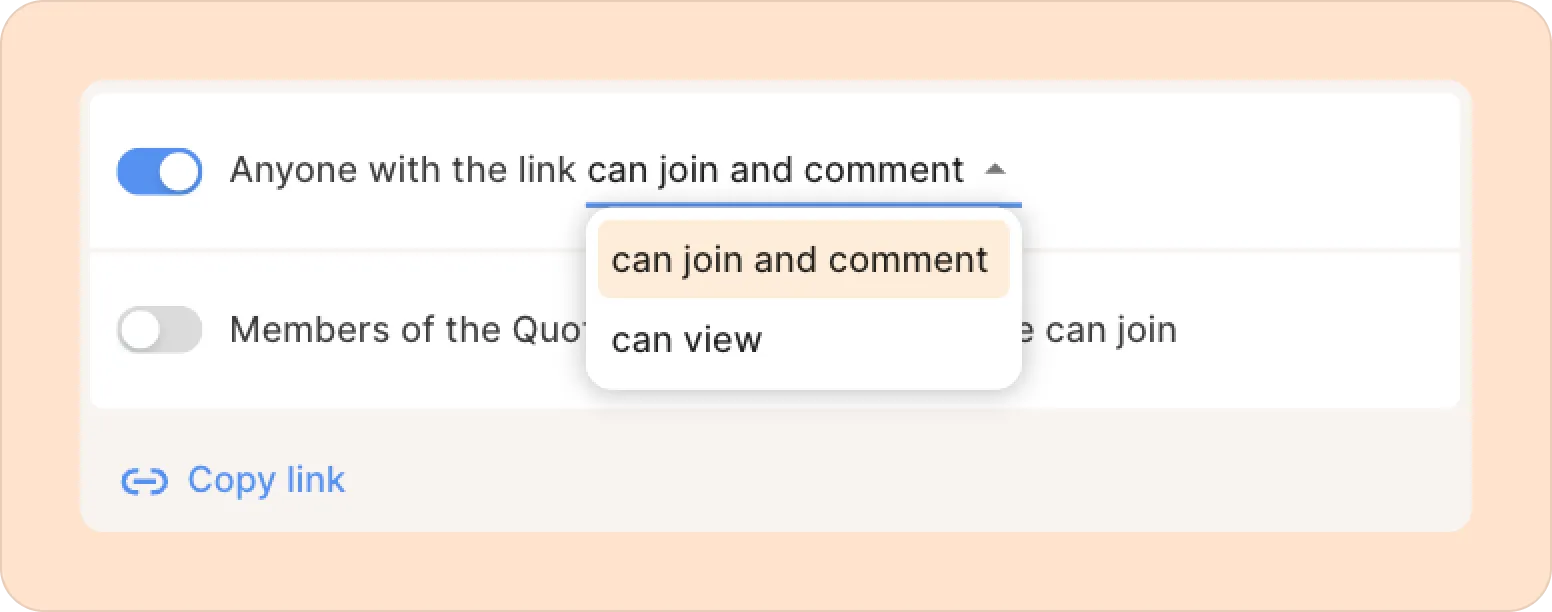
- Click Access permissions.
- Turn on the toggle Anyone with the link can…
- Choose:
- Can view – others can view recordings and transcripts, but cannot comment and make highlights.
- Can join and comment – others can highlight and leave comments.
- Click Copy link to share access.
Giving edit access to your team
Turn on Members of [your org] workspace can join. This gives full access to everyone on your team: editors can join the project with editor privileges, while commenters can join in that capacity.
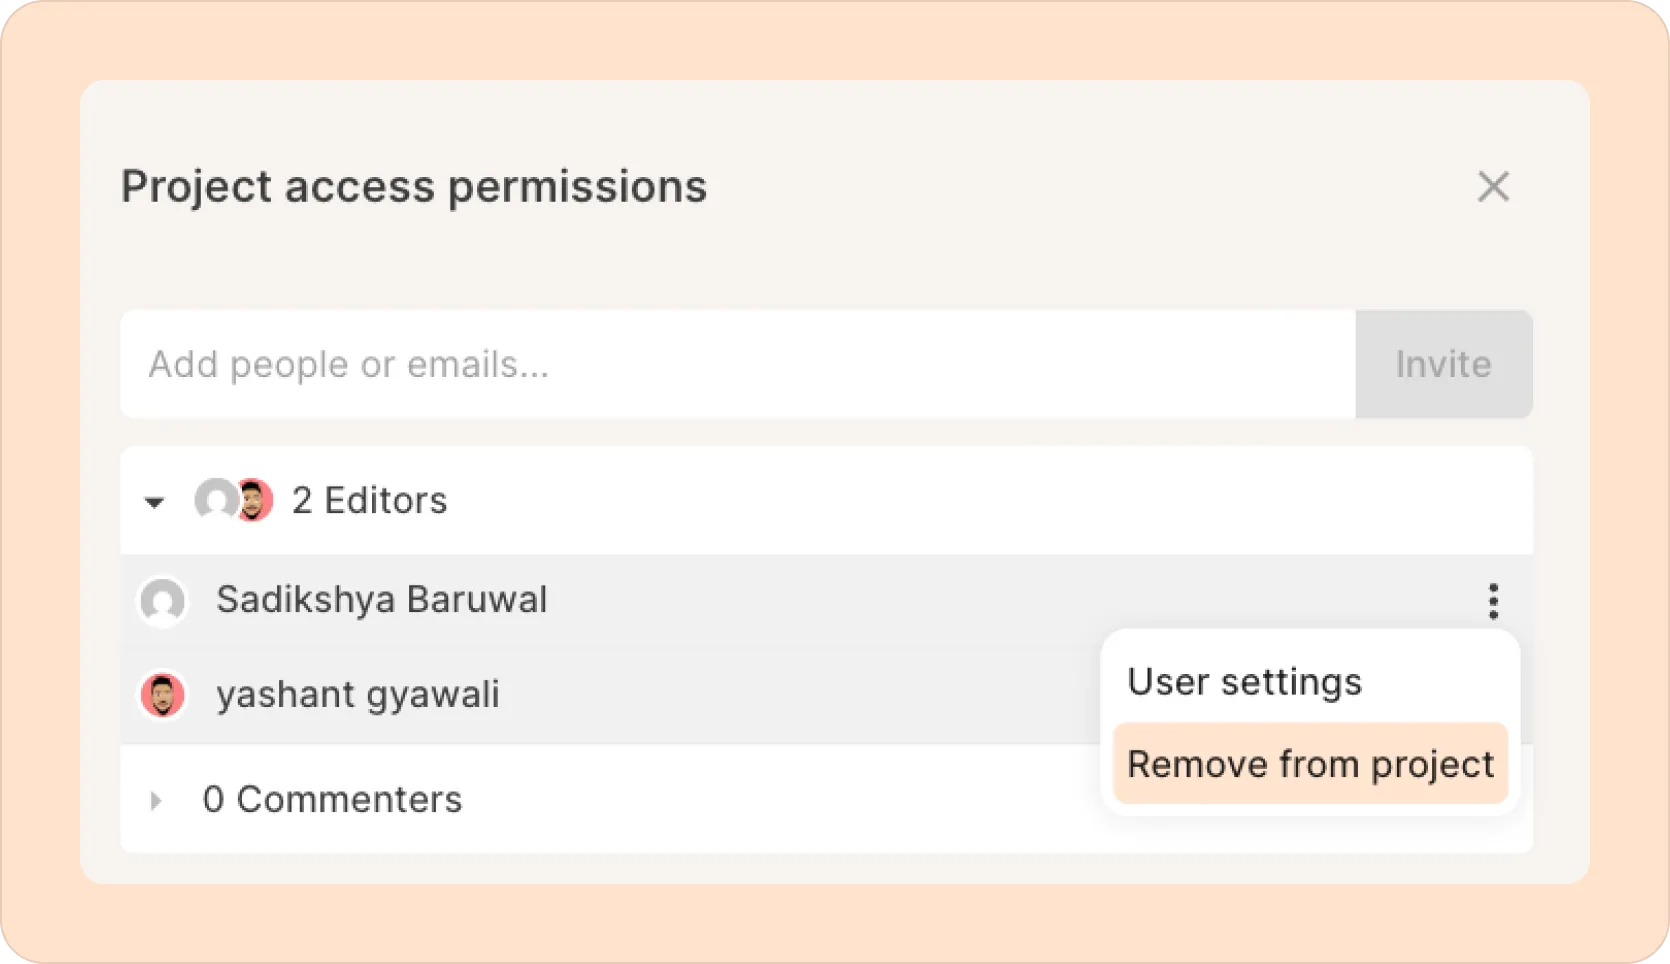
You can also add/remove members individually:
- To invite someone, type their email address and click Invite.
- If they are new to the workspace, make sure to select the role you want to invite them as; if they are already in the workspace, they will have the same permissions in all projects they are members of.
- To remove someone, click the kebab (︙) menu next to their name and choose Remove from project.
Using the quick filter and sort options
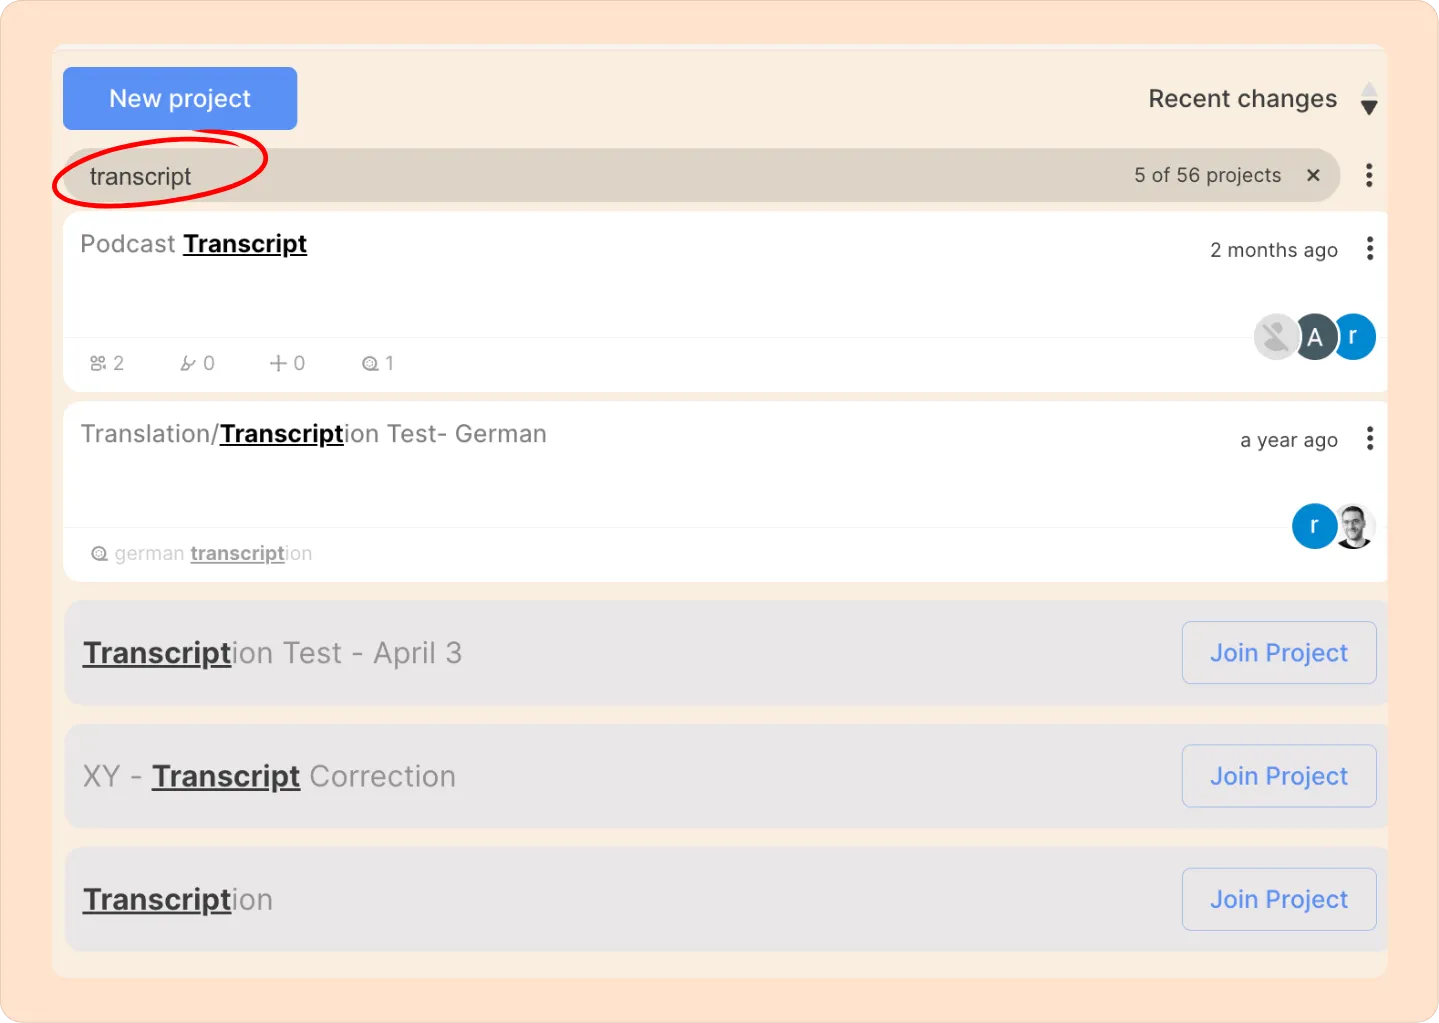
To quickly locate a specific project, you can use Reduct's filter option.
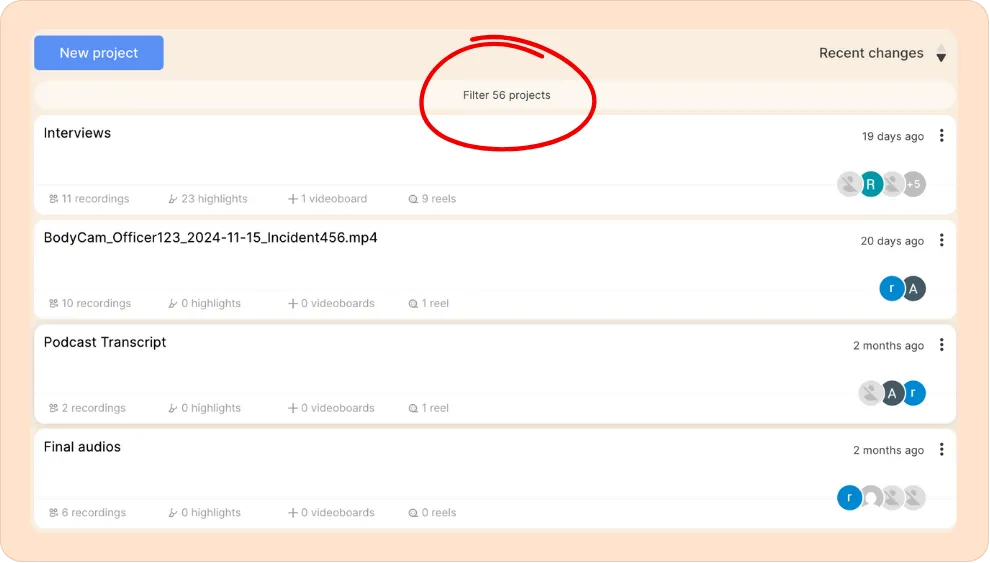
This allows you to narrow down the project list by title and keywords in the description, making it easier to access the project you need without scrolling through everything.
This is especially helpful when managing multiple projects.
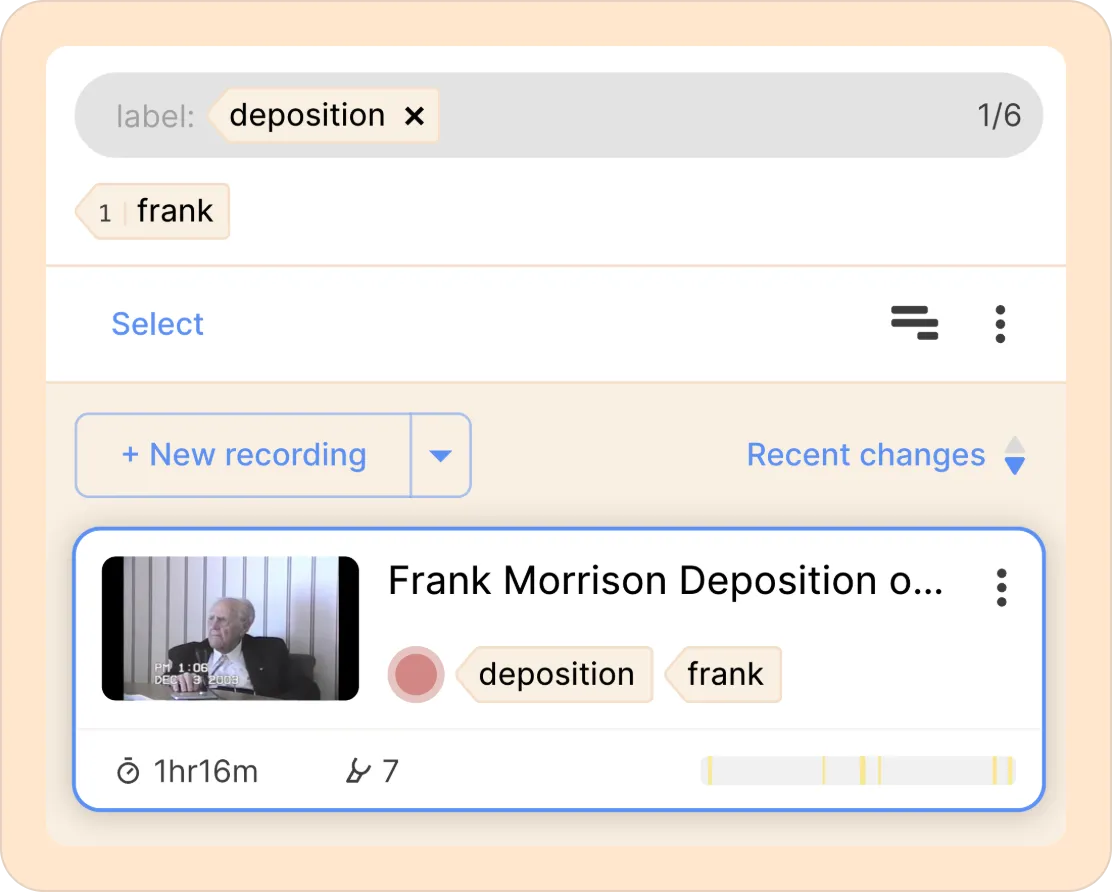
The quick filter can also help you find specific recordings or reels within projects, and looks through the title and description of items.

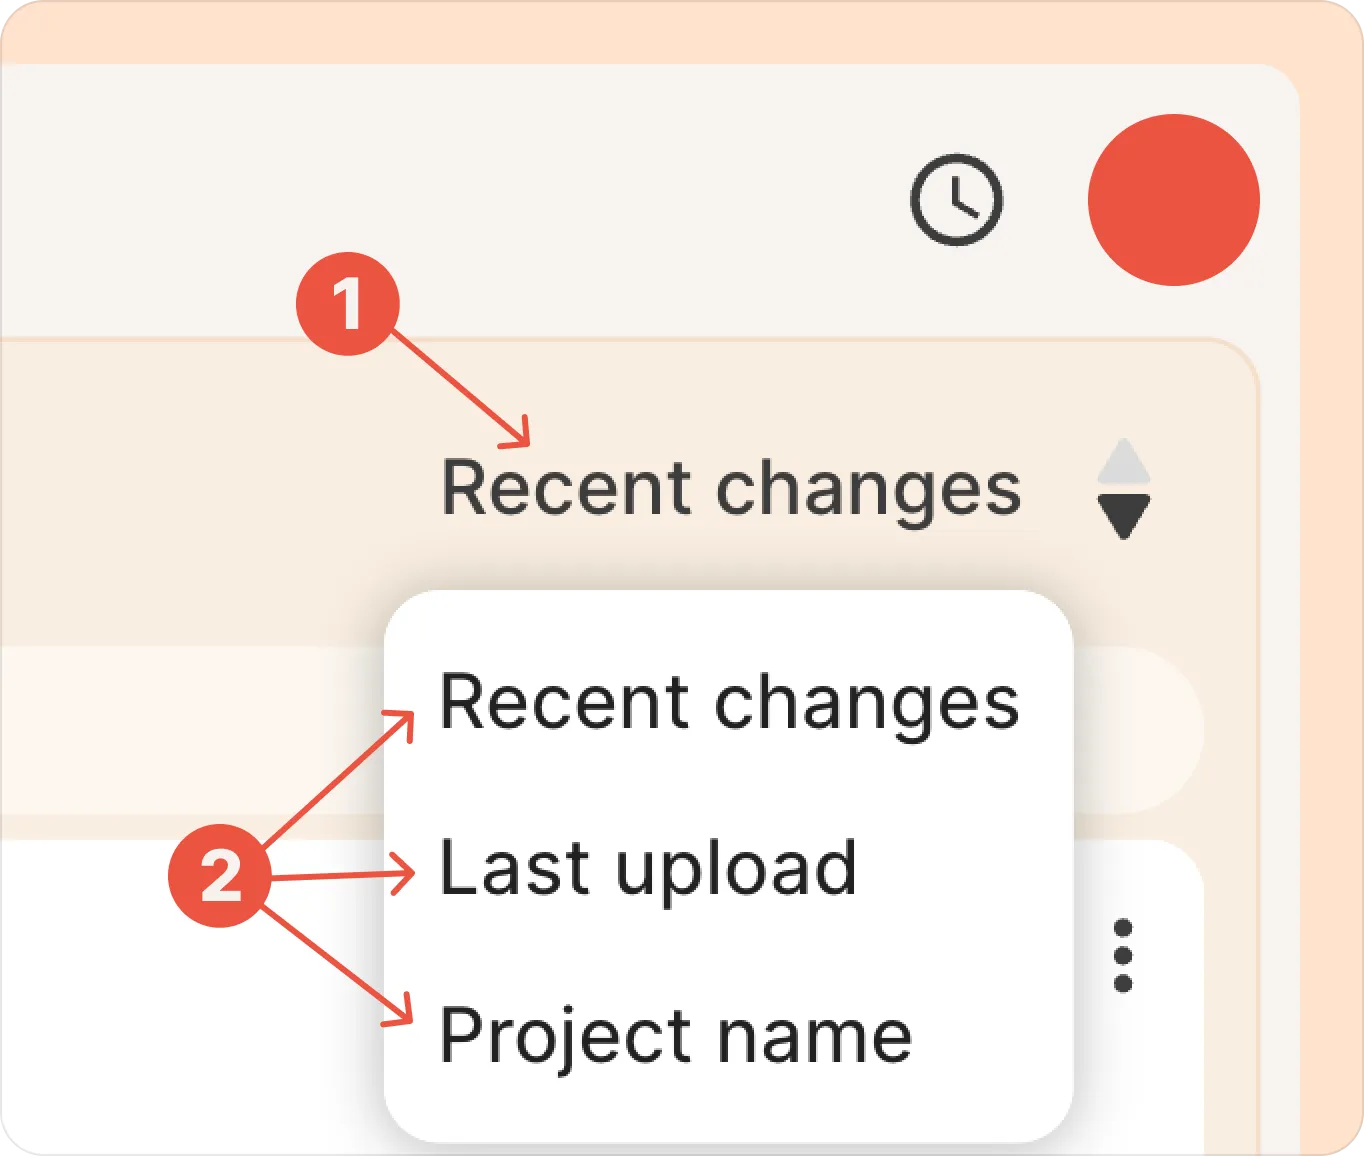
You can also sort your projects by recent changes, last upload, or project name to quickly find what you’re looking for.
You can rename your project, update its description, manage settings, and control access at any time.
Using labels to organize within a project
Reduct handles volumes of files well, and a bit of organization makes it even easier to find what you need as your repository grows.
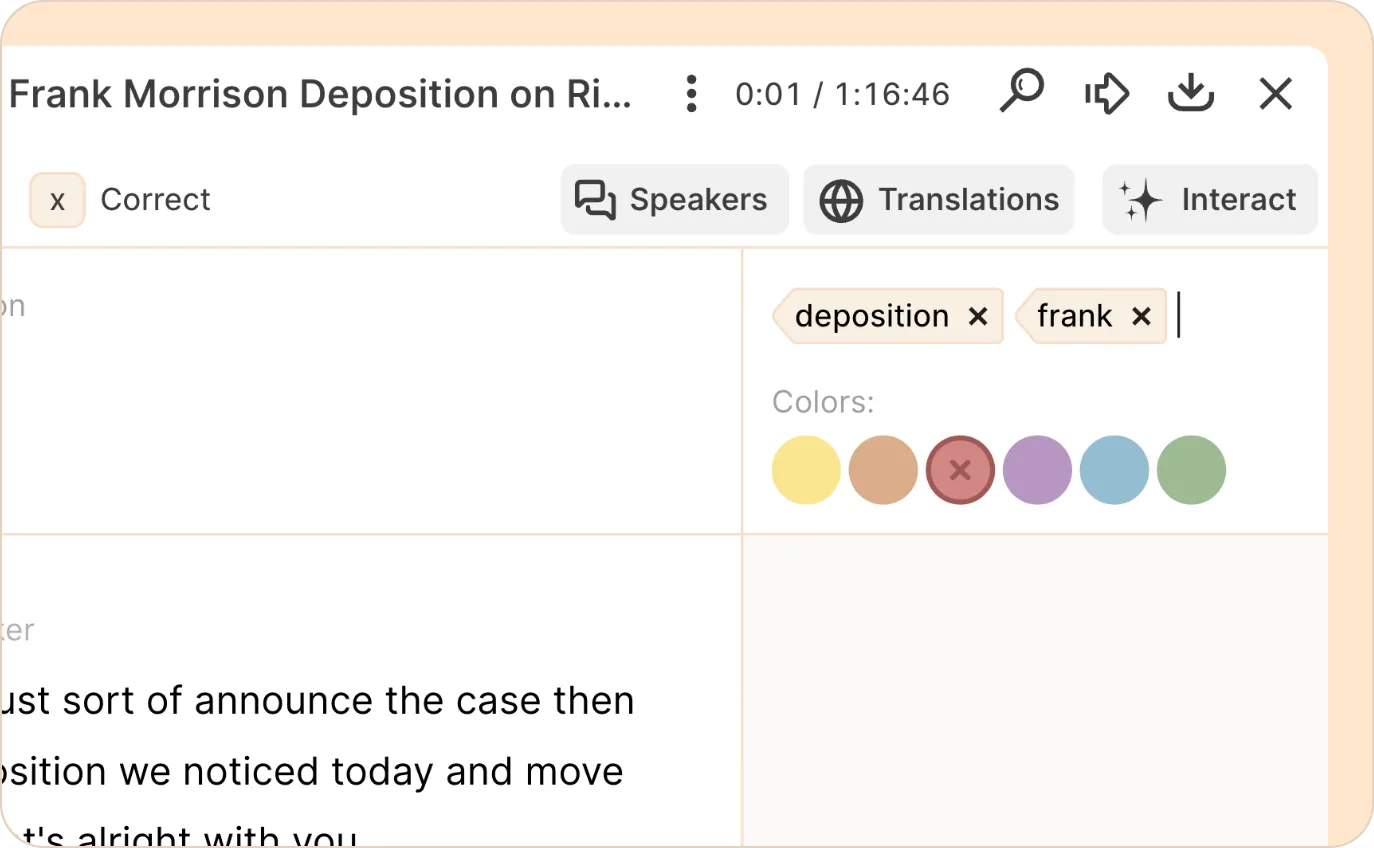
Labels help you stay organized by grouping similar recordings together for easy filtering. You can assign multiple labels to a single recording and add color-coding for quick visual scanning.
Adding labels to a recording
- Open the recording you want to label.
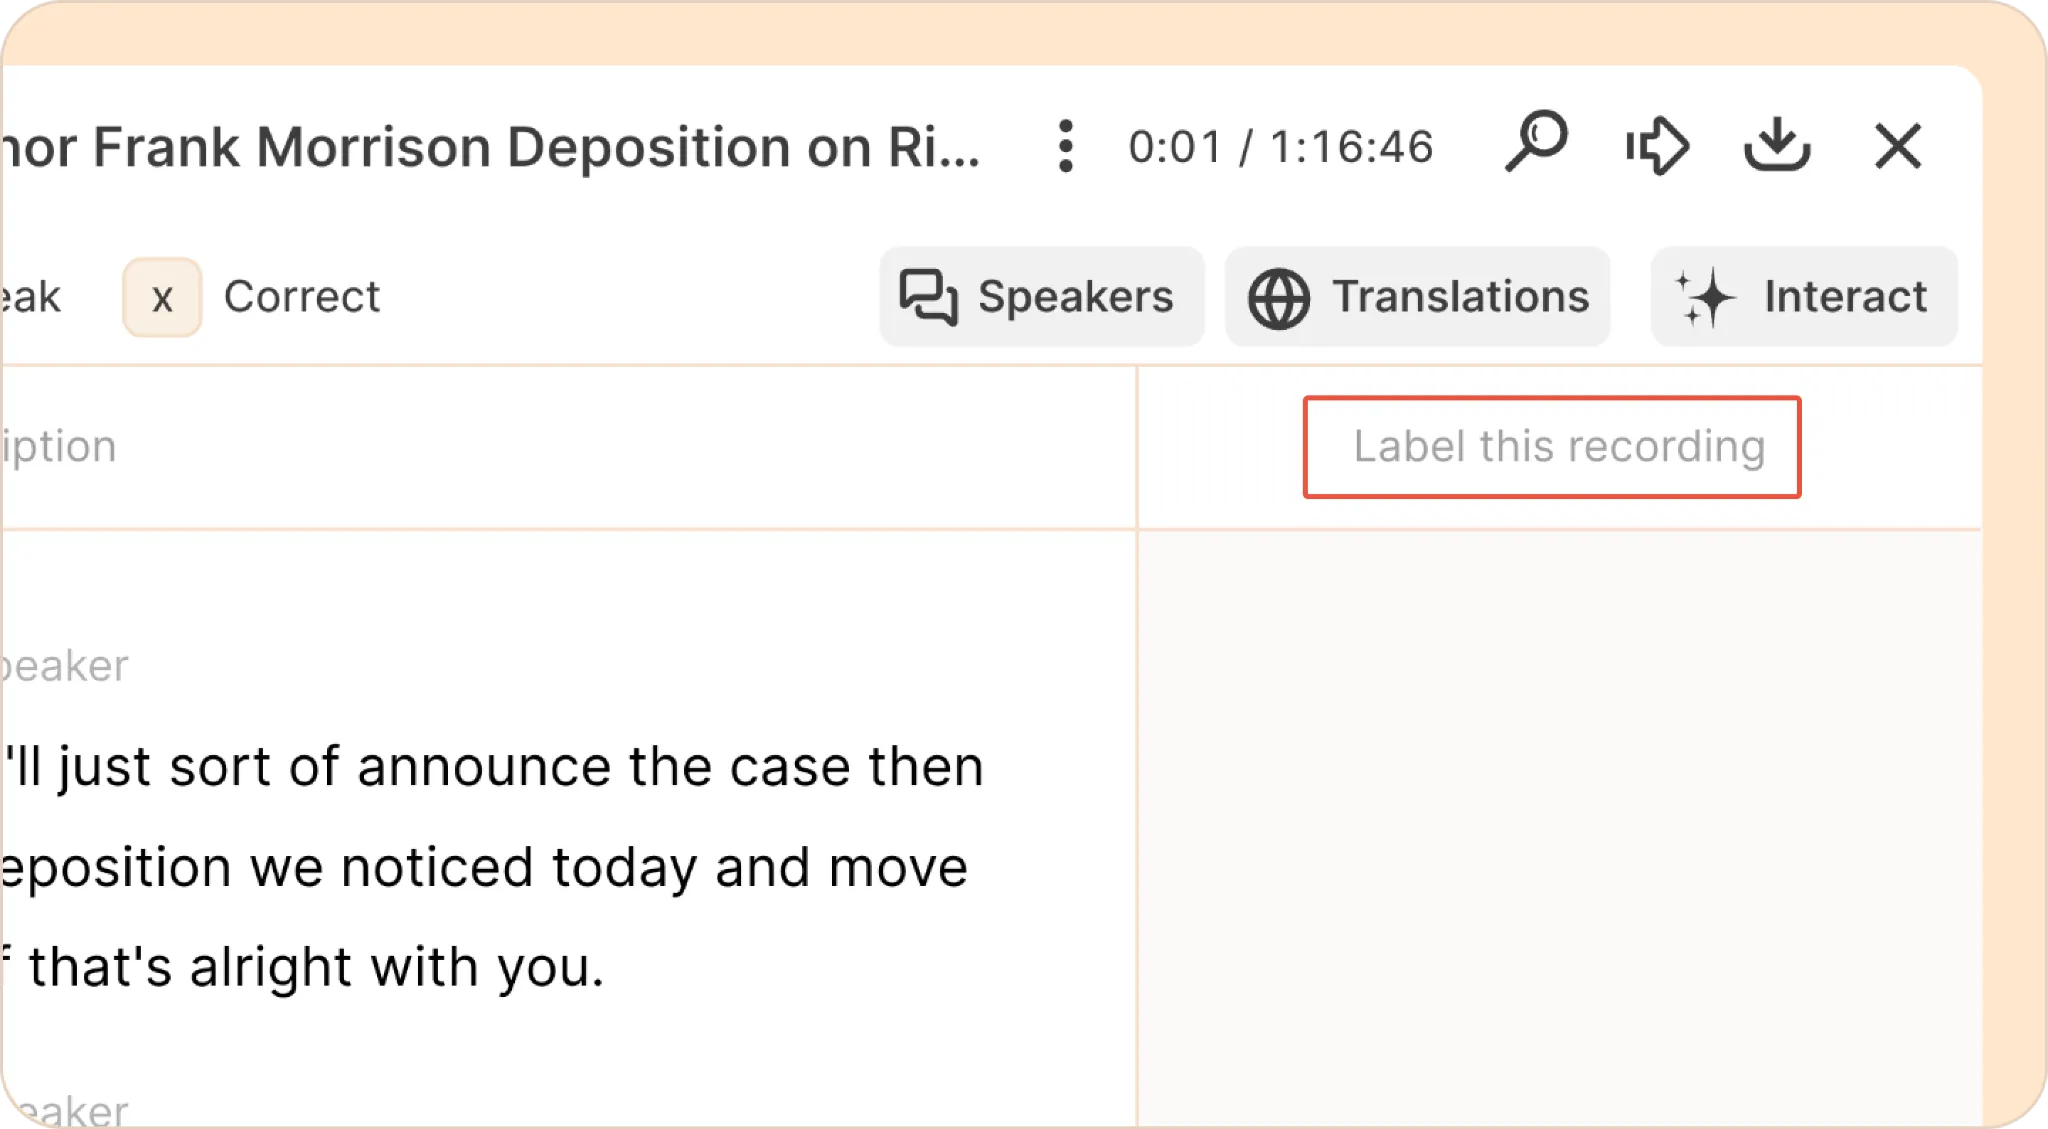
- In the top-right corner of the transcription panel, click the “Label this recording” box.
- Select a color or type in a custom label name; this will autocomplete to use labels already in use in the project, if applicable.
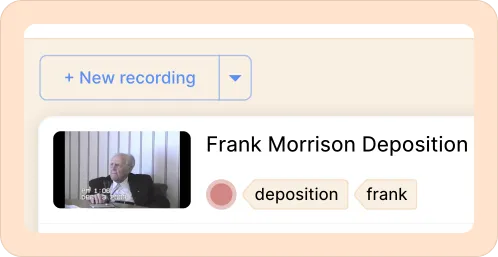
- The label will now appear next to the recording in the LHS panel.
- You can now use labels to filter the recordings and find what you need, fast.
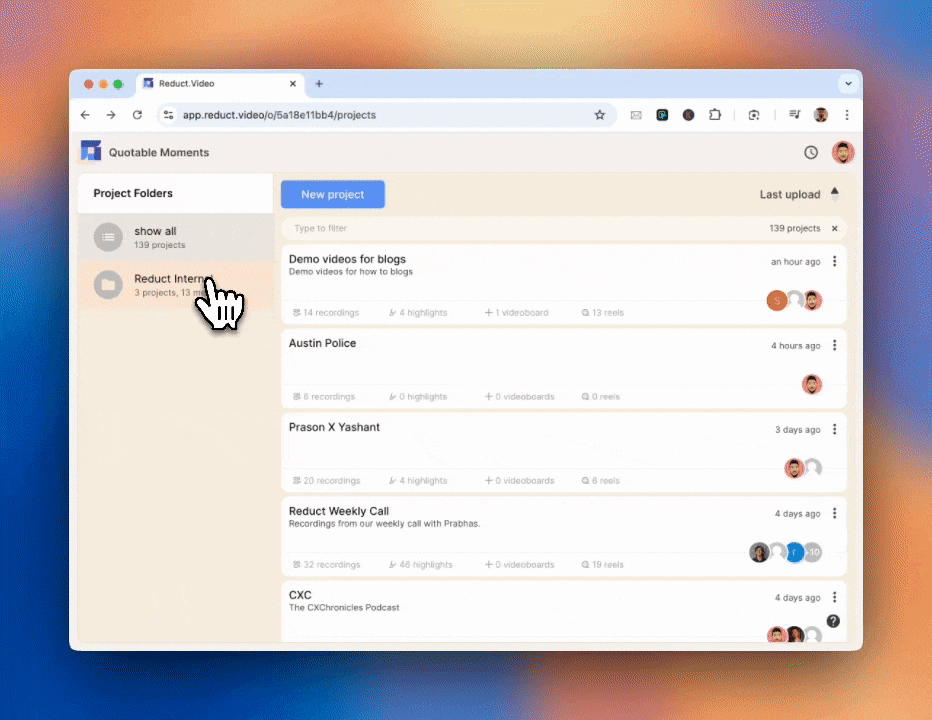
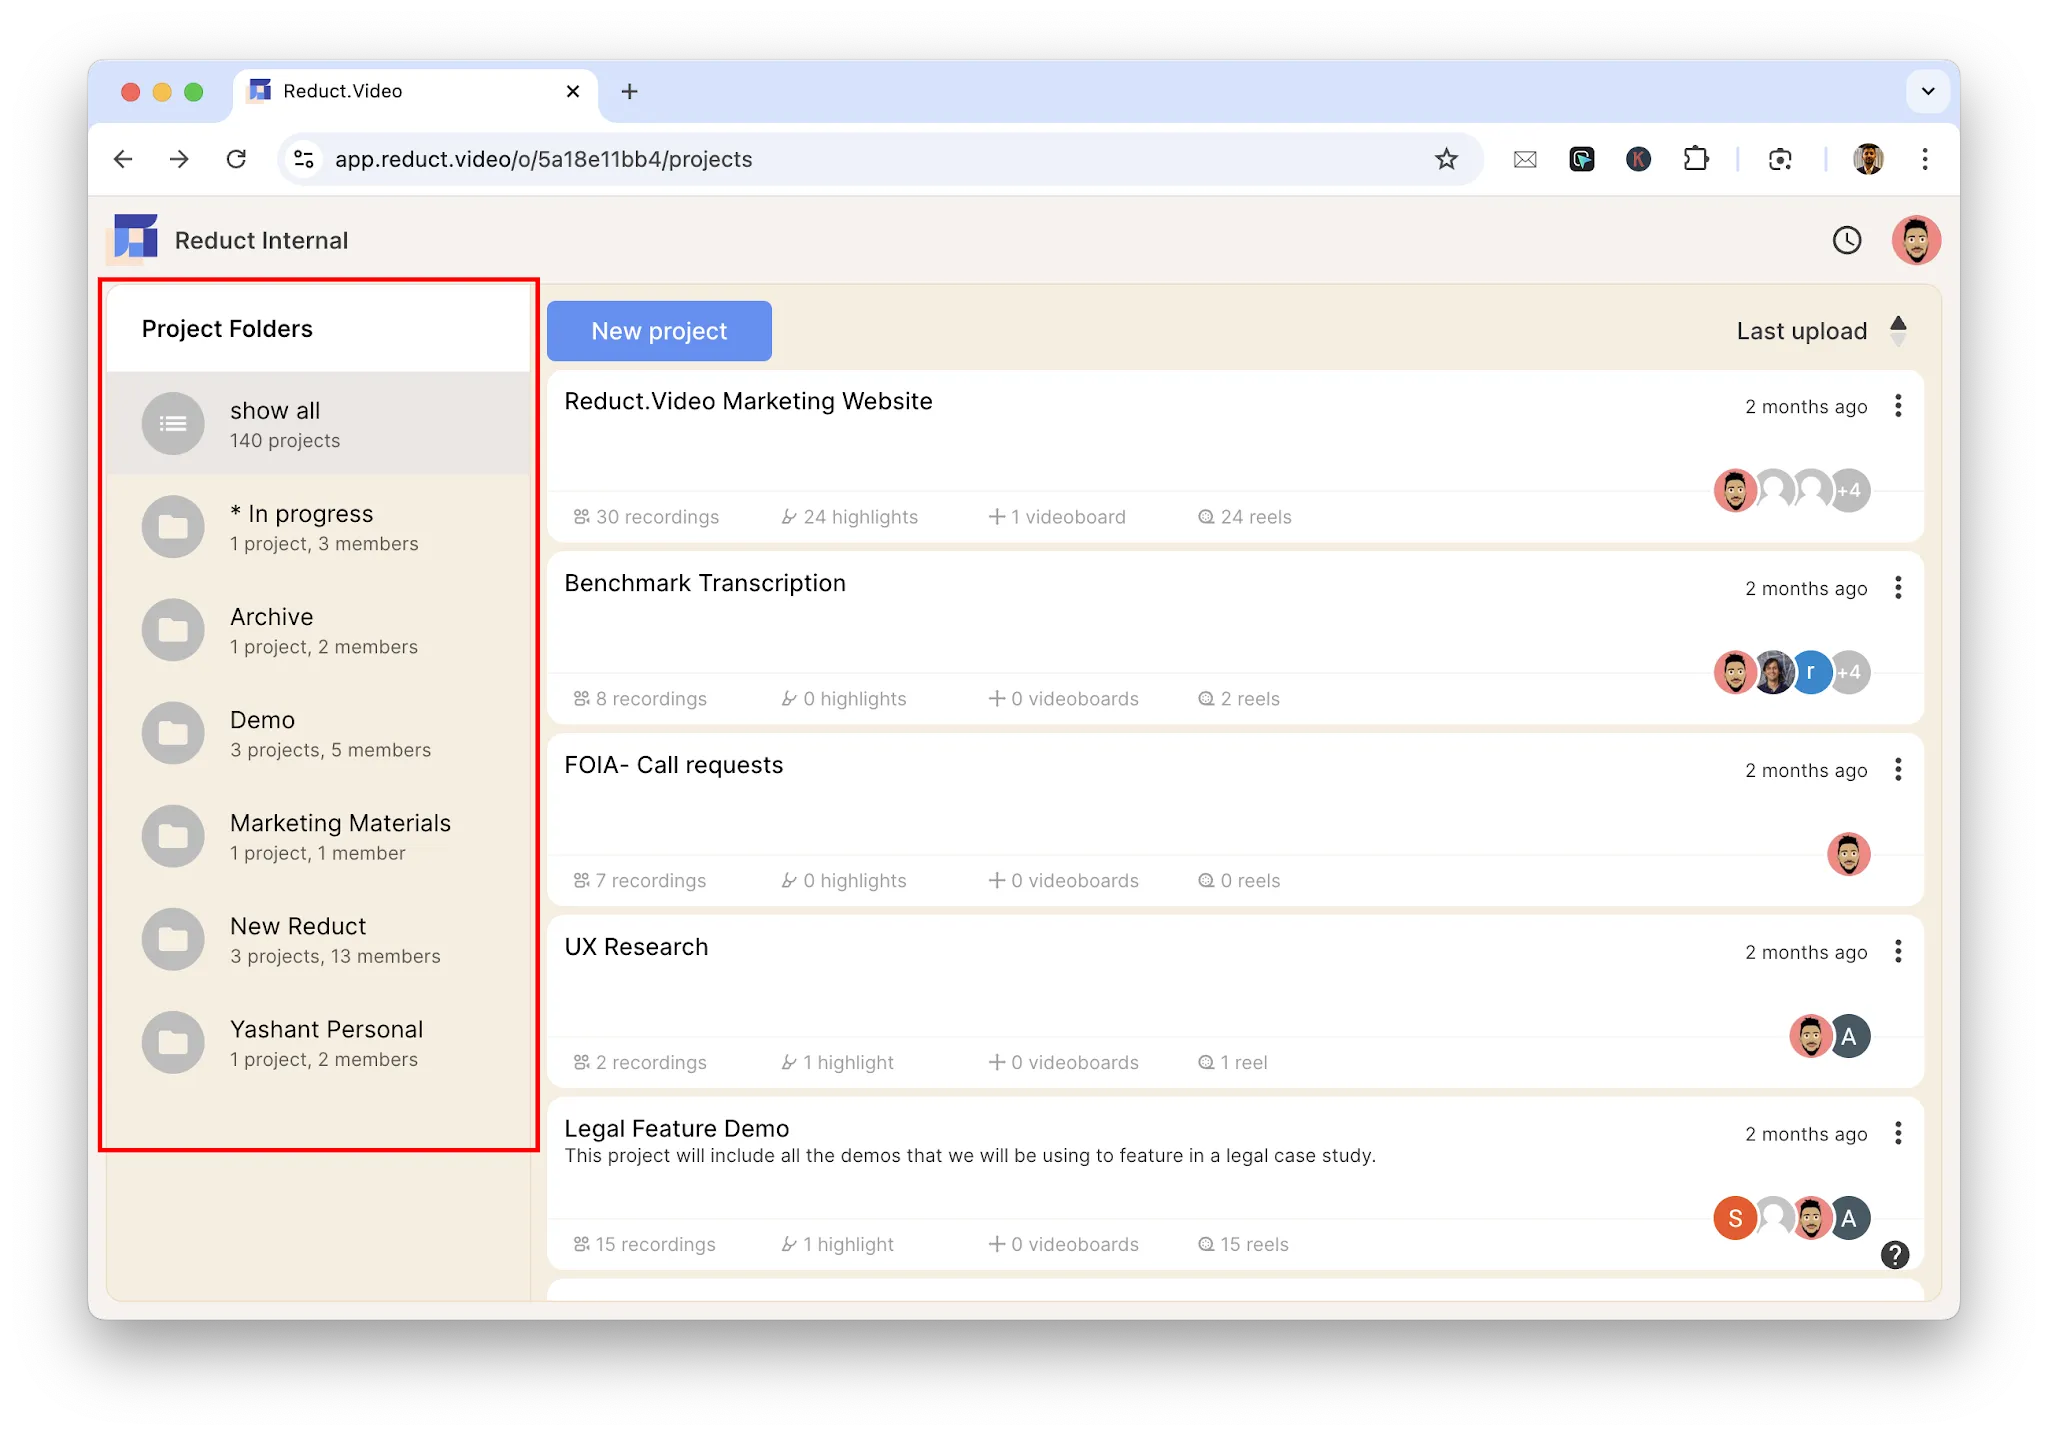
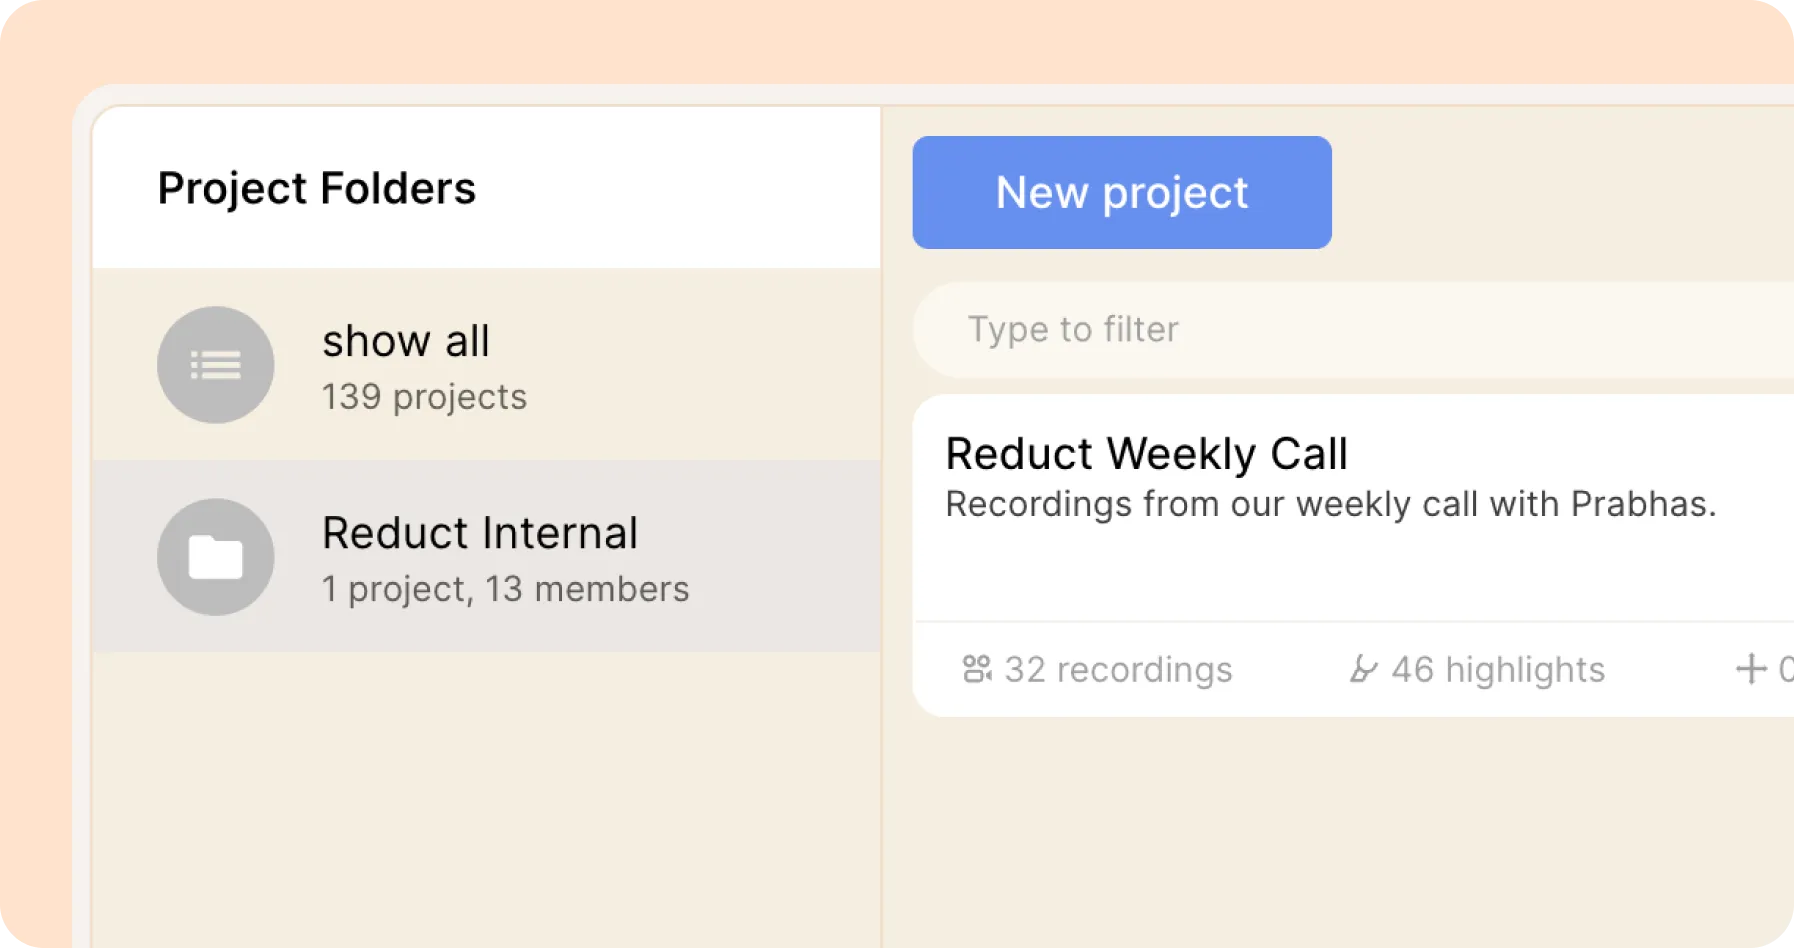
Organizing projects into folders
Each user sees a different set of projects when they log into Reduct and look at the project listing page. At the top are all the projects they are a member of, and below that are projects they are not members of but can join. Unlisted projects do not show up here for users who are not members of those projects.
If the overall number of projects begins to get too large for many users, you can start to group projects into folders to stay organized.
Creating a new folder
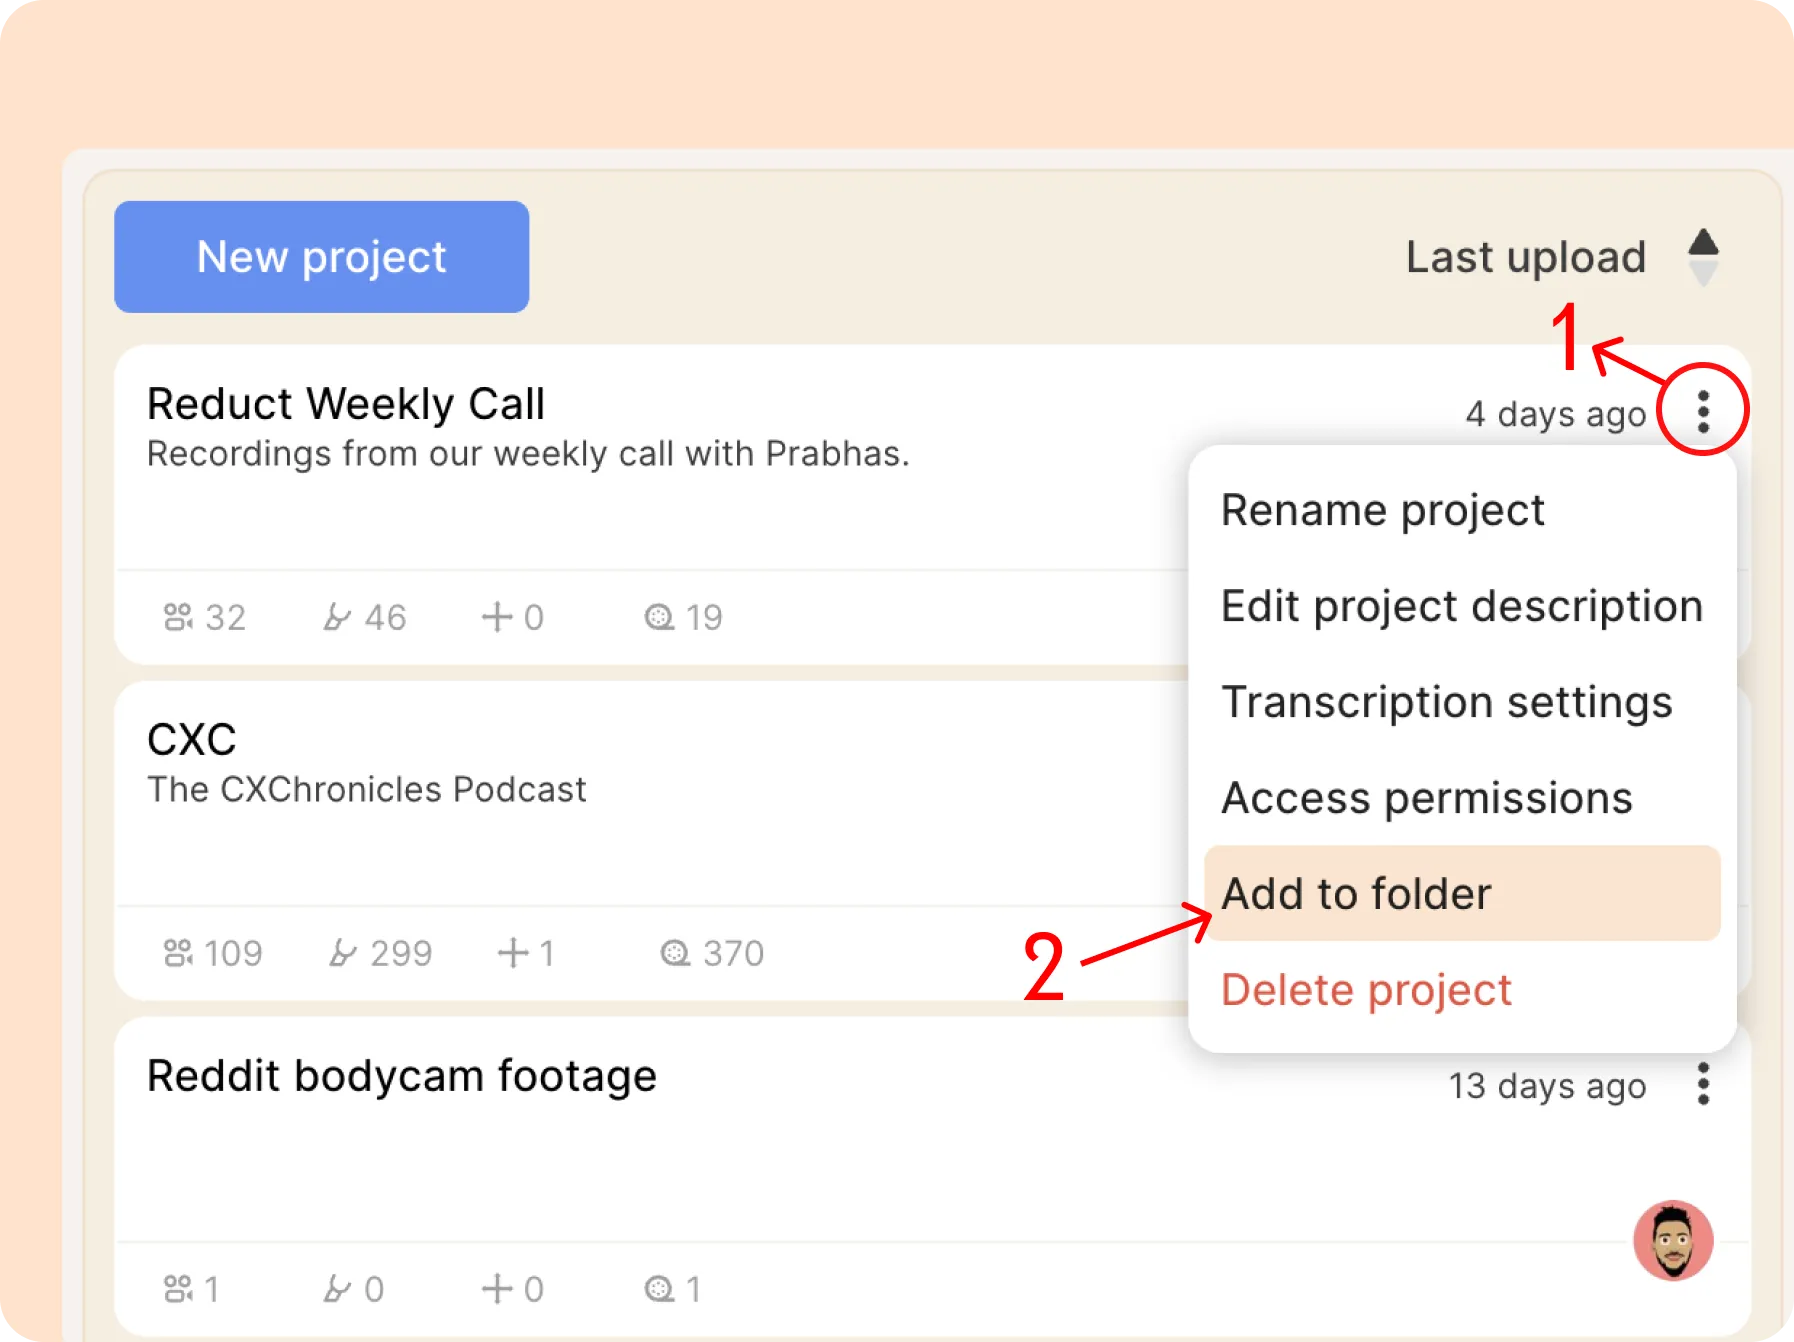
- To create a new folder, click on the kebab (︙) menu to the right of a project. From the list of options, select Add to folder.
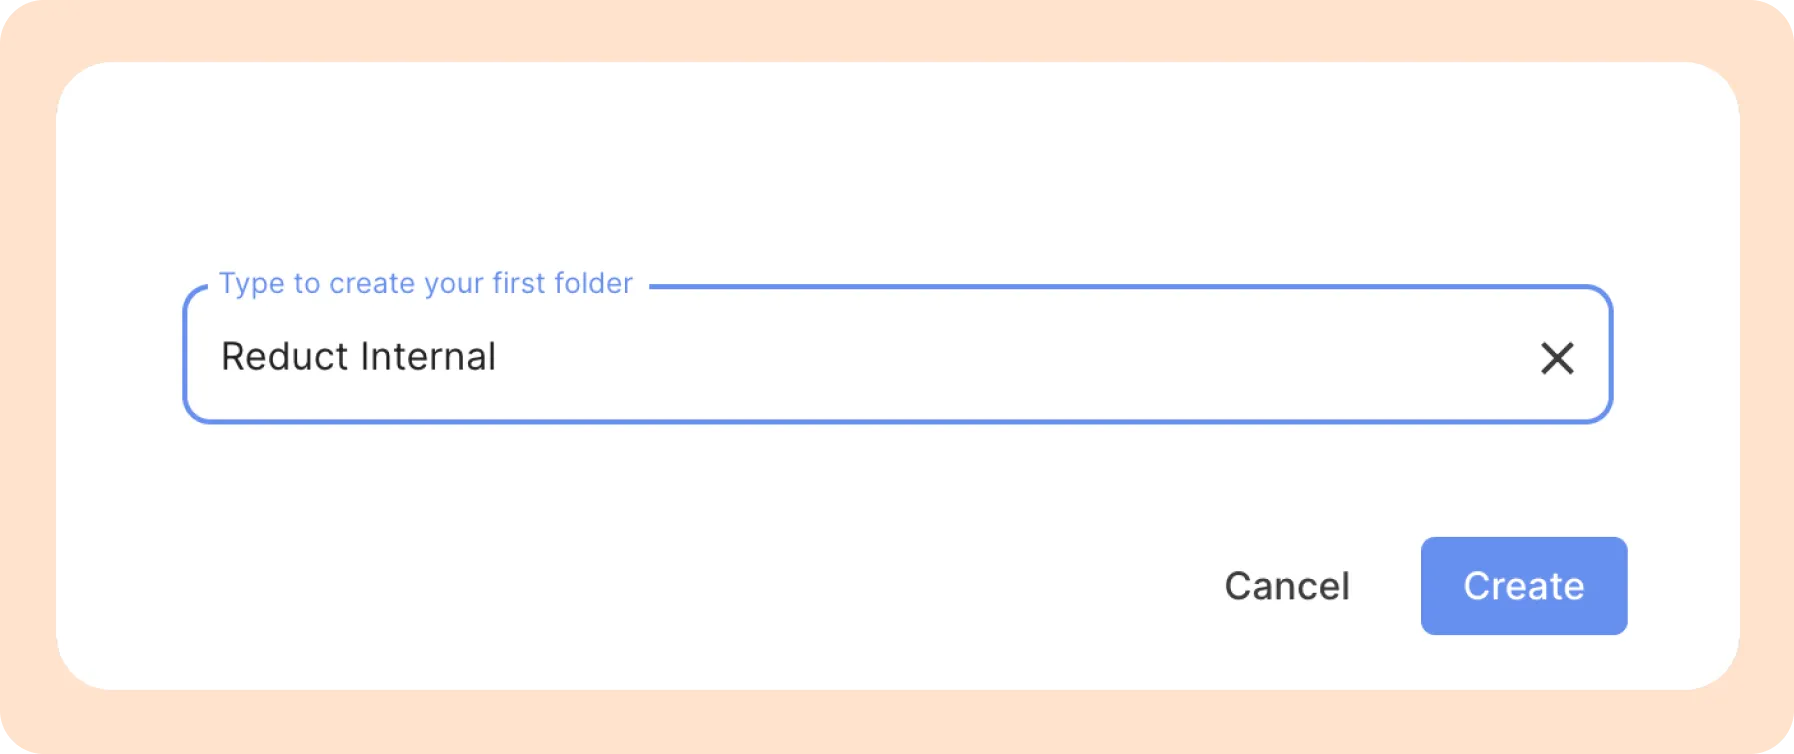
- Type to select an existing folder or to create a new folder.
- You’ll now see a new panel on the left side of the screen displaying your newly created folder. You can click on the folder to view the projects inside.
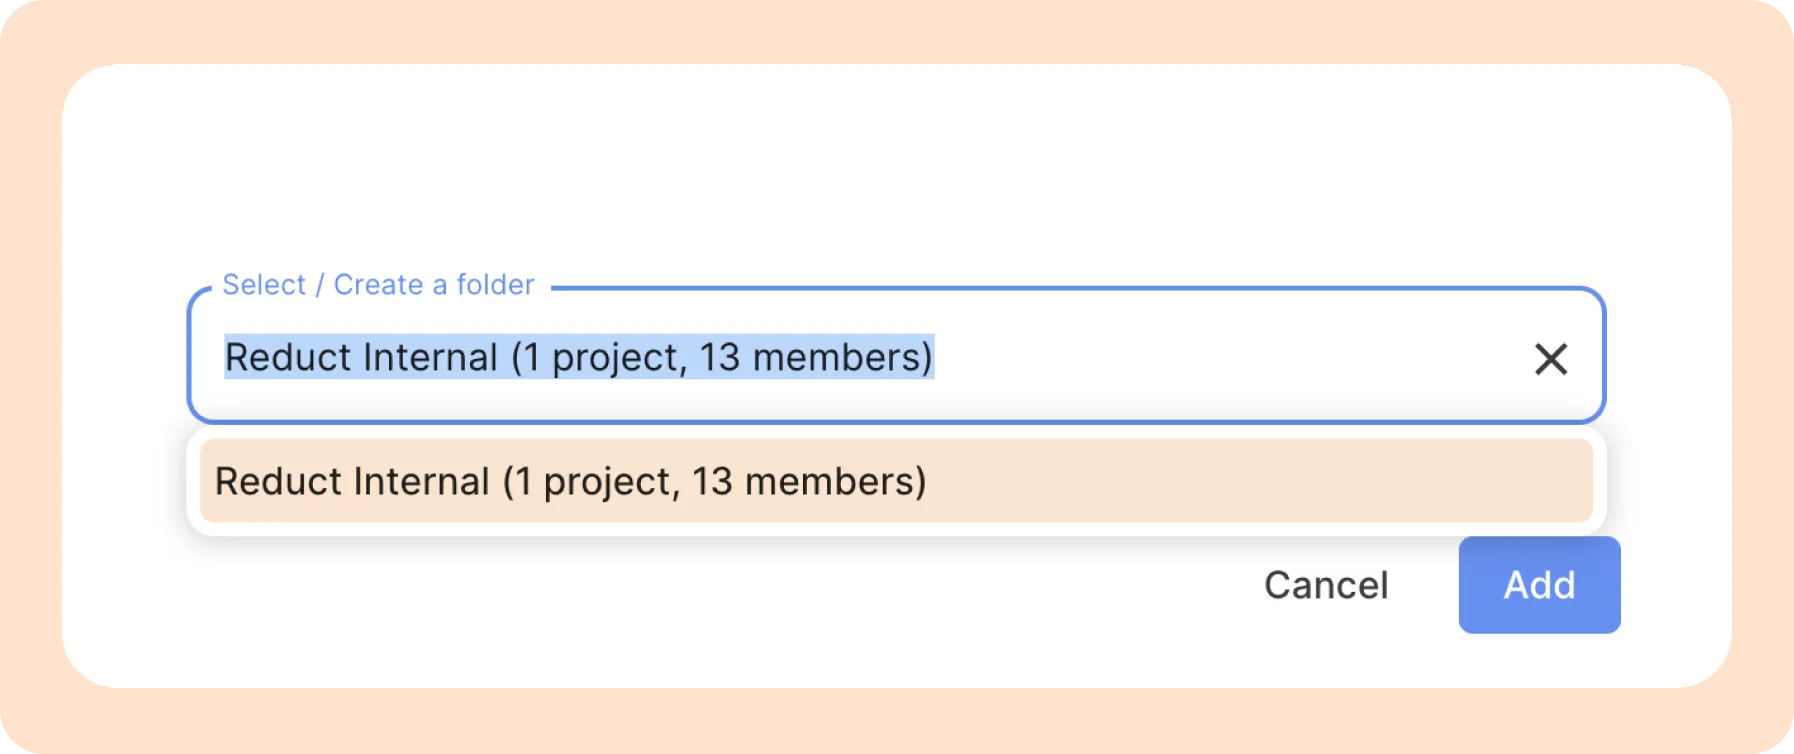
Adding a Project to an existing folder
- Click on the kebab (︙) menu next to the project you want to add to a folder. From the options, select Add to folder.
- In the window that appears, select one of the existing folders, then click the Add button.
Removing a project from a folder
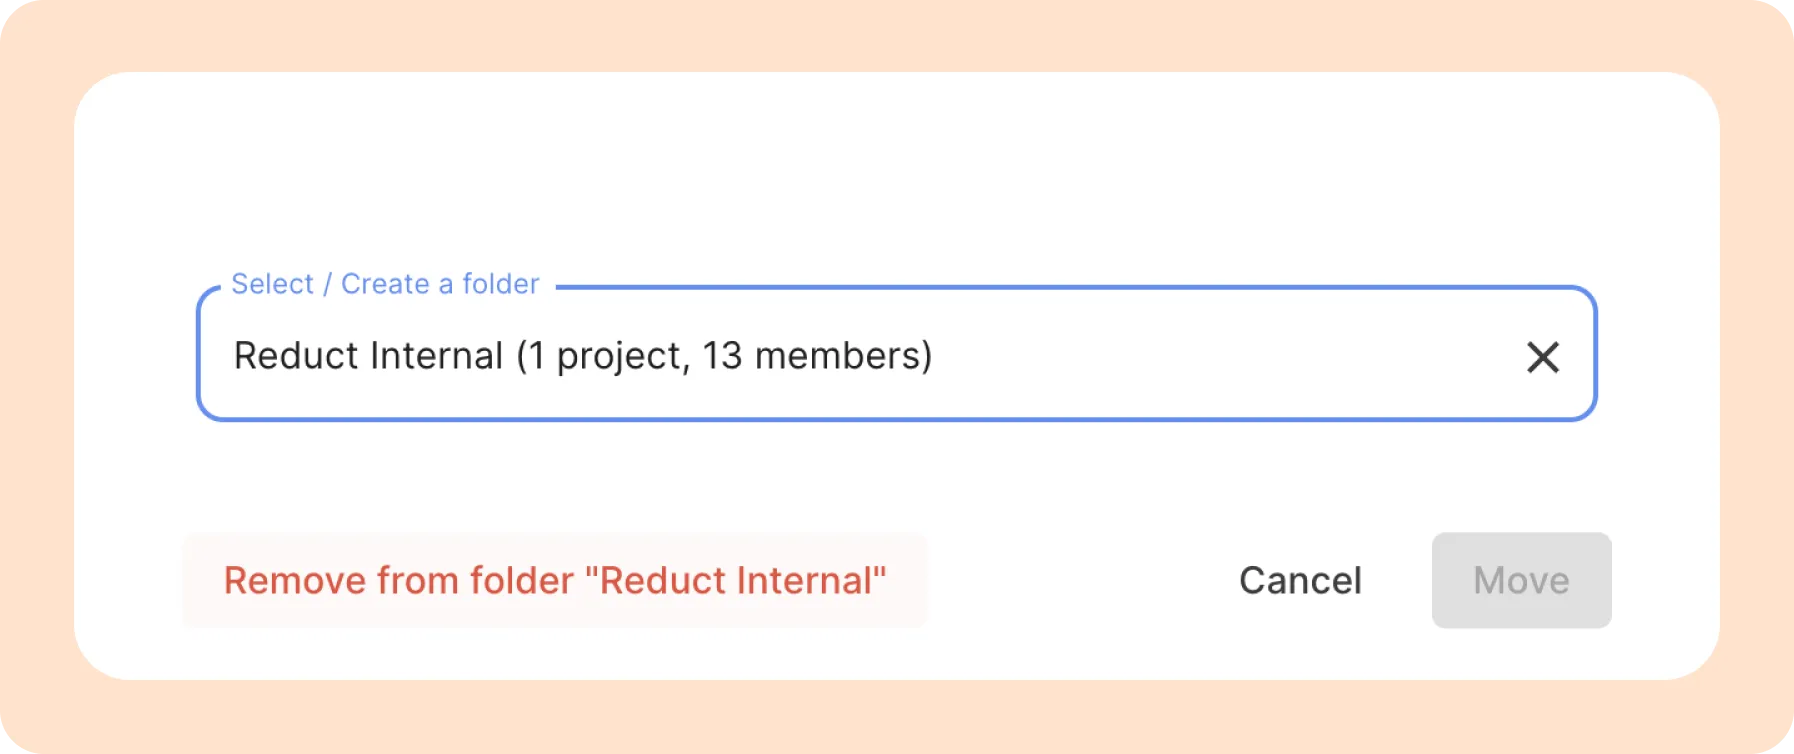
- From the kebab (︙) menu, select the Change folder option.
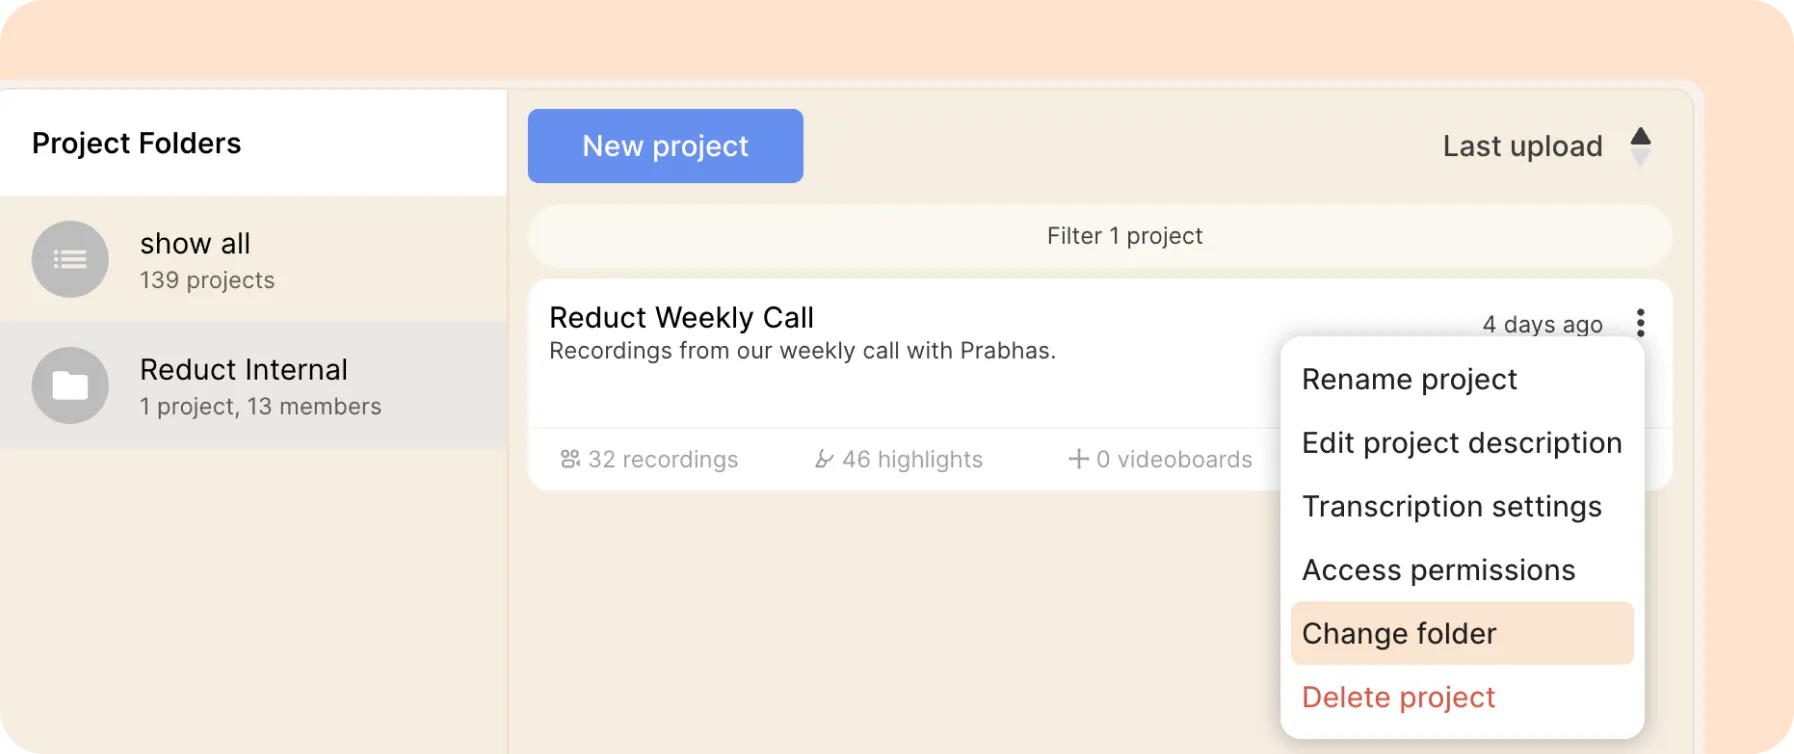
- In the pop-up window, click the Remove from Folder “[folder name]” button.
Use the quick filter to select multiple projects and add, remove, or change folders in one go. When you type in the “filter” box, a new kebab (︙) menu will appear on the right with batch options.