Adding titles to reels
You can add titles at the beginning of reels as interstitials to introduce new subjects or themes, or to close out a reel. You can edit the text of a title slide, change the duration it is on the screen, and add a background image.

How to create and add simple title cards to your reels?
- With a reel open, click on the Title button towards the top of the reel.
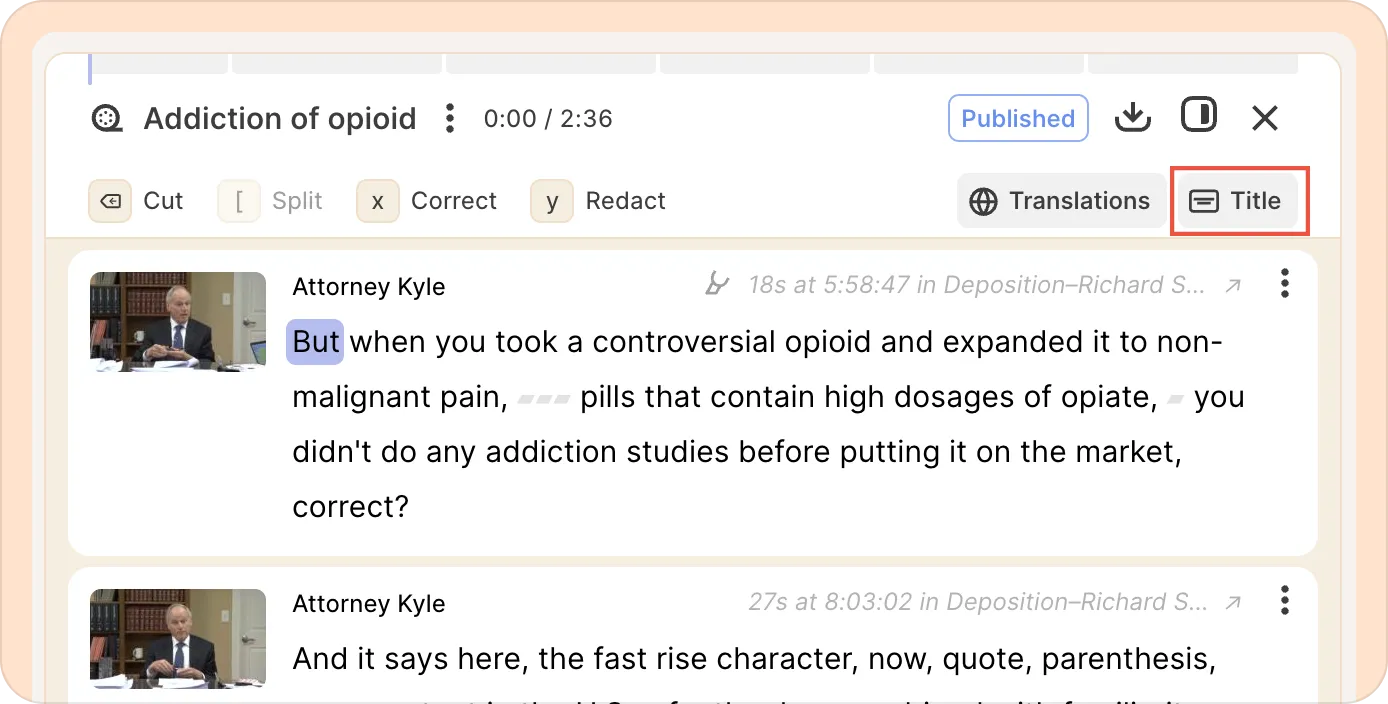
- A new title card will appear with two empty text boxes: Title & Subtitle.
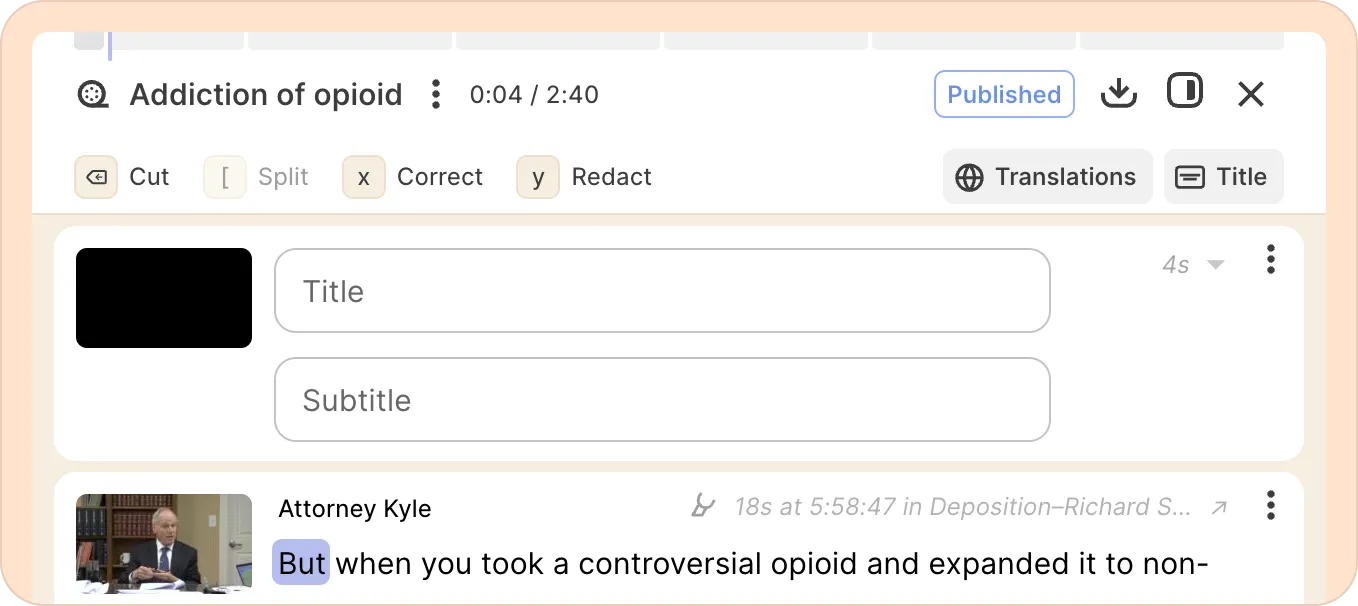
- Enter a clear title and subtitle, then use the control on the right to choose how long the title card stays on screen.
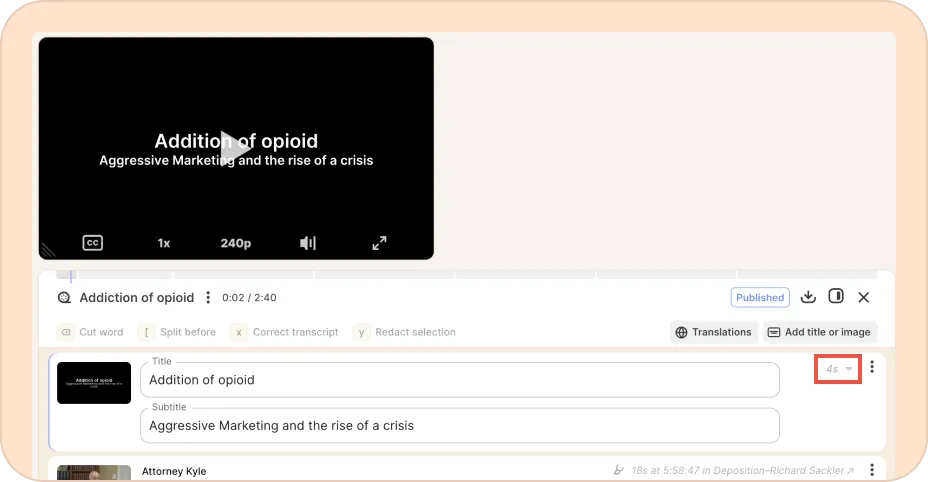
If you're importing reels into Premiere Pro using the Reduct extension, these titles will show up as comment markers on the timeline, with a gap for the selected duration. You can use this to "reserve space" on your timeline for B-roll or graphics.
Customizing the title slide
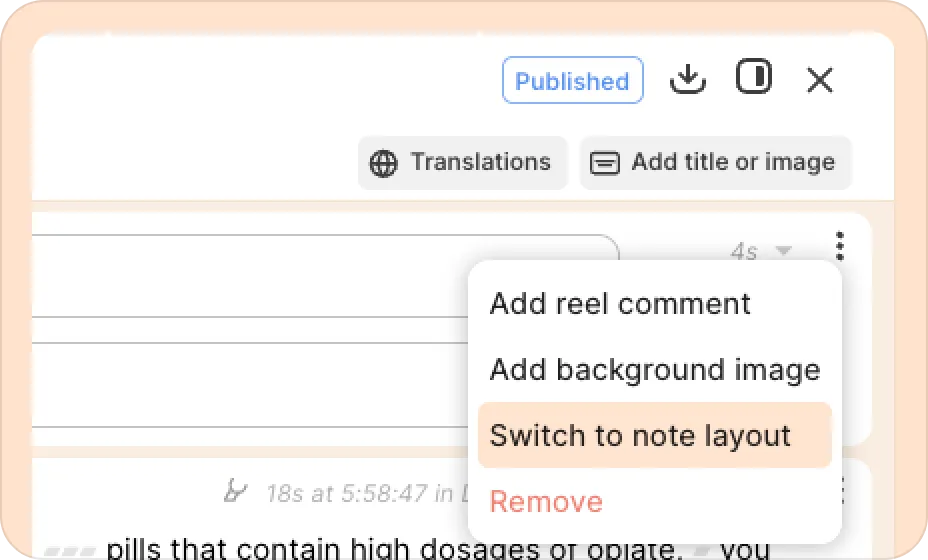
Changing the layout: If you need a layout where you want to add longer notes, you can switch to a note layout.
Once you’ve added a title slide, click on the three-dot kebab (︙) menu on the right of it and select Switch to note layout.
Adding background images to titles: You can add images to title cards, which you can use to introduce photos or graphics to your narrative or to brand the titles with your organization's look-and-feel.
To add an image as a title slide, follow the steps below:
- With a reel open, click on the Title button towards the top of the reel to add a regular title slide.
- Click on the three-dot kebab (︙) menu on the right side of the title card and select Add background image.
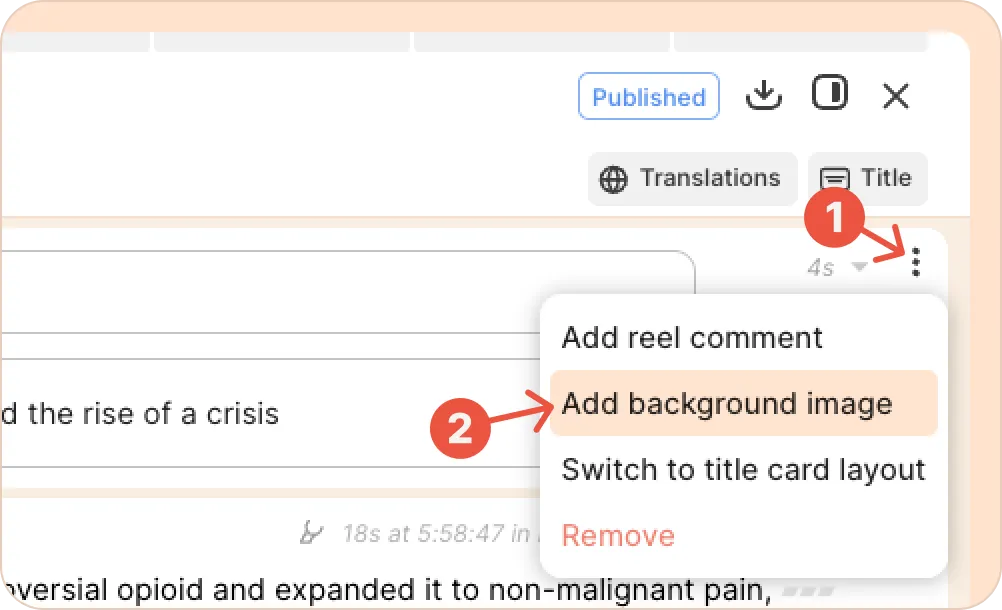
- Select an image of your choice from your computer, and it will be set as the background. You can replace or remove it at any time.
- If you add text in the title and subtitle fields, these will be displayed on top of your image.
Recommended image resolution: 1920 × 1080 pixels
Supported formats: JPG, PNG & GIF
Images will be resized to fit, and will not be cropped. We recommend using high-resolution images to avoid them looking blurry. The closer the image ratio is to that of the video, the more seamless it will appear, so you may need to crop them before bringing them into Reduct.
Using presentation software to create branded divider slides
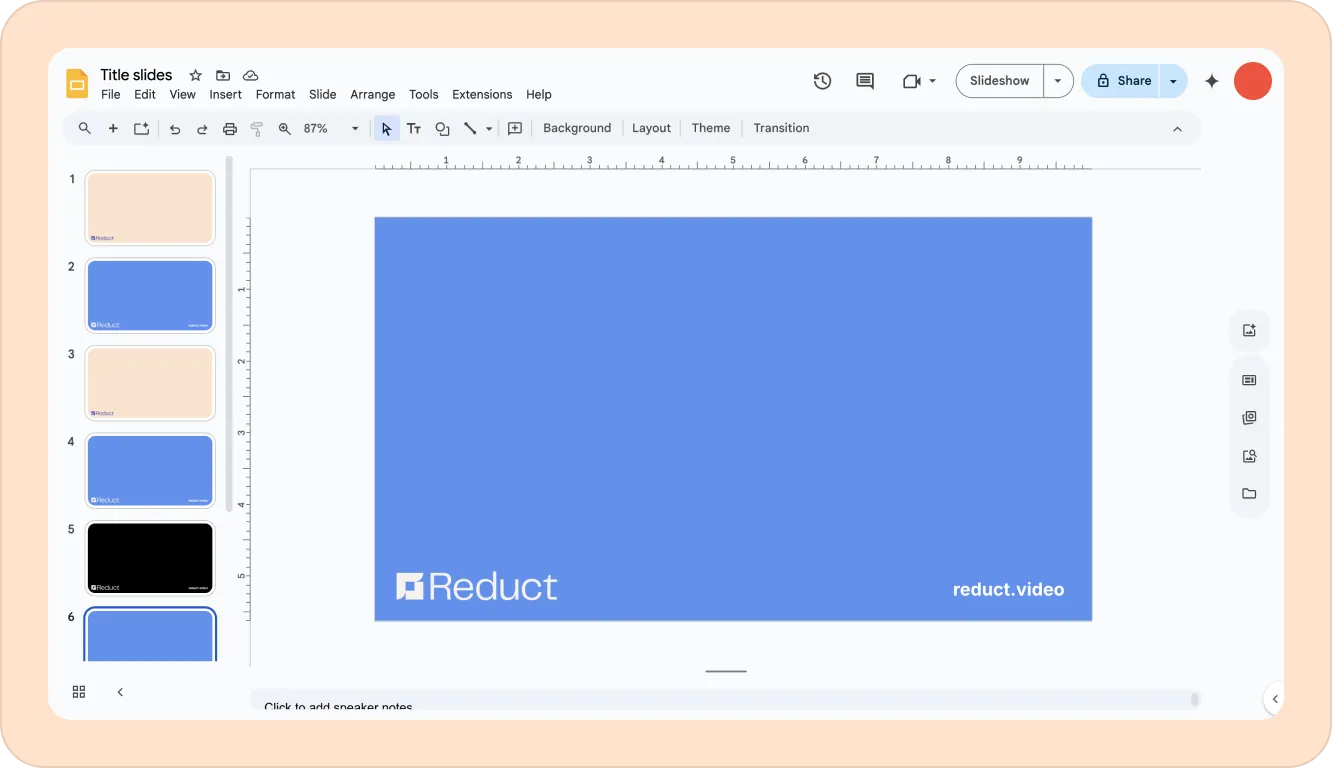
You can use a program of your choice to generate images to use as a background for titles. A common example is using PowerPoint, Keynote, or Google Slides to create correctly sized backgrounds as a template.
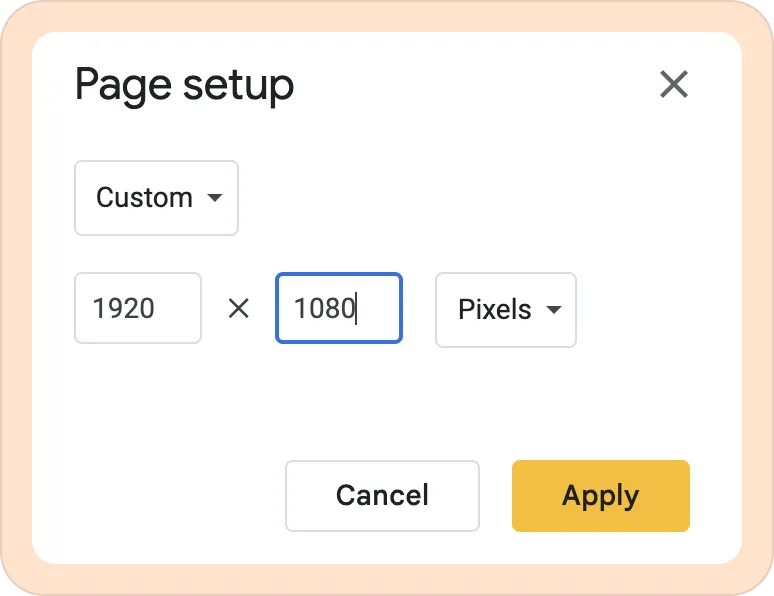
If you are using Google Slides, you will need to adjust the slide resolution from the default, otherwise you will have blurry templates.
- Create a new presentation, and change the page size to the correct format. To do that, select File > Page setup > * Custom size > * Change units to pixels > * 1920x1080
- Design a slide as you wish by adding images, shapes, text, and colors. Use any fonts and graphics as needed.
- Export the current slide as an image, and then use that file as a background image for a title card in your reels.
File > Download > PNG image (.png, current slide)
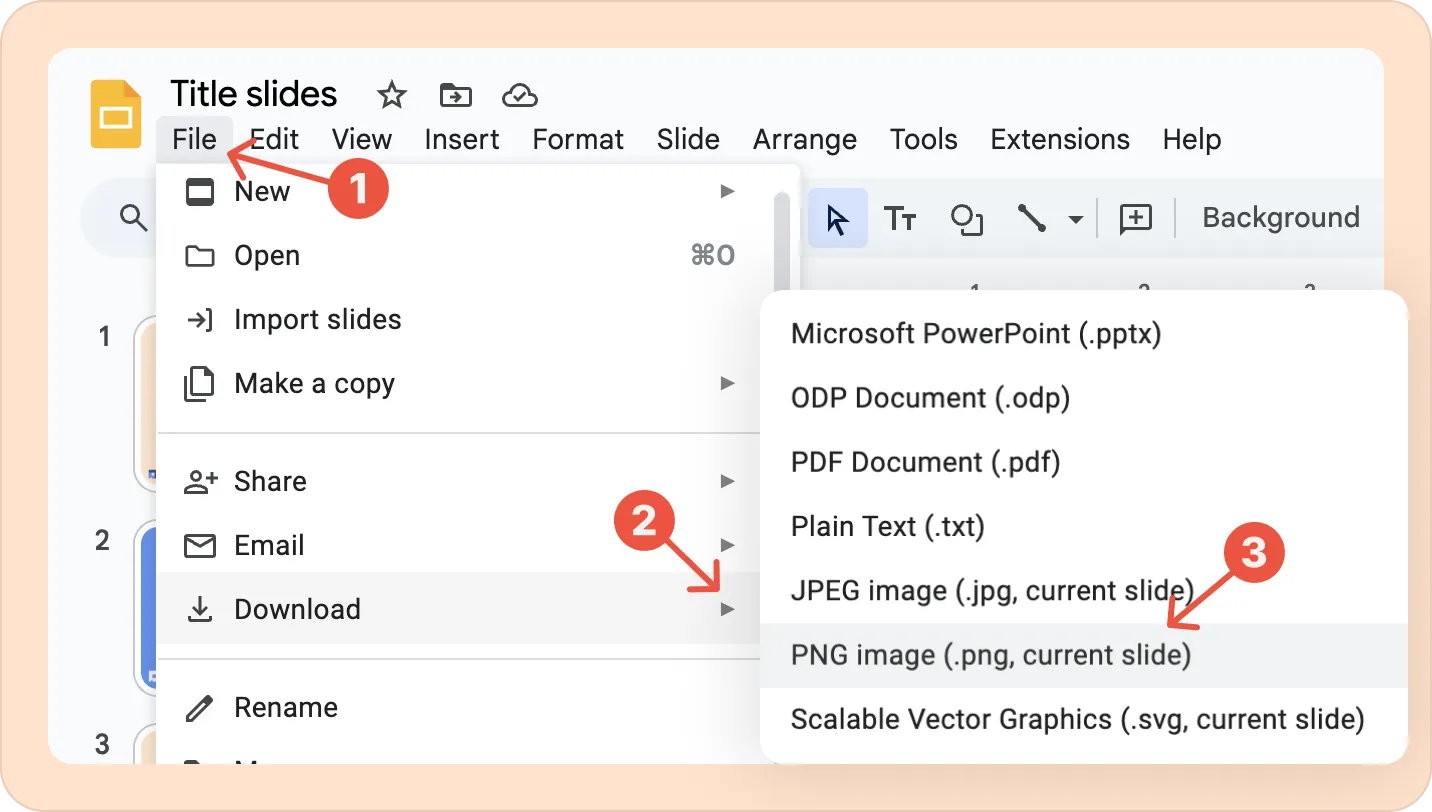
And then add the downloaded image of the slide as a background to the title card in Reduct.
