Document support in Reduct
You can now upload PDFs, Word docs, spreadsheets, images, and more, directly into Reduct, and work with them the same way you work with recordings. Search across your documents, summarize them, highlight and label what’s important, and share them with your team without switching to a different tool.
Document support is currently available to Enterprise customers only, at no additional cost through the end of 2026. If you don't see the Documents tab in your workspace, reach out to support@reduct.video.
Getting to the Documents tab
You’ll find the Documents tab at the top of the left-hand sidebar, alongside Recordings, Labels, Videoboards, and Reels.
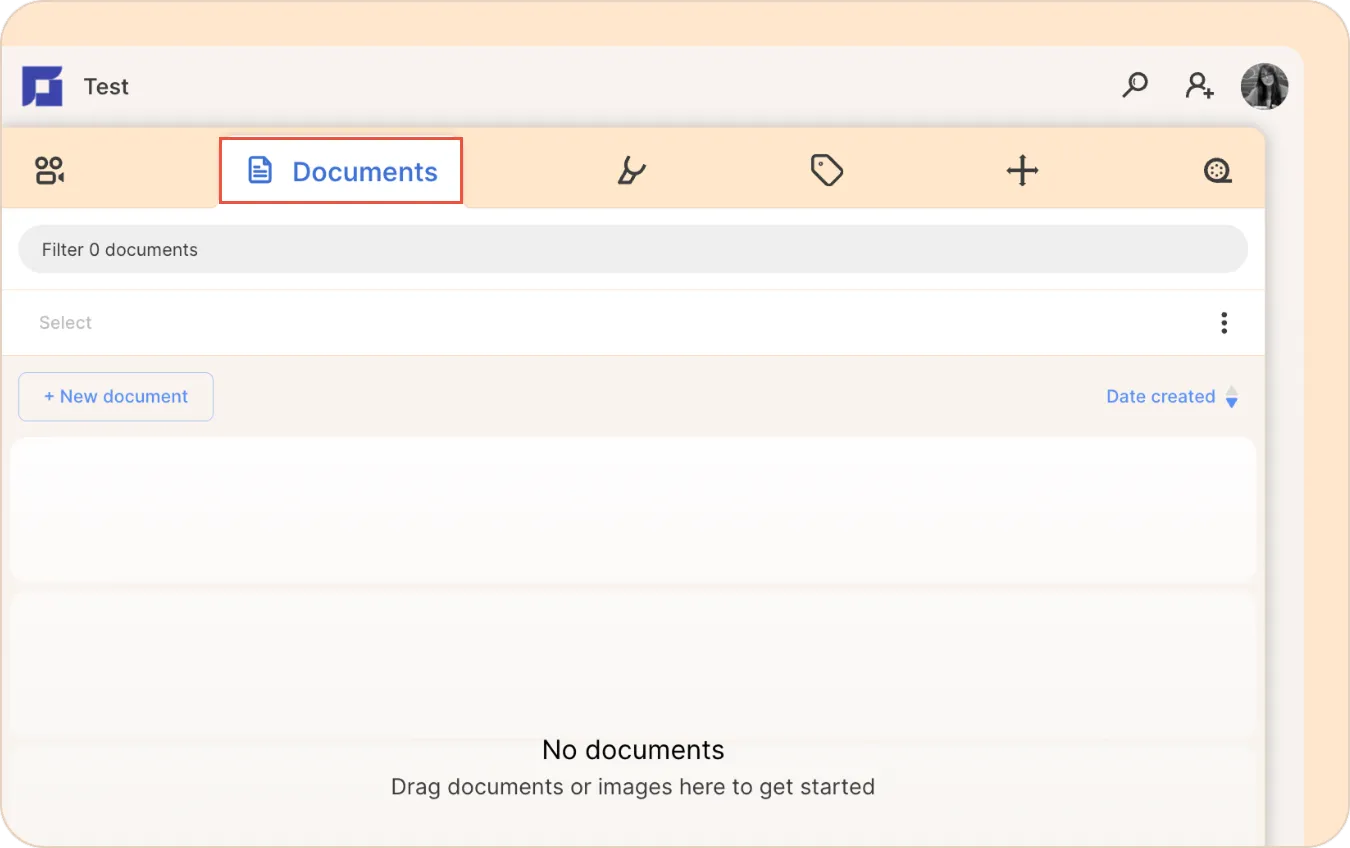
From here, you can upload, browse, and work with all your documents within the project.
Uploading your files
You can drag in an entire folder to Reduct at once. It will process all the files and flag any duplicates already in the project. You can still upload a flagged file anyway if needed.

Adding metadata to stay organized
You can add context to each document to make it easier to find and navigate later.
- Click on a document to open it.
- At the top of the document panel, click Add a description to write a short note about what's in the file.
- On the right-hand panel, click Label this document.
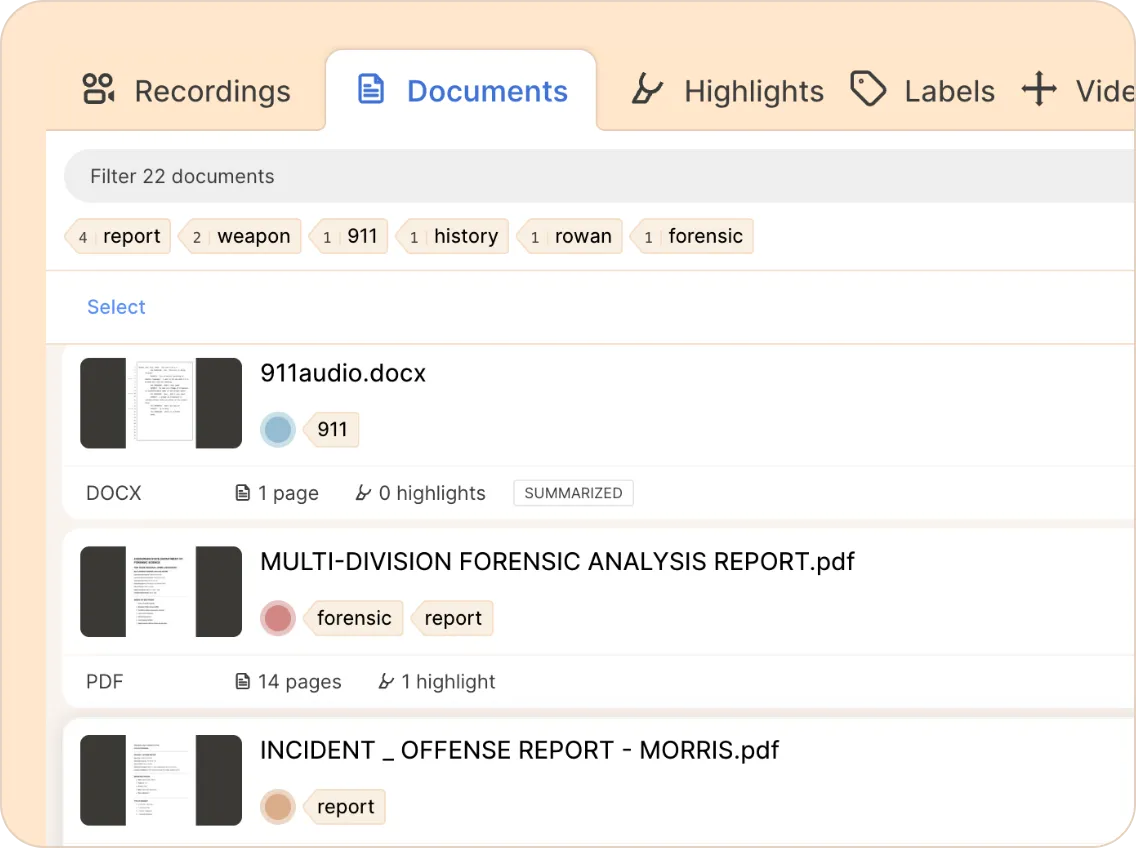
Labels are color-coded, so you can visually scan your sidebar and spot document types at a glance - useful when you're managing a project with dozens of files.
Use consistent label colors across projects so your team always knows what they're looking at. For example, red for intake documents, yellow for supporting materials, and blue for official records.
Searching across documents
Searching within a project
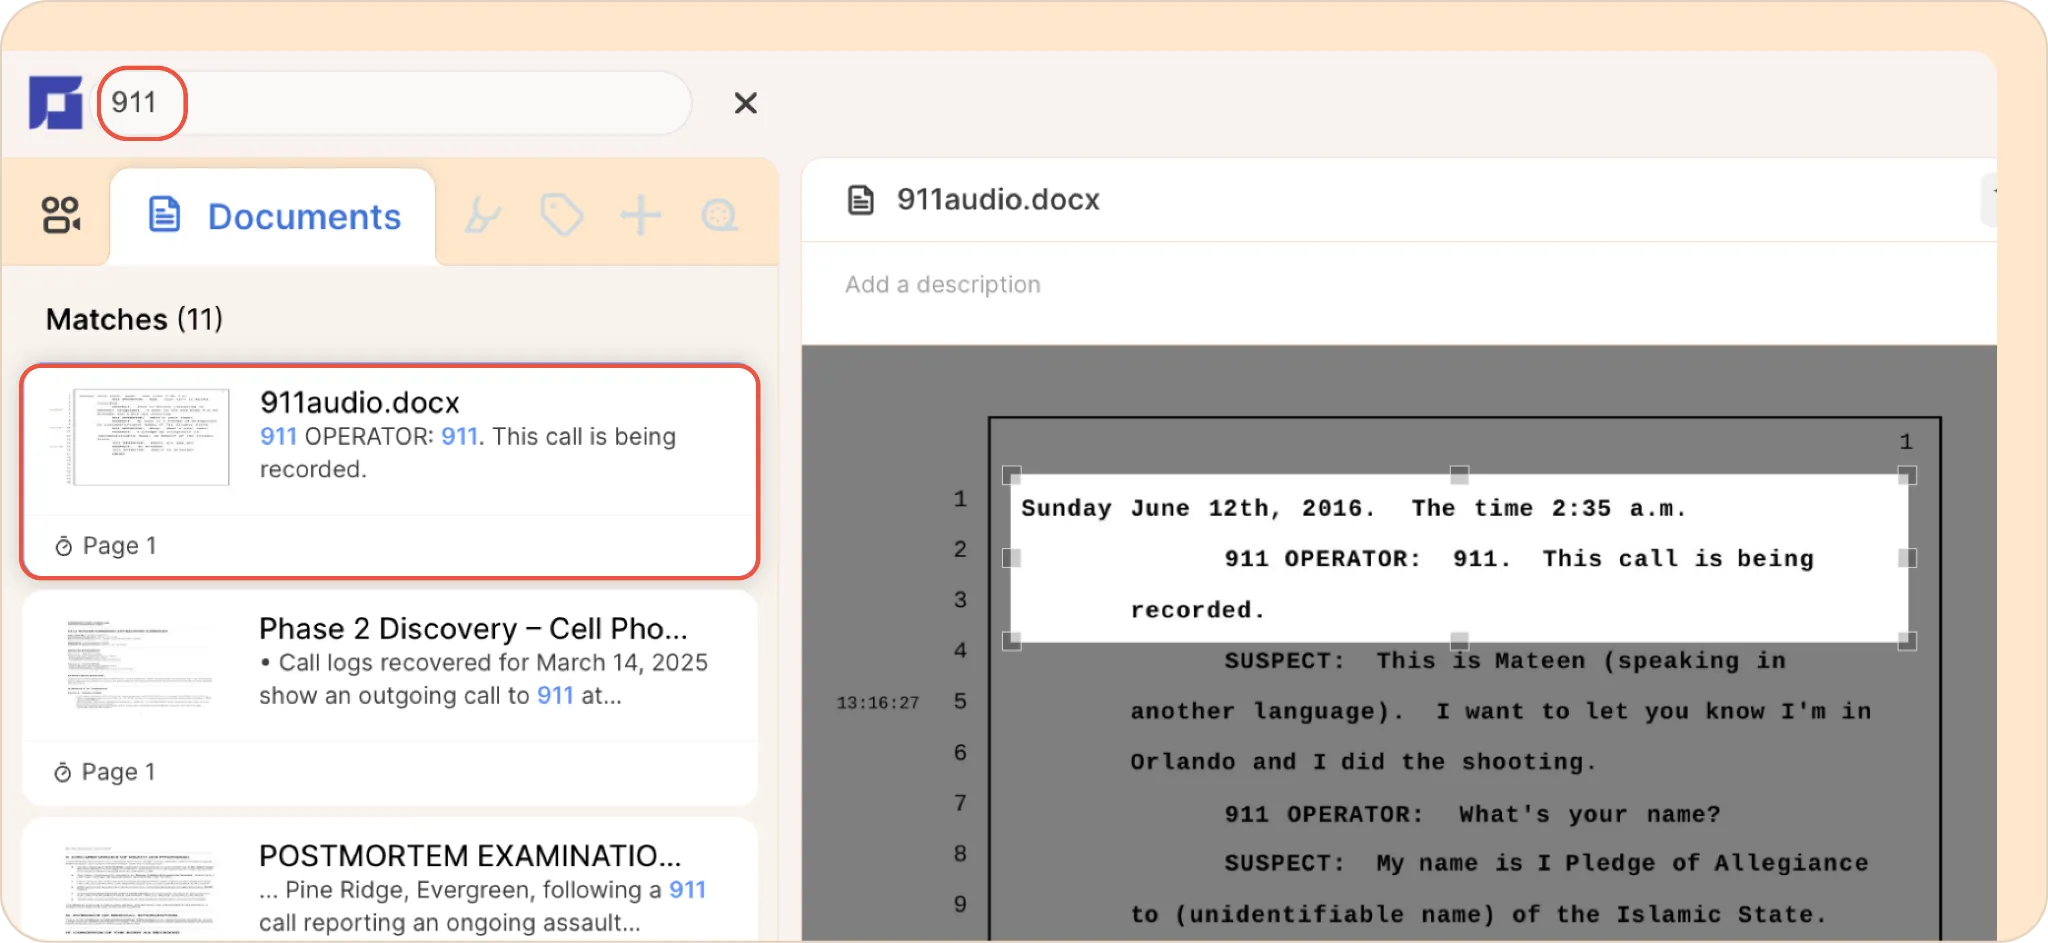
- Click the Search transcripts and documents bar at the top of the screen to search for any word or phrase.
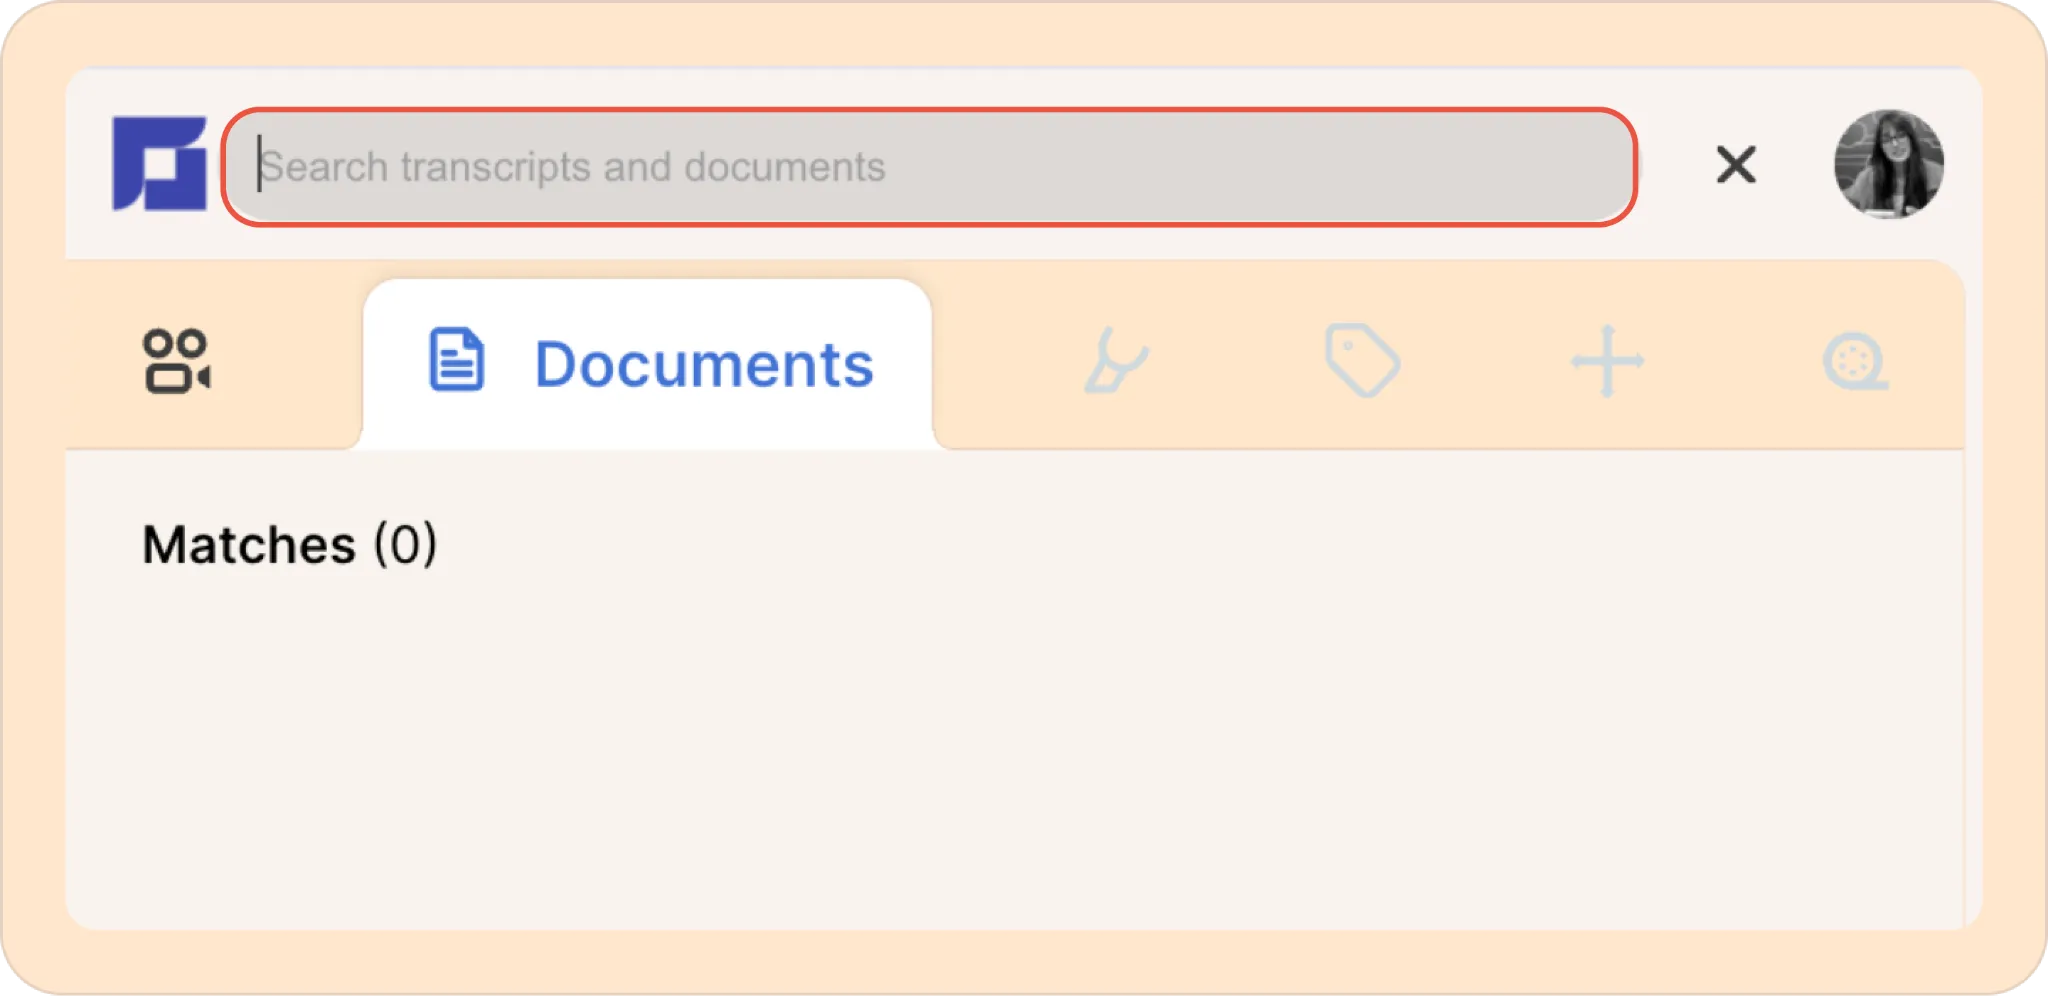
- Reduct will surface every match across both your recordings and your documents in the current project.
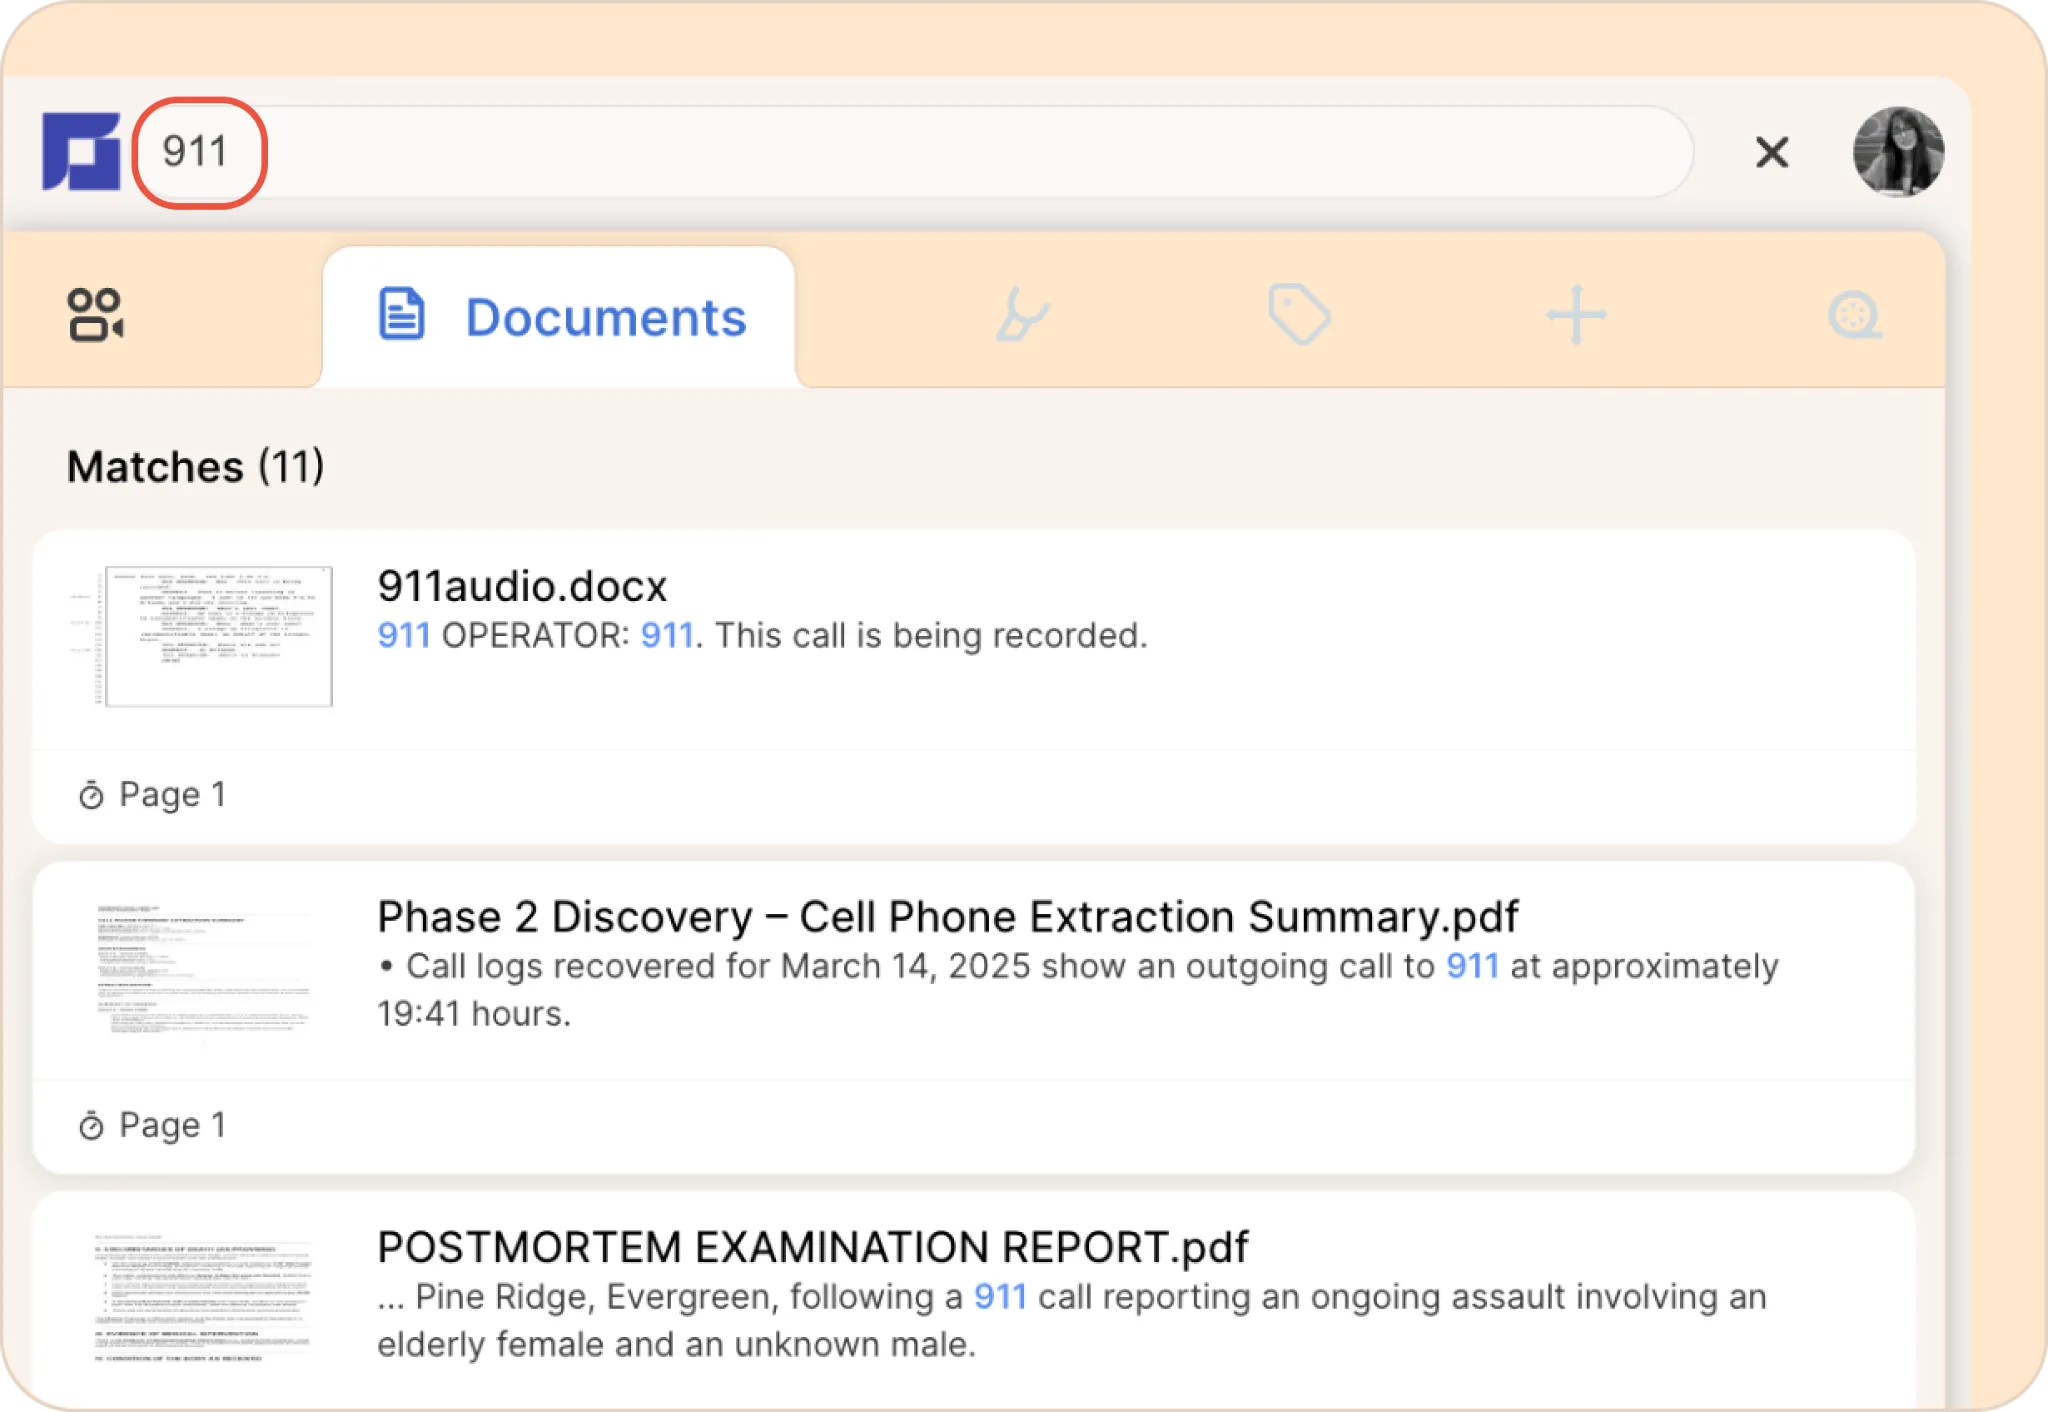
- Click on any search result to jump to that specific part of the document.
This is useful when you need to track down a specific name, date, or term that appears across a large set of files without opening each one individually.
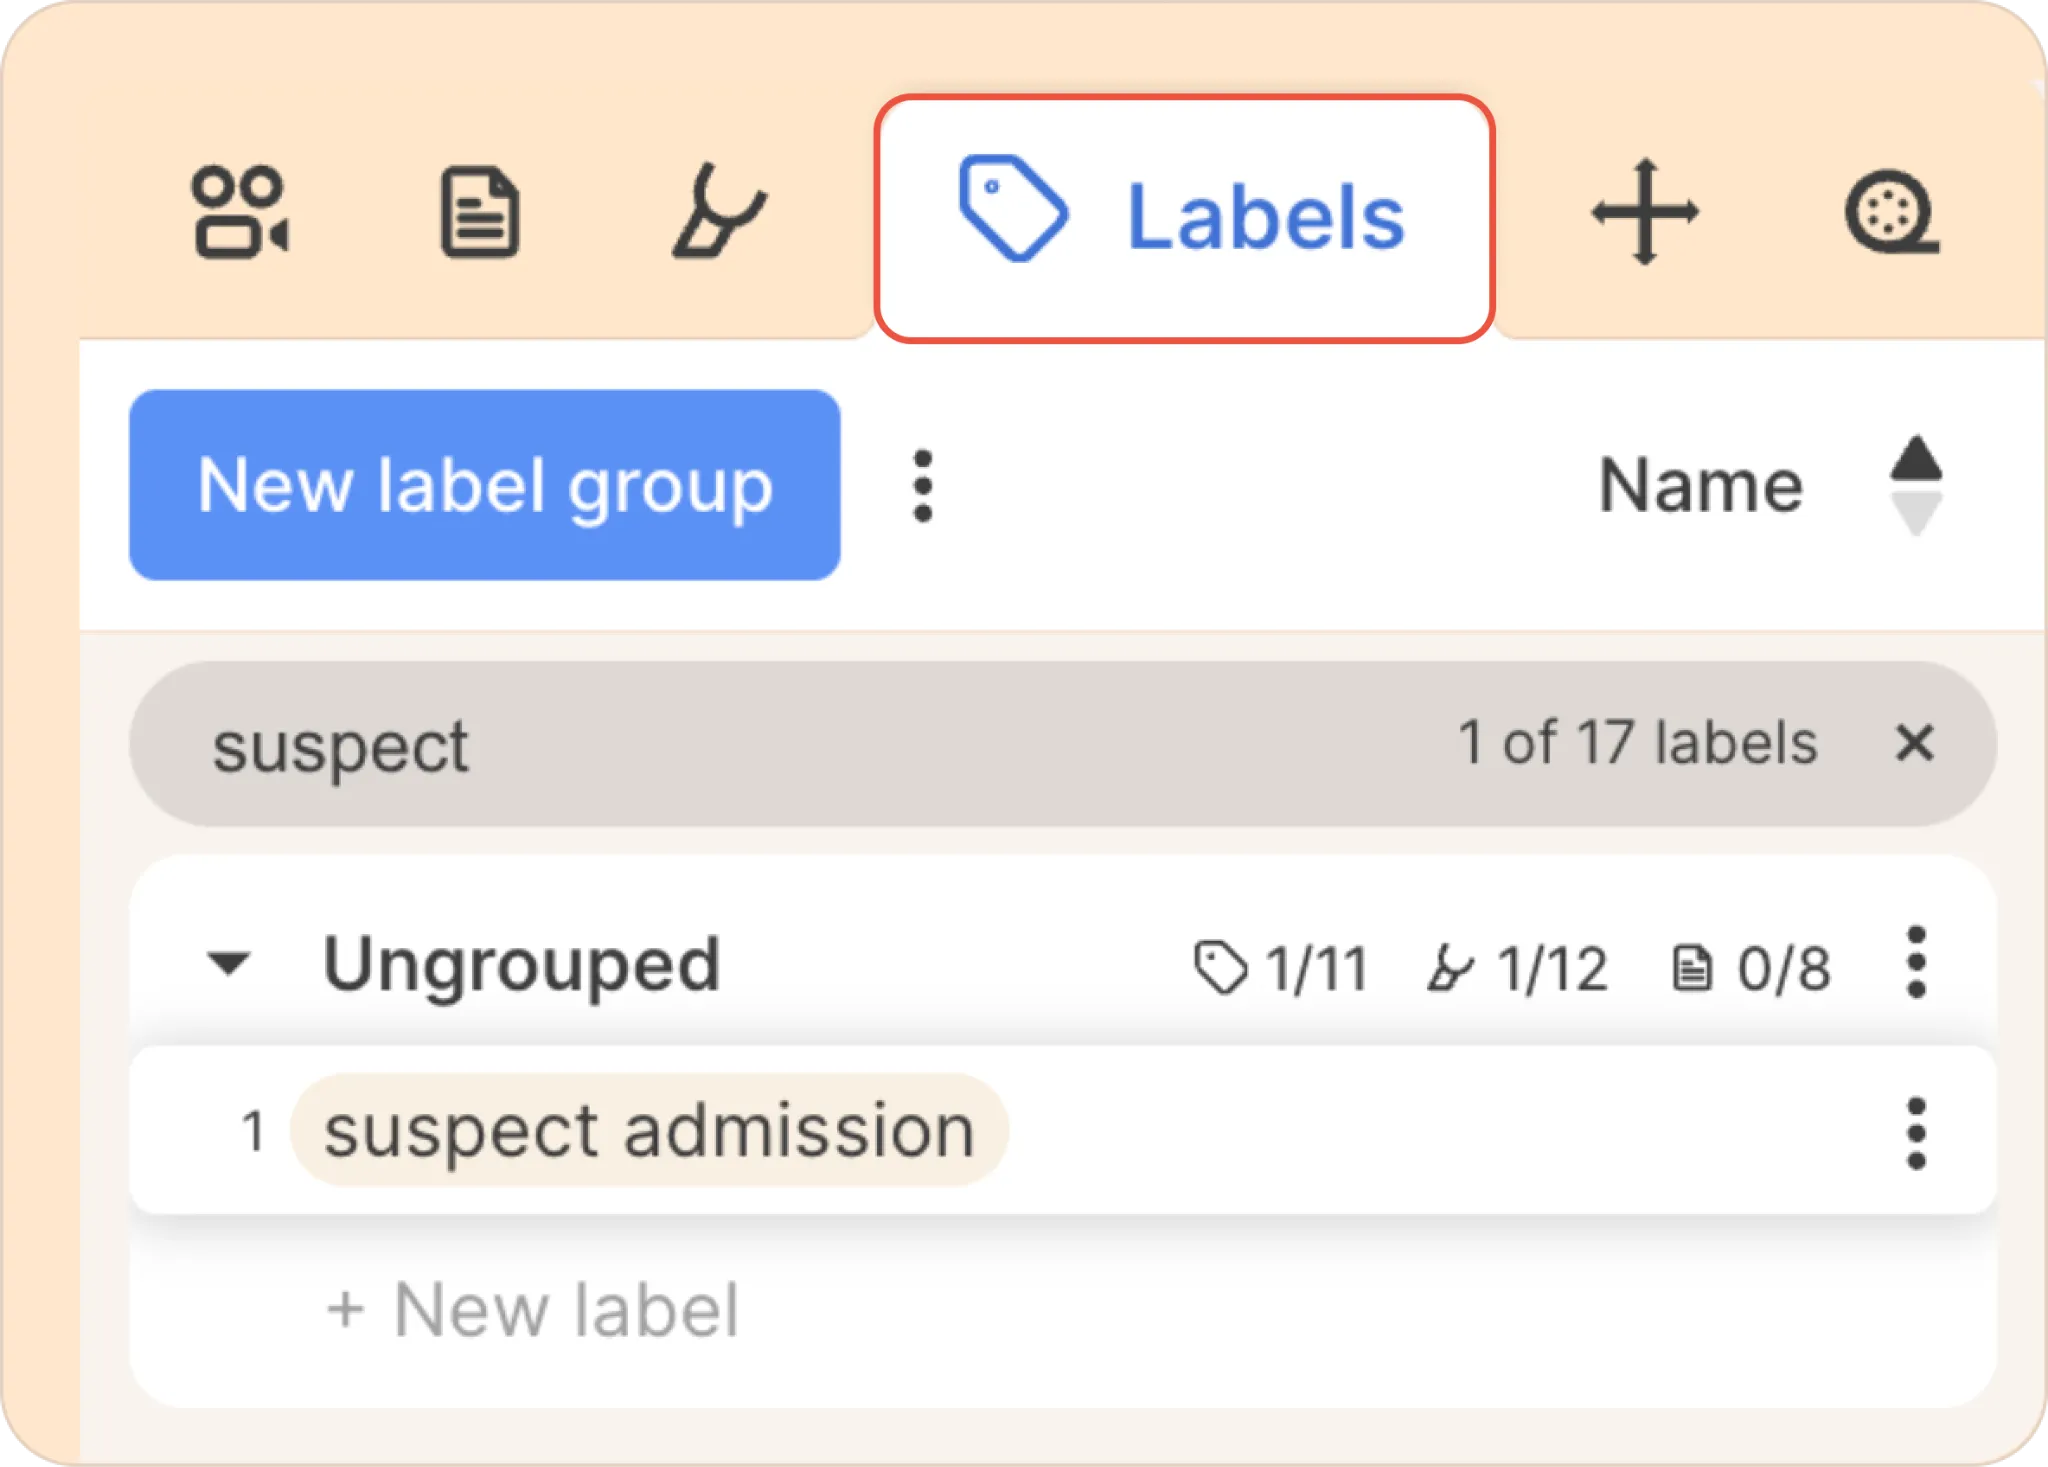
Filtering your document list
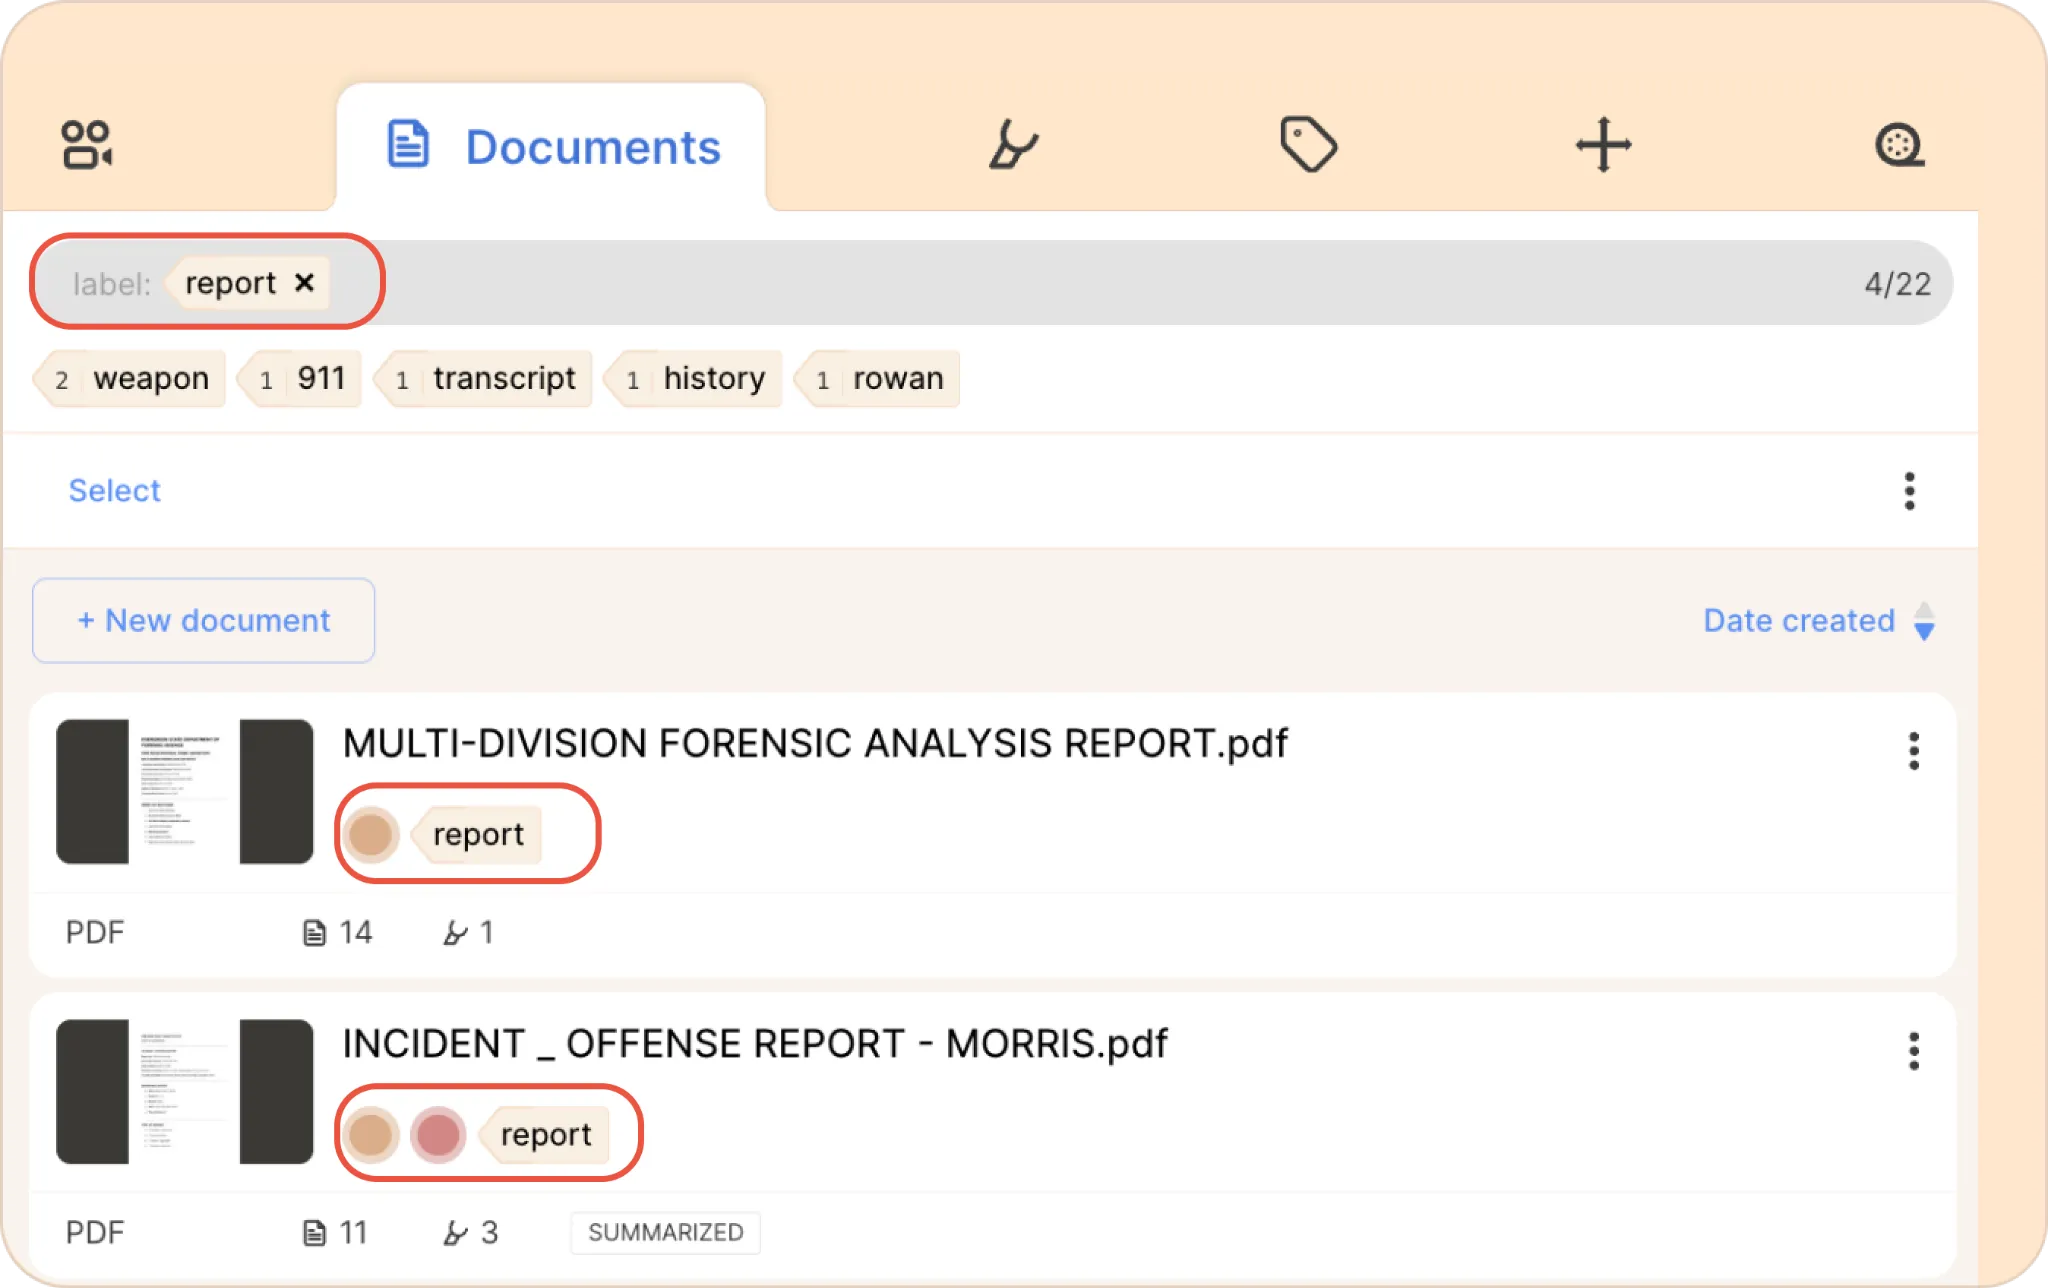
In the Documents sidebar, you can filter the document list by label to narrow things down quickly.
- Go to the Documents tab.
- Click the Filter bar at the top of the document list.
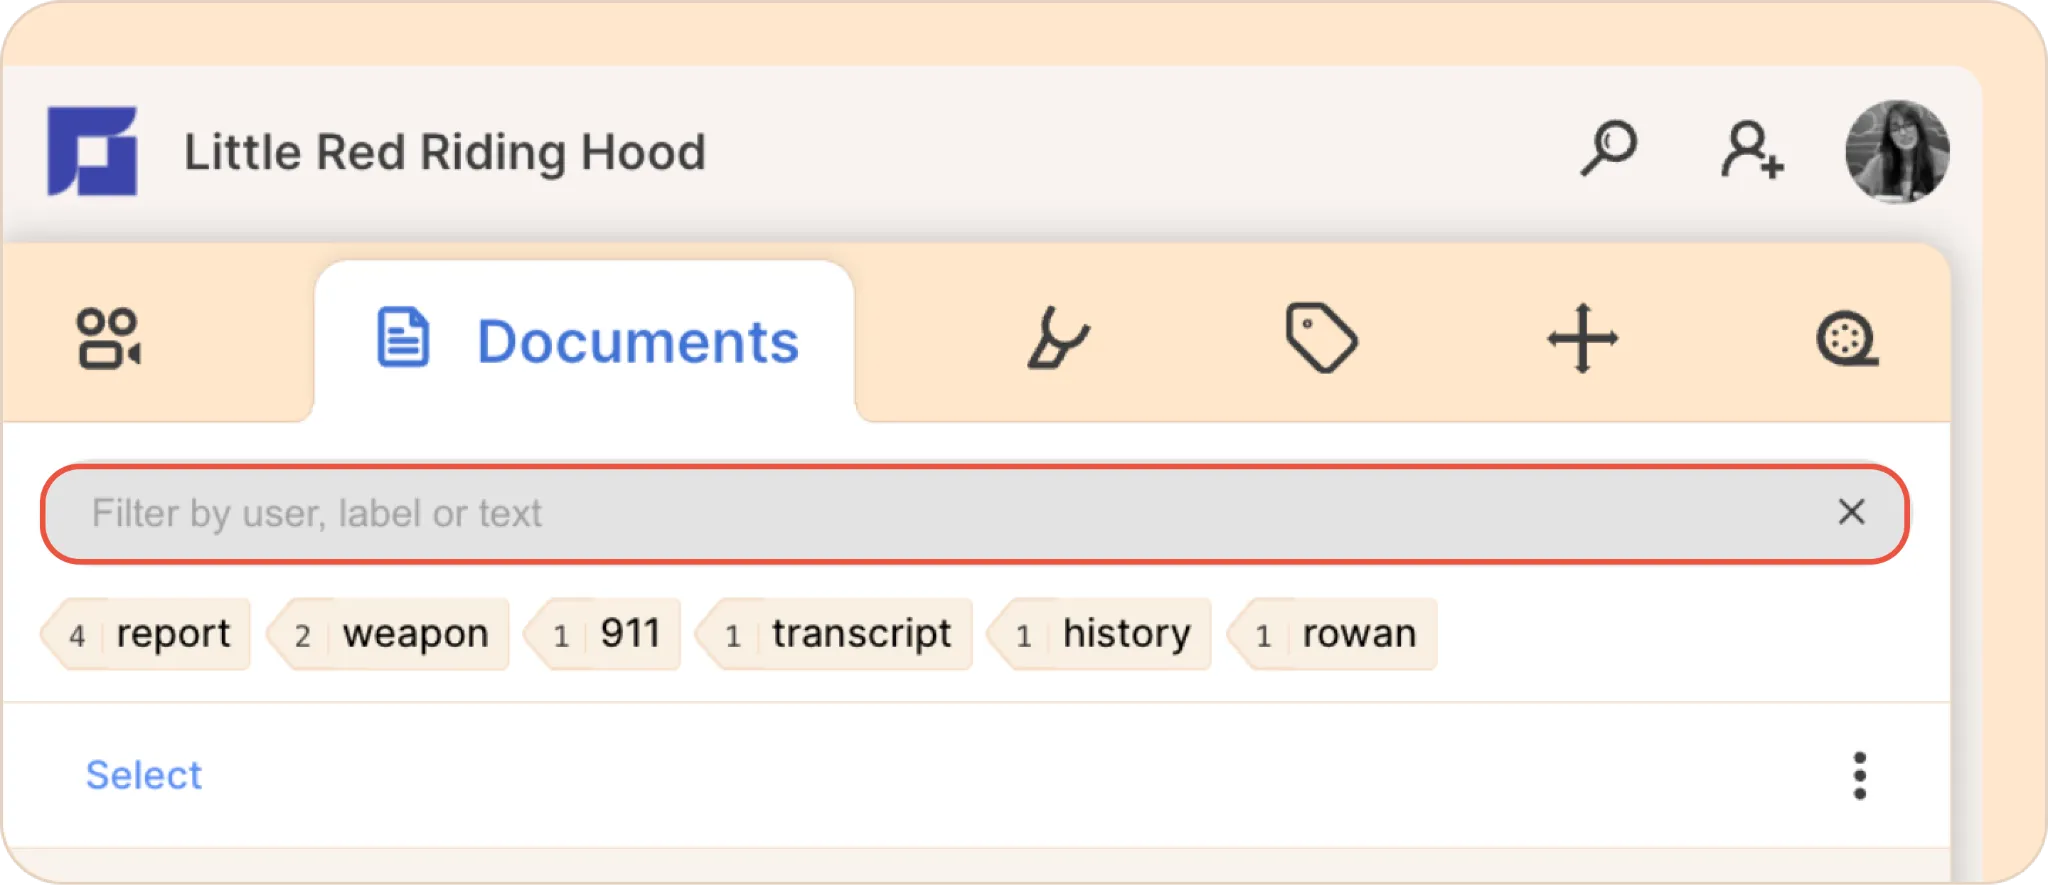
- Select a label from the filter options, and your document list will update to show only documents with that label.
Summarizing documents
Just like you can summarize recordings in Reduct, you can summarize documents.
Summarizing a single document
- Open a document.
- Click Interact in the top-right corner.
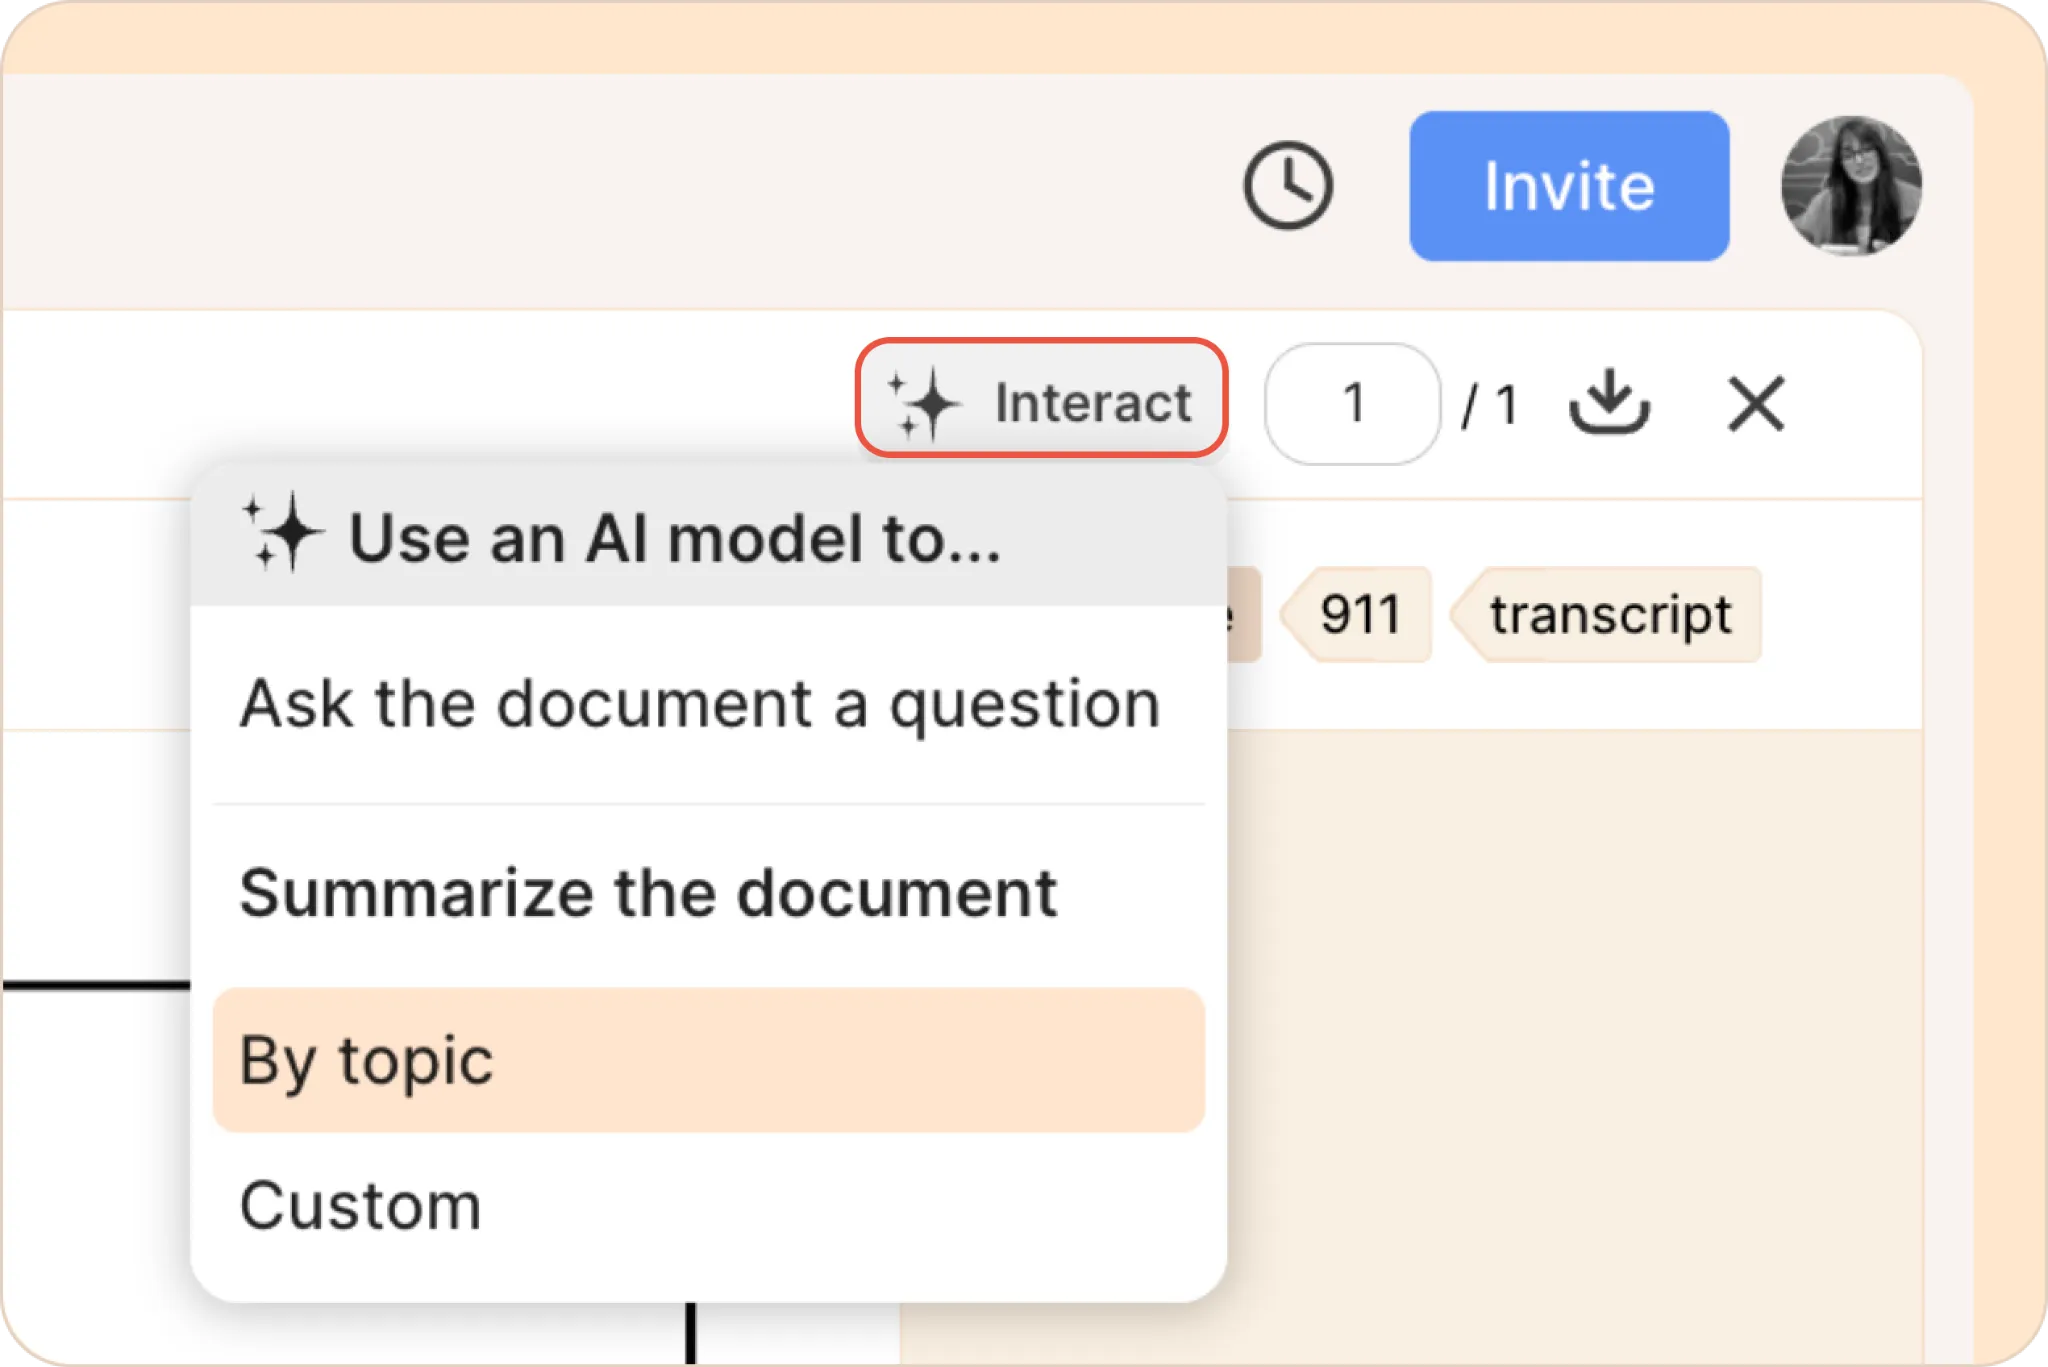
- Choose between:
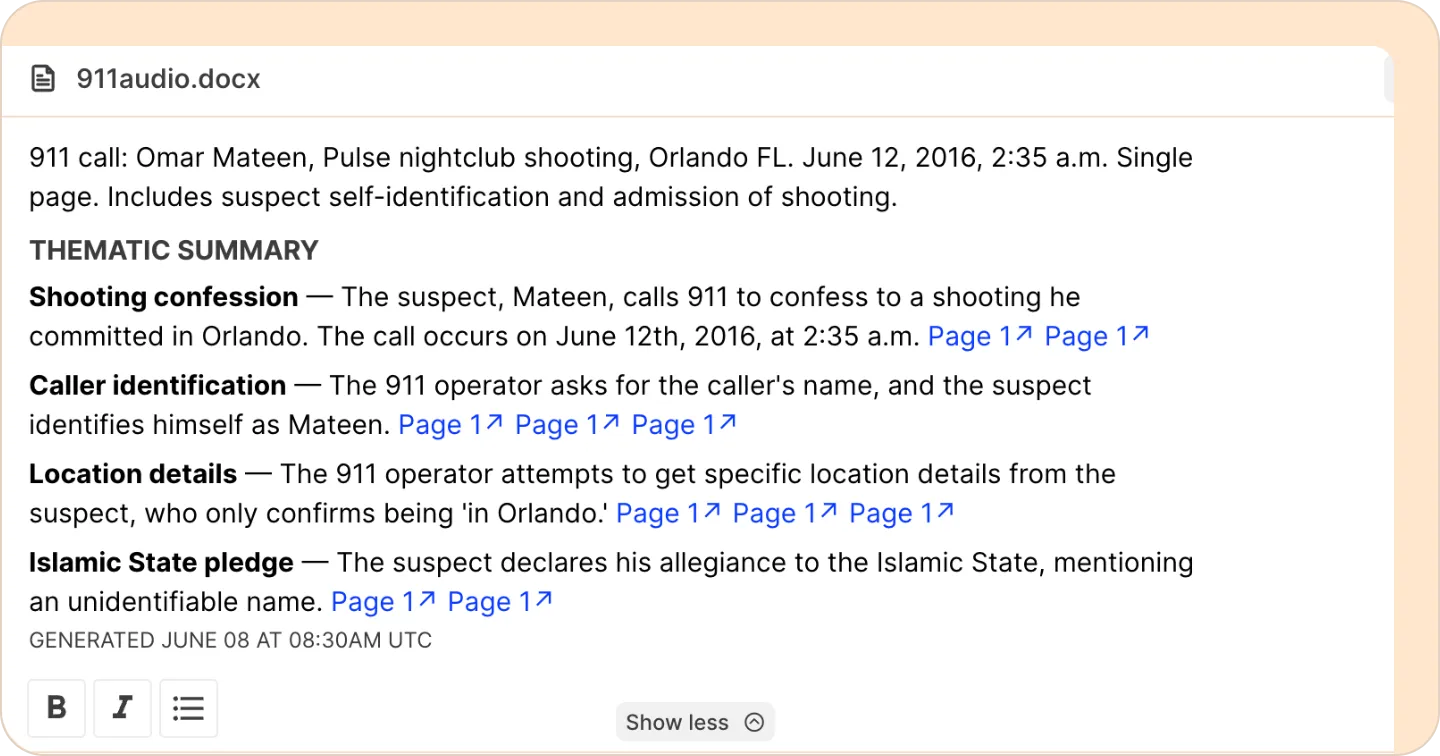
- Thematic summary (By topic): Reduct organizes the key ideas by topic, with each point linked to the relevant page. Click any item in the summary to jump straight to that section.
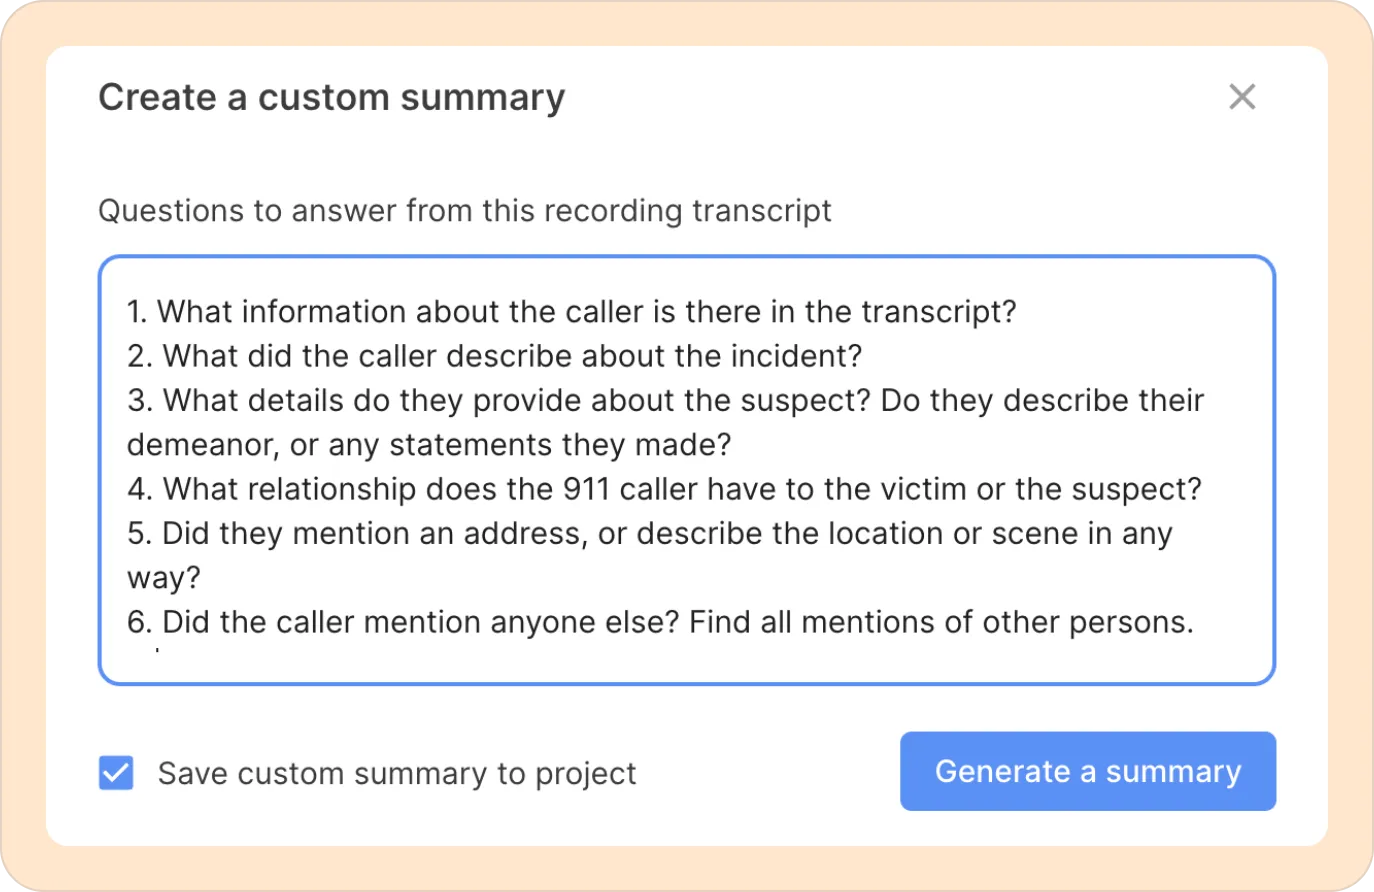
- Custom summary: When you already know what you’re looking for in the document, write your own questions, and click Generate a summary.
- Thematic summary (By topic): Reduct organizes the key ideas by topic, with each point linked to the relevant page. Click any item in the summary to jump straight to that section.
Reduct pulls answers directly from the document. You can save your questions to the project so the same summary runs automatically on every new document added.
Batch summarizing all documents in a project
You can run summaries across every document in your project at once without opening them one by one.
- In the Documents tab, select multiple documents using the checkboxes (or select all).
- Click the Batch summarize option from the three-dot kebab (⋮) menu.
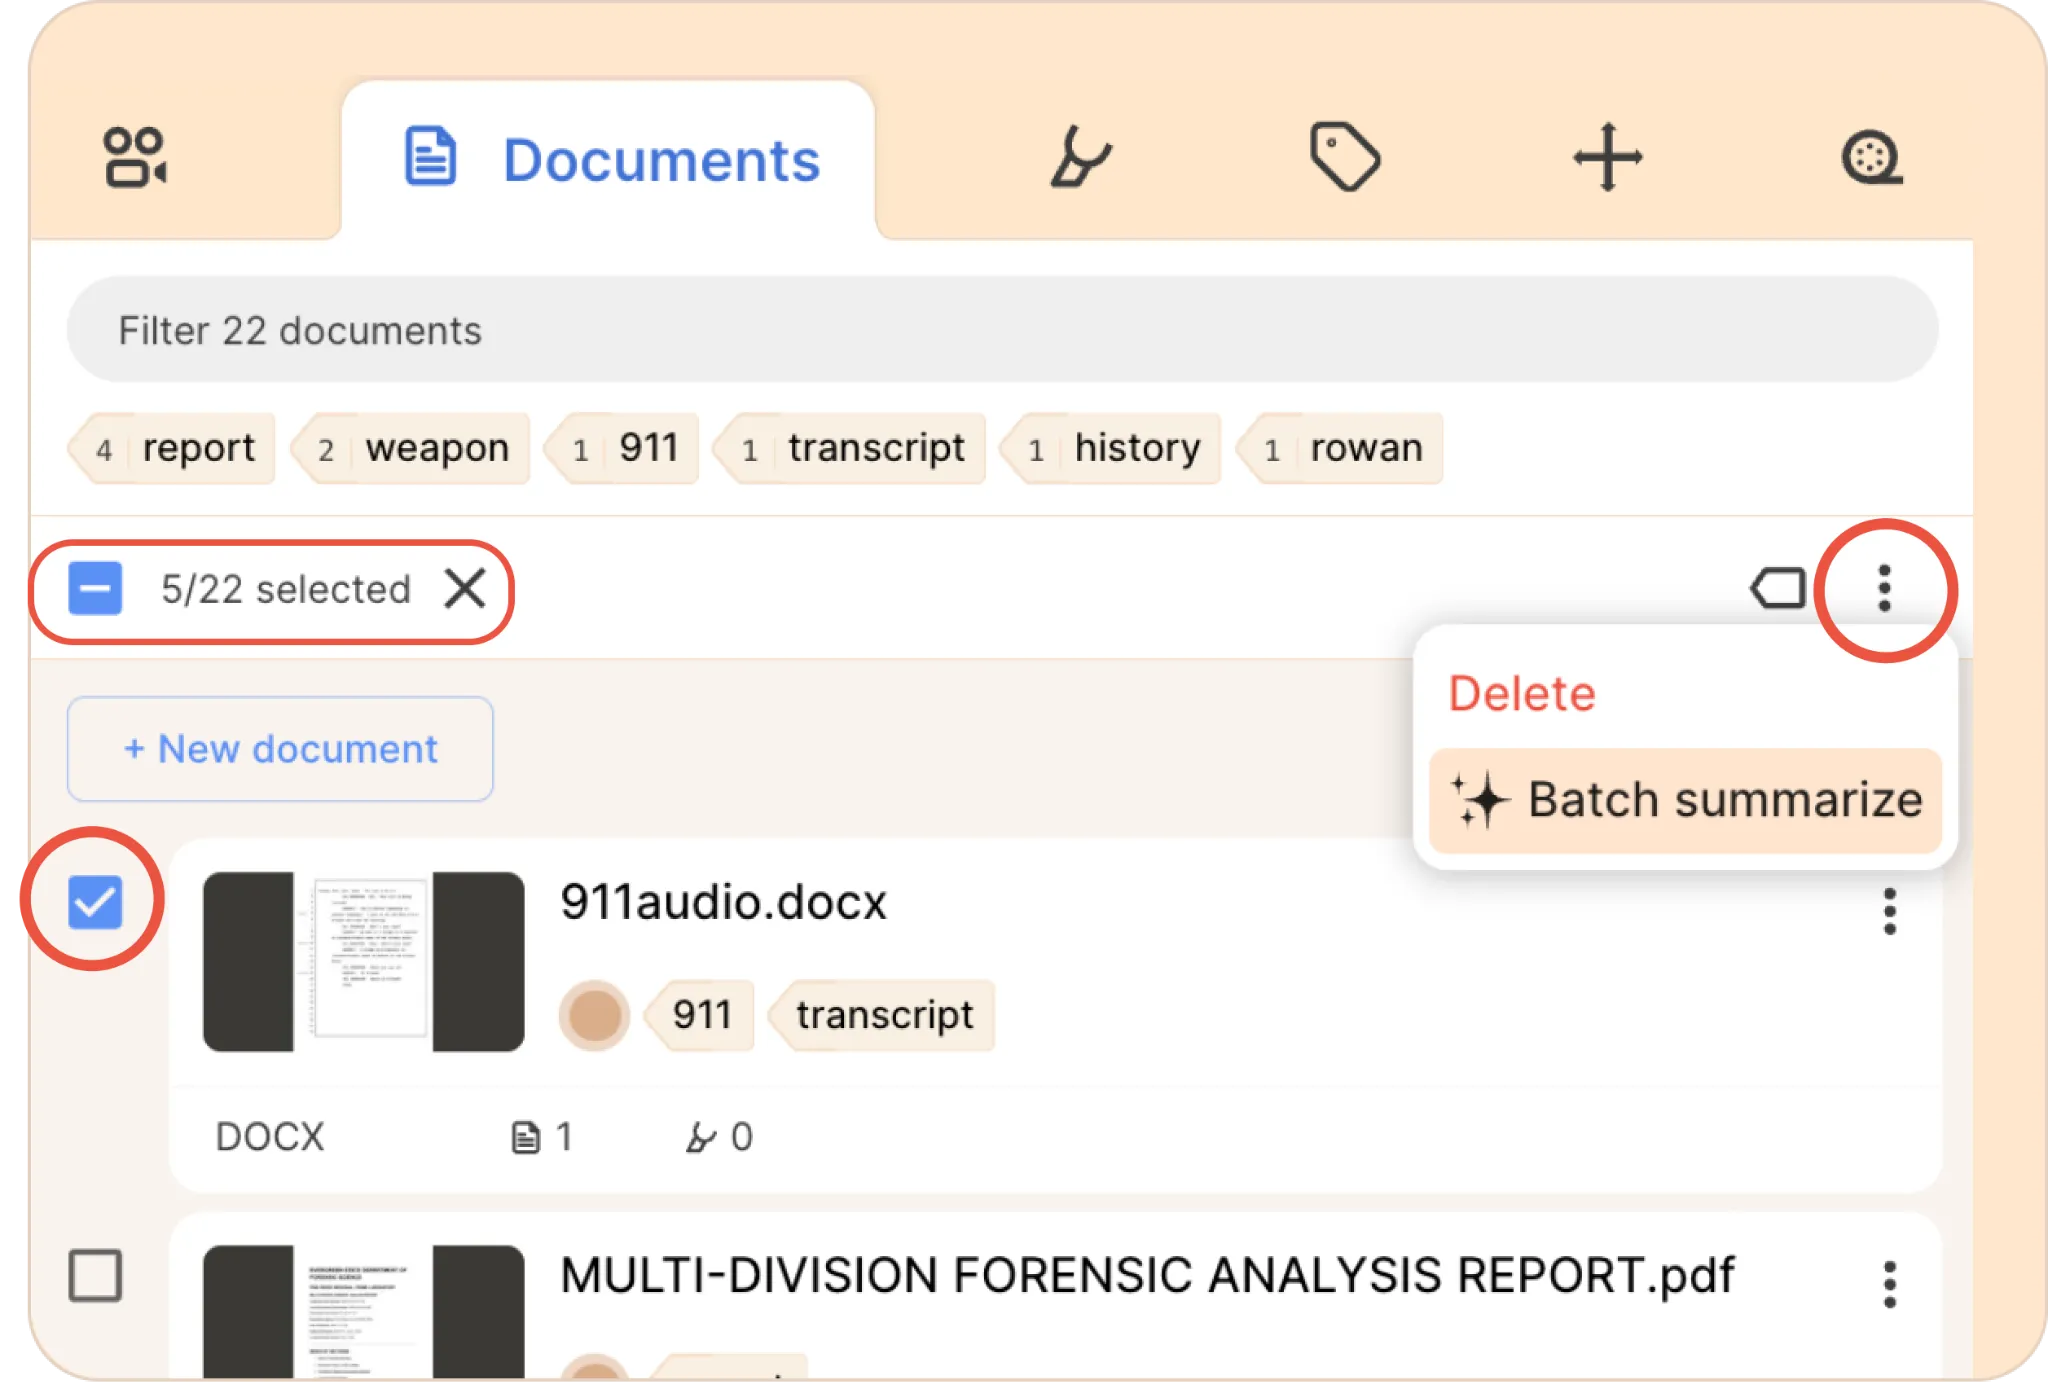
- Choose Thematic, Custom, or Template.
Asking a document a question
If you want to dig into a specific file without rereading it page by page, you can ask it a direct question.
- Open the document.
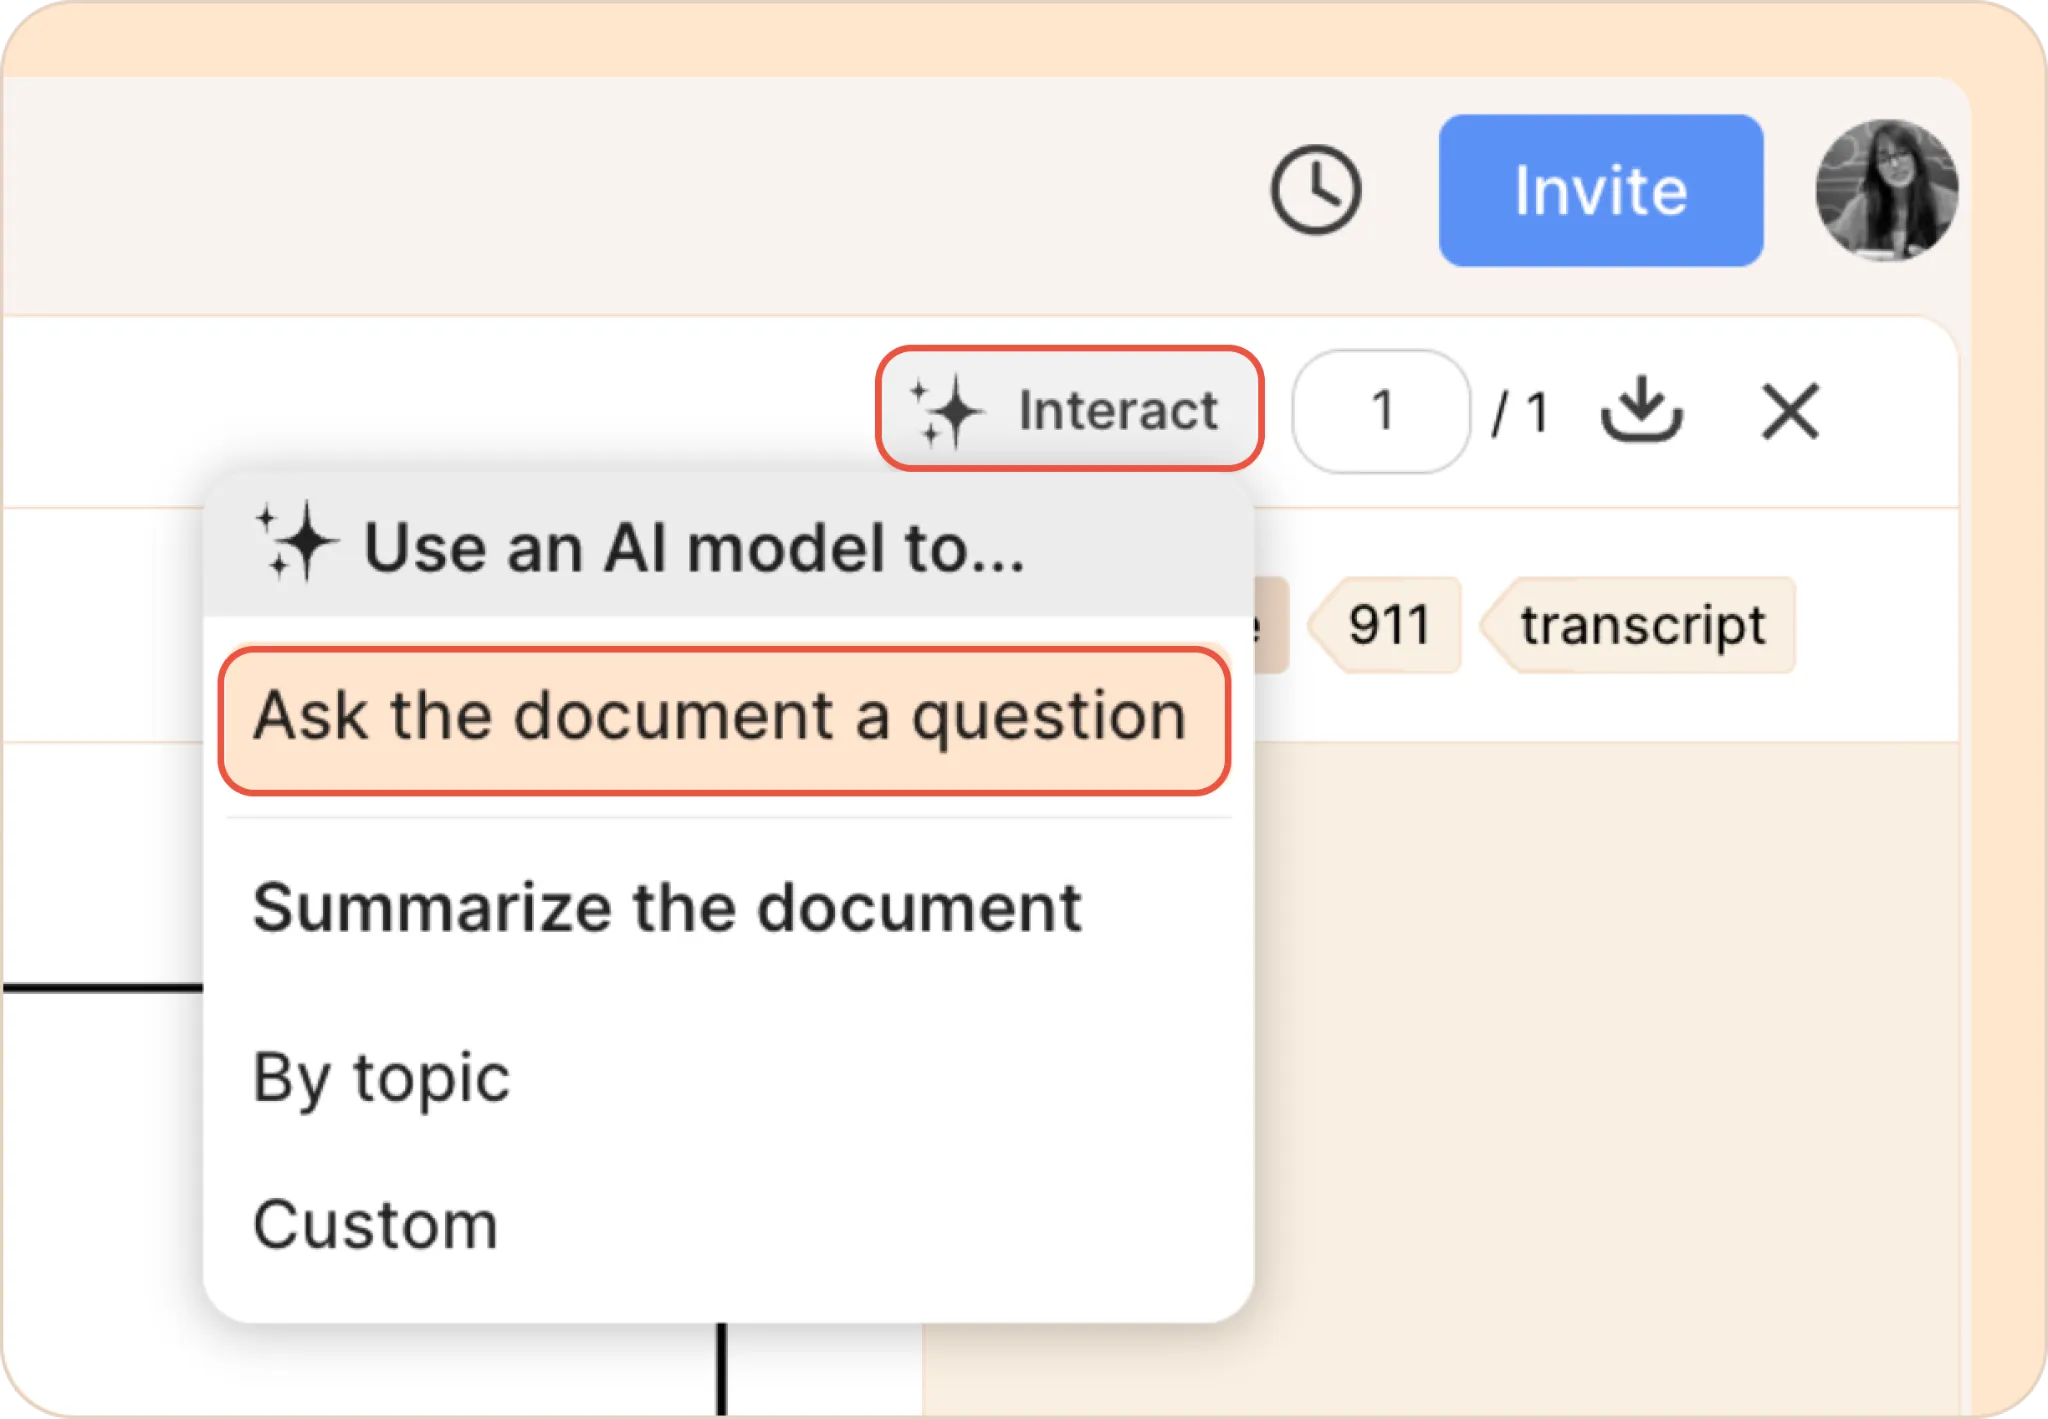
- Click Interact in the top-right corner and select Ask the document a question.
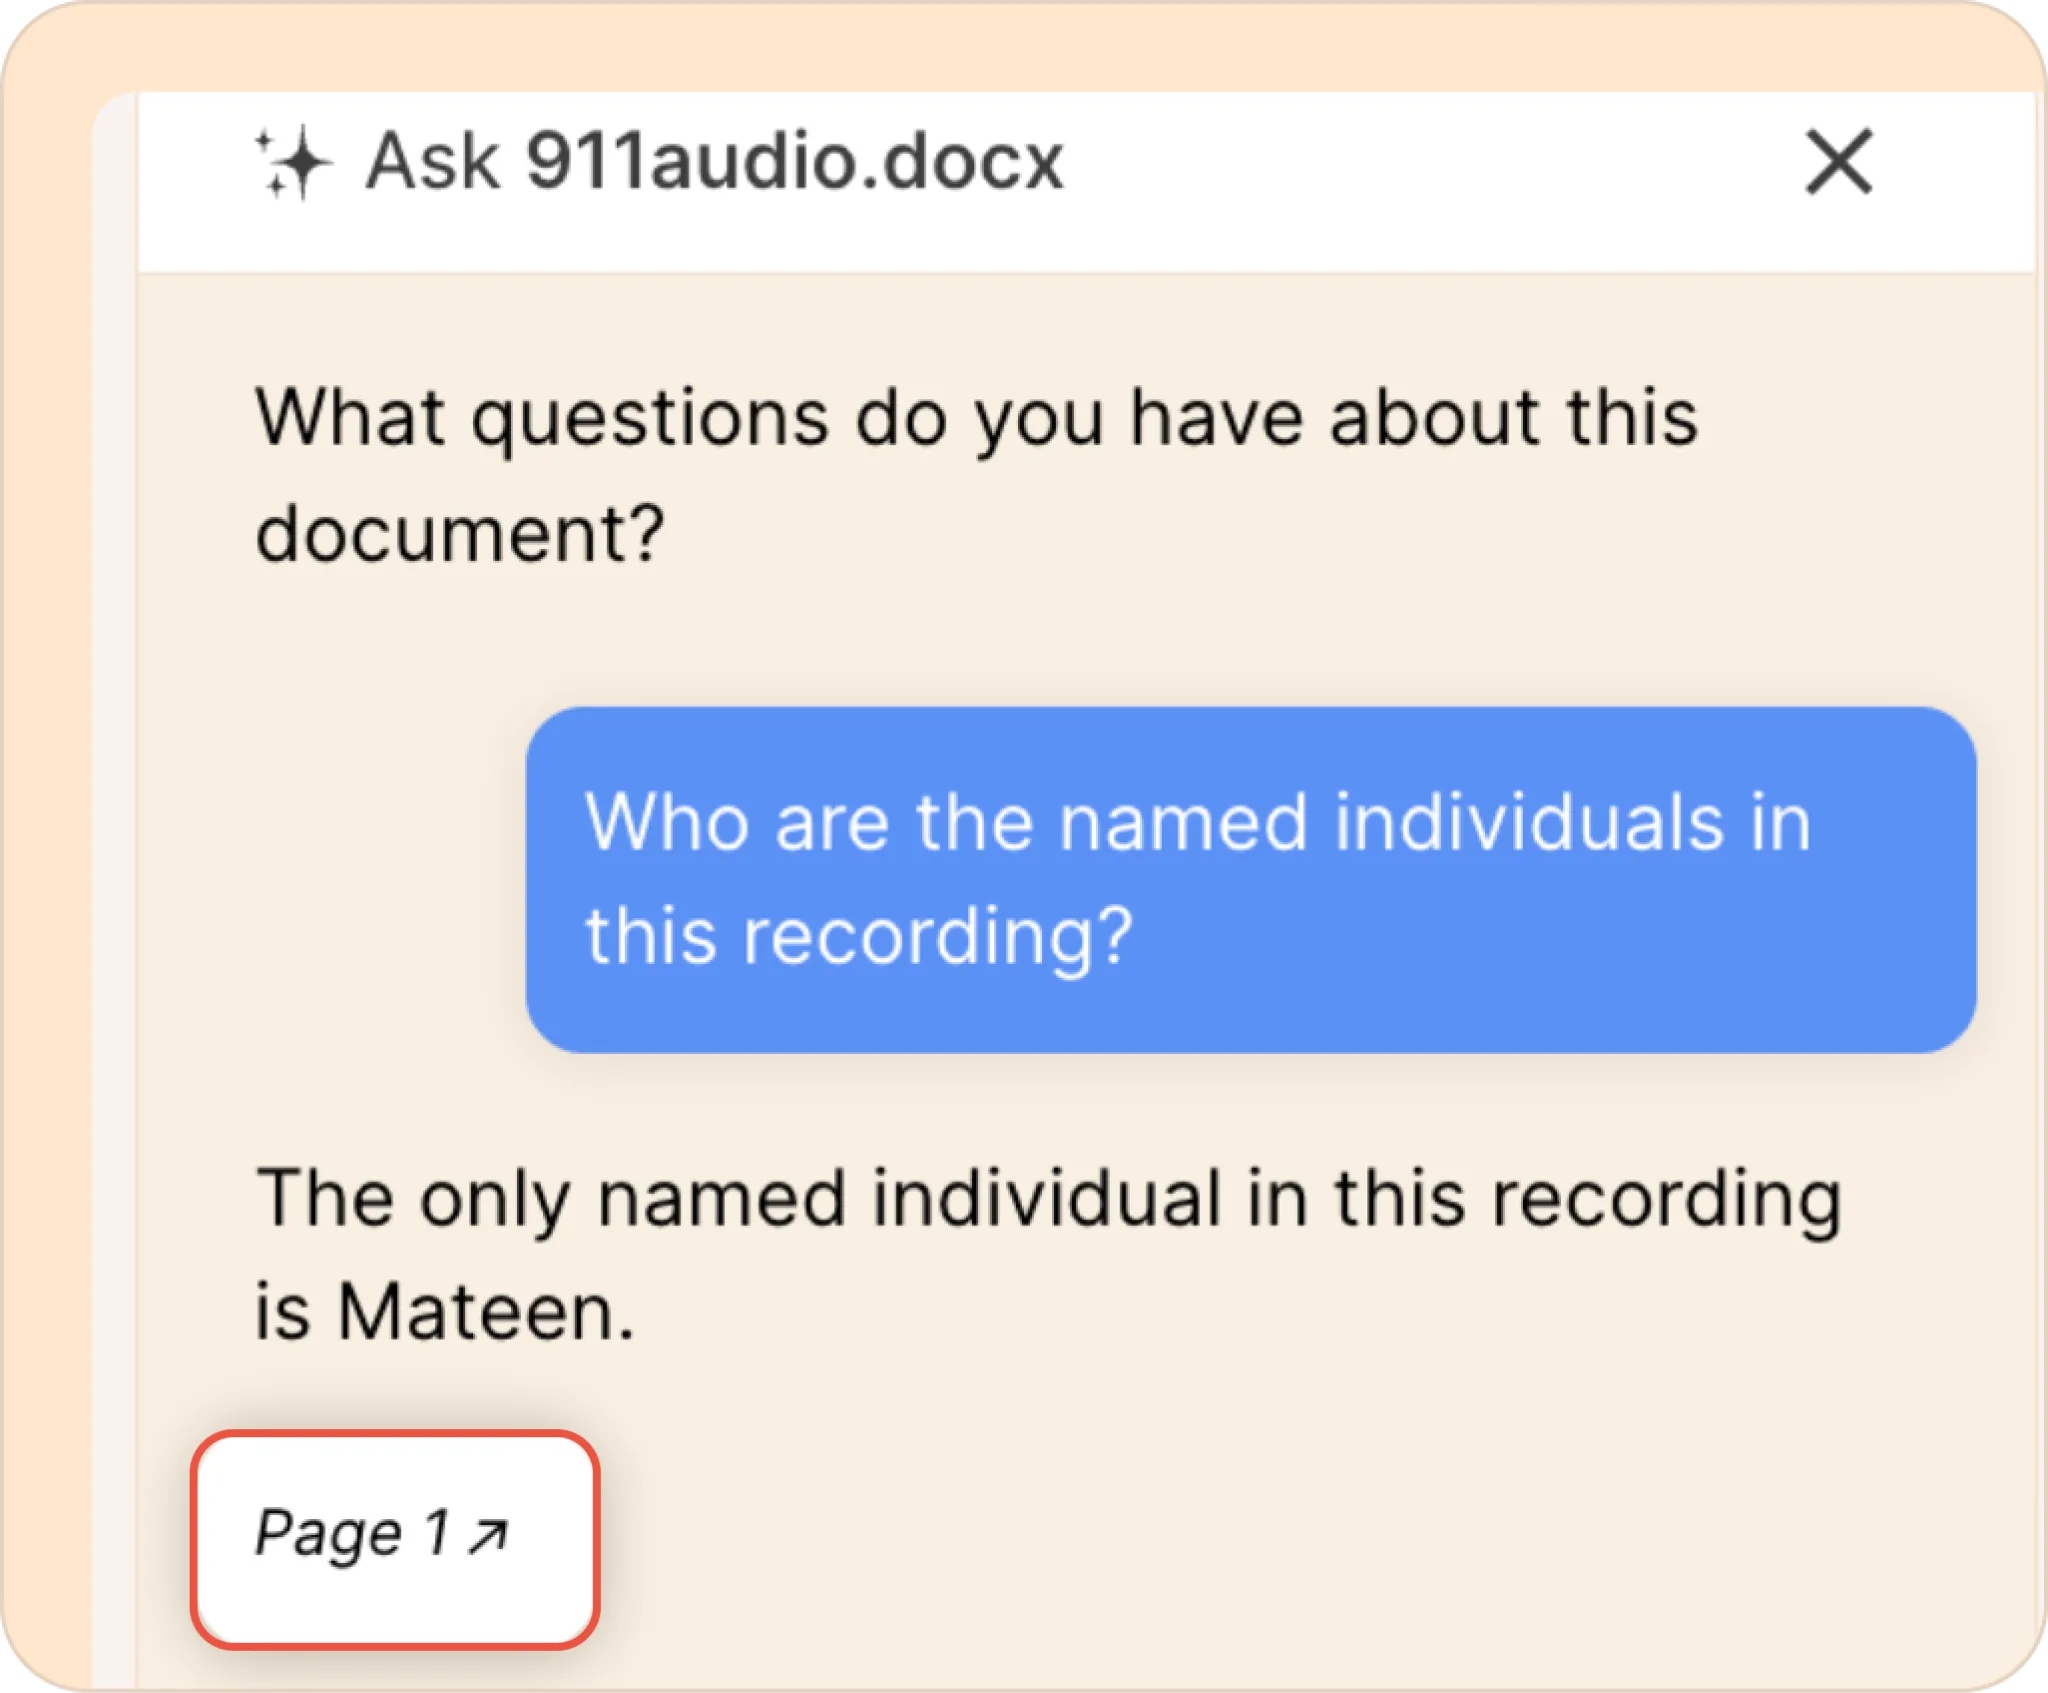
- Type your question in the panel that opens on the right. For example: "What was the timeline of events? Who are the individuals mentioned in this document?", then click Ask.

Reduct will return an answer pulled directly from the document's content, along with a clickable page number that takes you to the exact moment in the transcript where the answer appears.
Highlighting and labeling content
Once you're inside a document, you can highlight and label sections directly in the transcript.
Highlighting
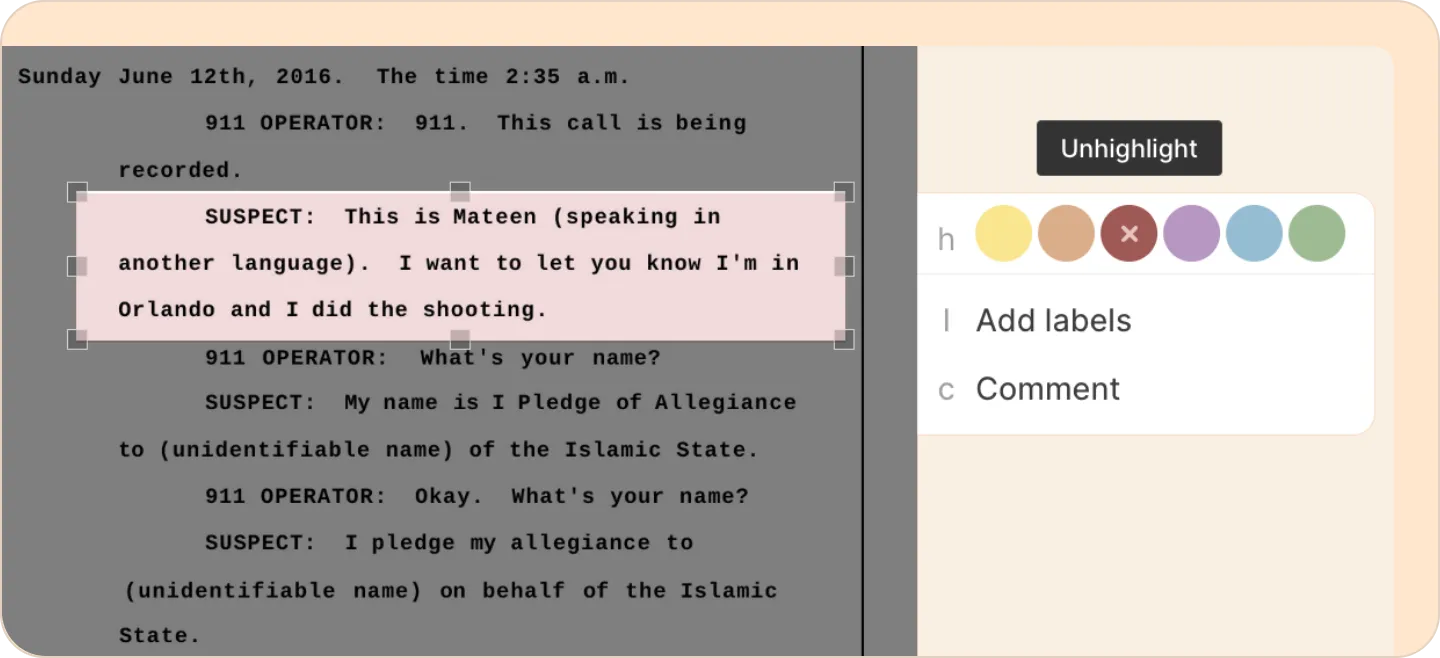
- Click and drag to select a section of text in the document. A bounding box appears around your selection.
- Choose a color from the color picker to apply a highlight. To change the color later, click on the existing highlight and select a new color.
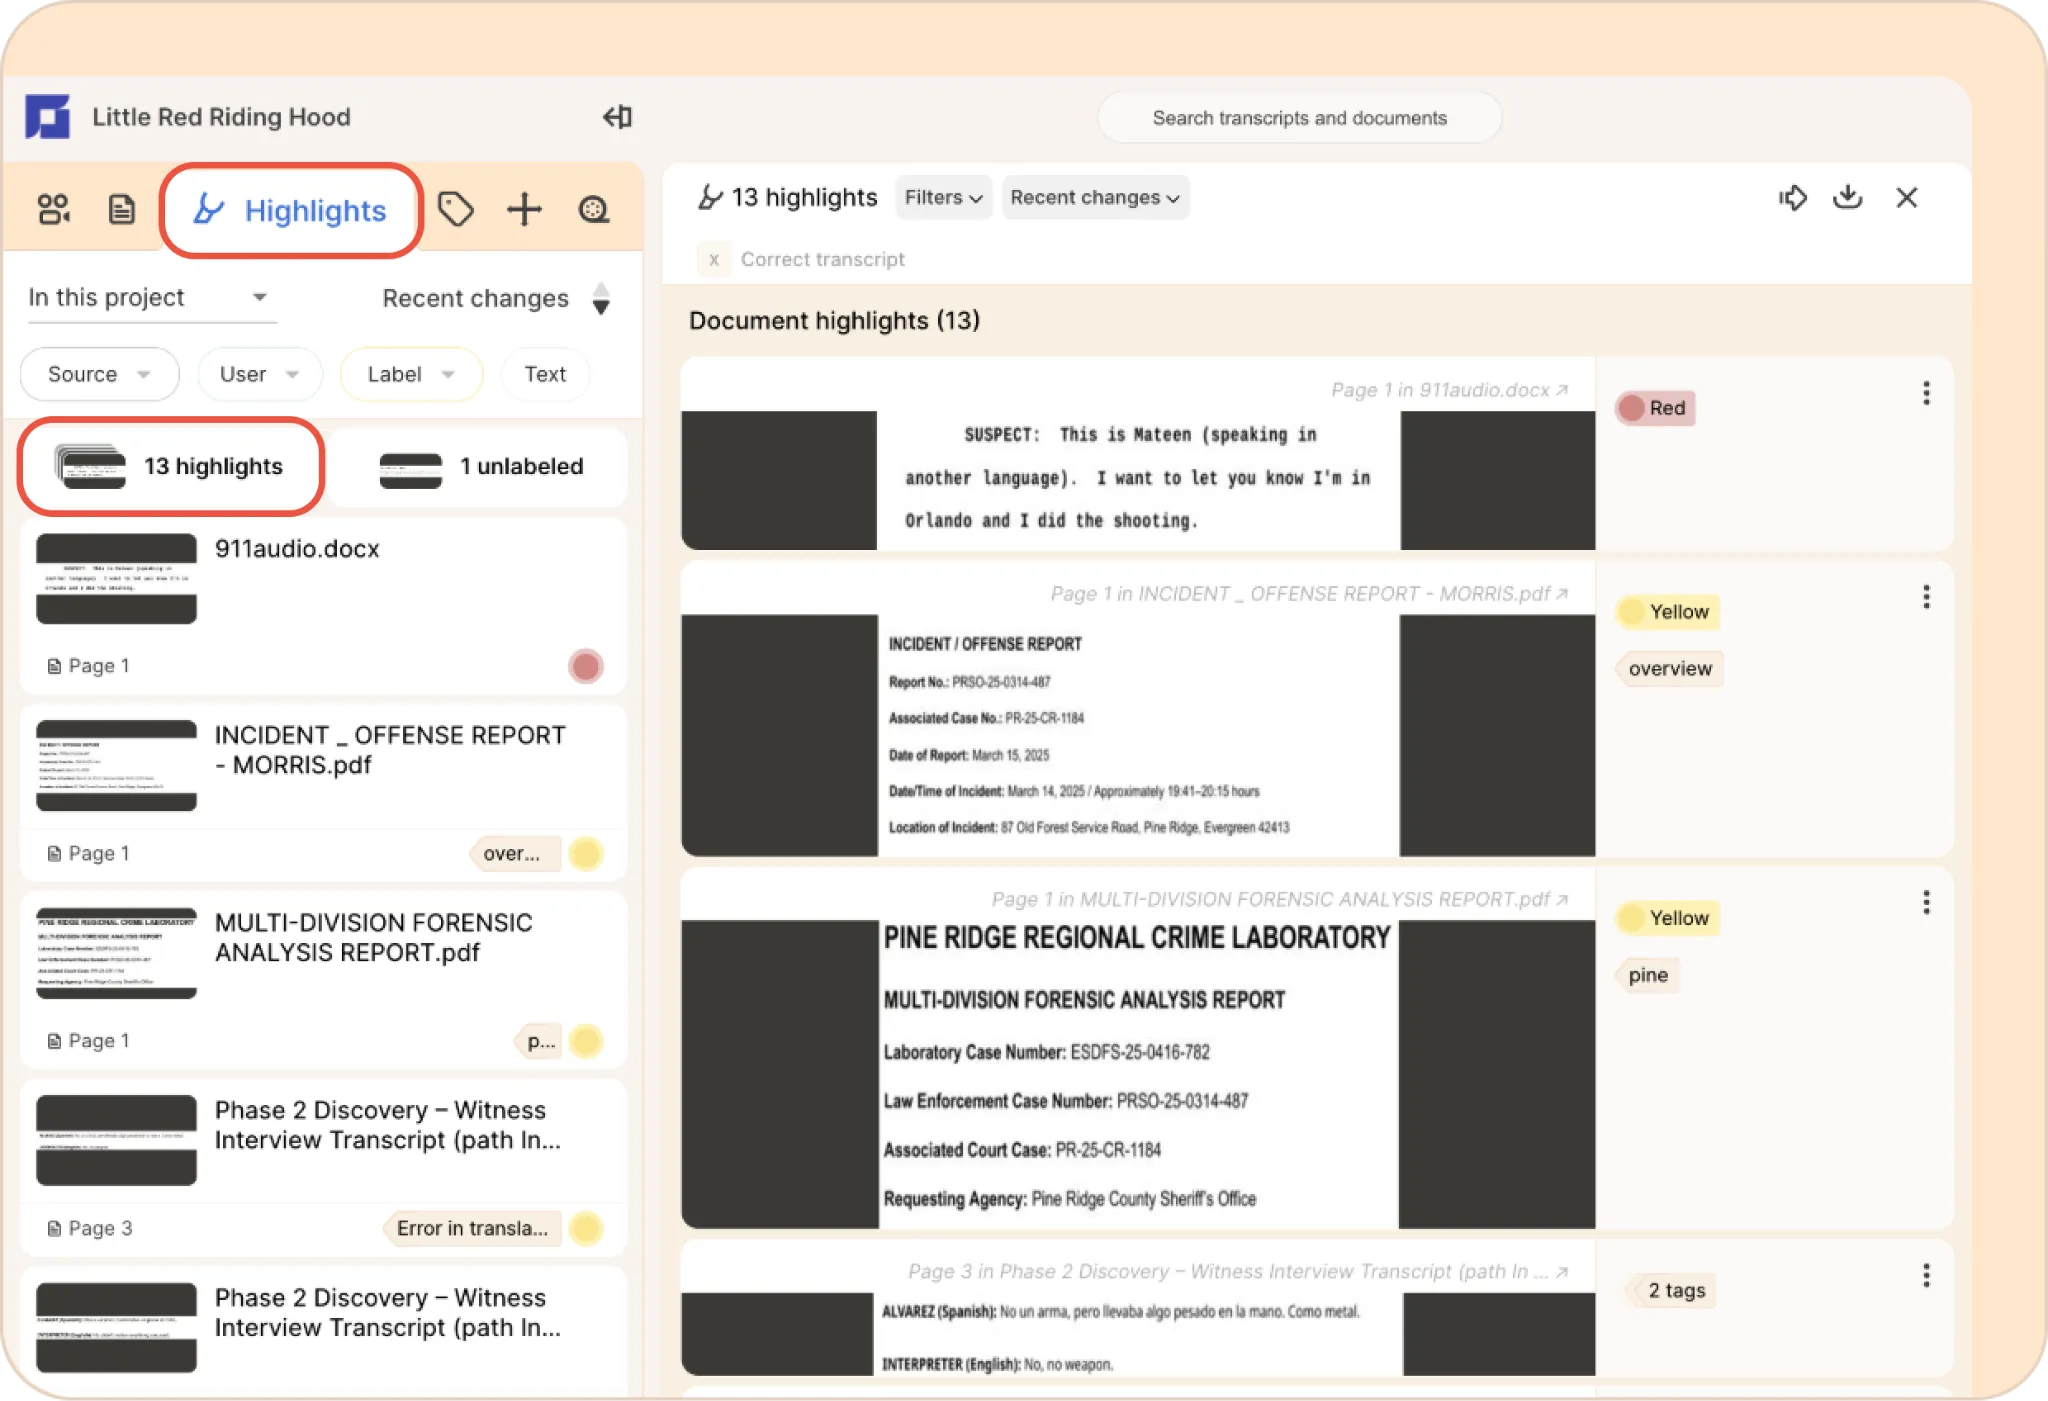
- To review all your highlights across documents, go to the Highlights tab in the top navigation.
Adding labels to sections
Labels let you tag specific sections for review and collaboration.
- Select the text you want to label.
- In the menu that appears, click Add labels.
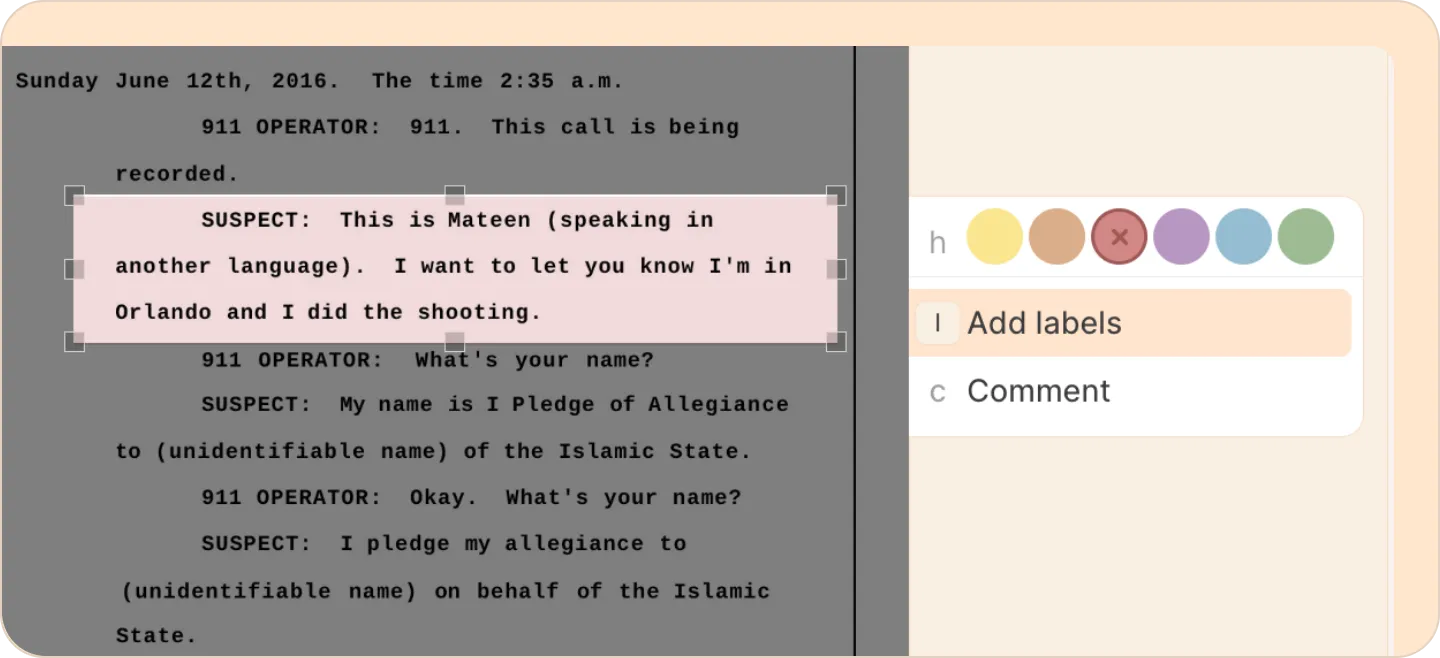
- Type your label name in the field that appears and hit Enter.
Labeled sections are visible to everyone with access to the project and can be viewed all in one place from the Labels tab.
Use labels to stay organized and flag content for your team. For example, mark sections as "Relevant to defense" or "Needs redaction" so nothing gets missed during review.
Sharing with your team
Documents in Reduct are shared at the project level.
- Click Invite in the top-right corner.
- Enter your teammate's email and set their role:
- Editor - full edit access across the workspace
- Commenter - can leave comments but not edit
- Project-specific editor - edit access limited to this project only
- Project-specific commenter - comment access limited to this project only
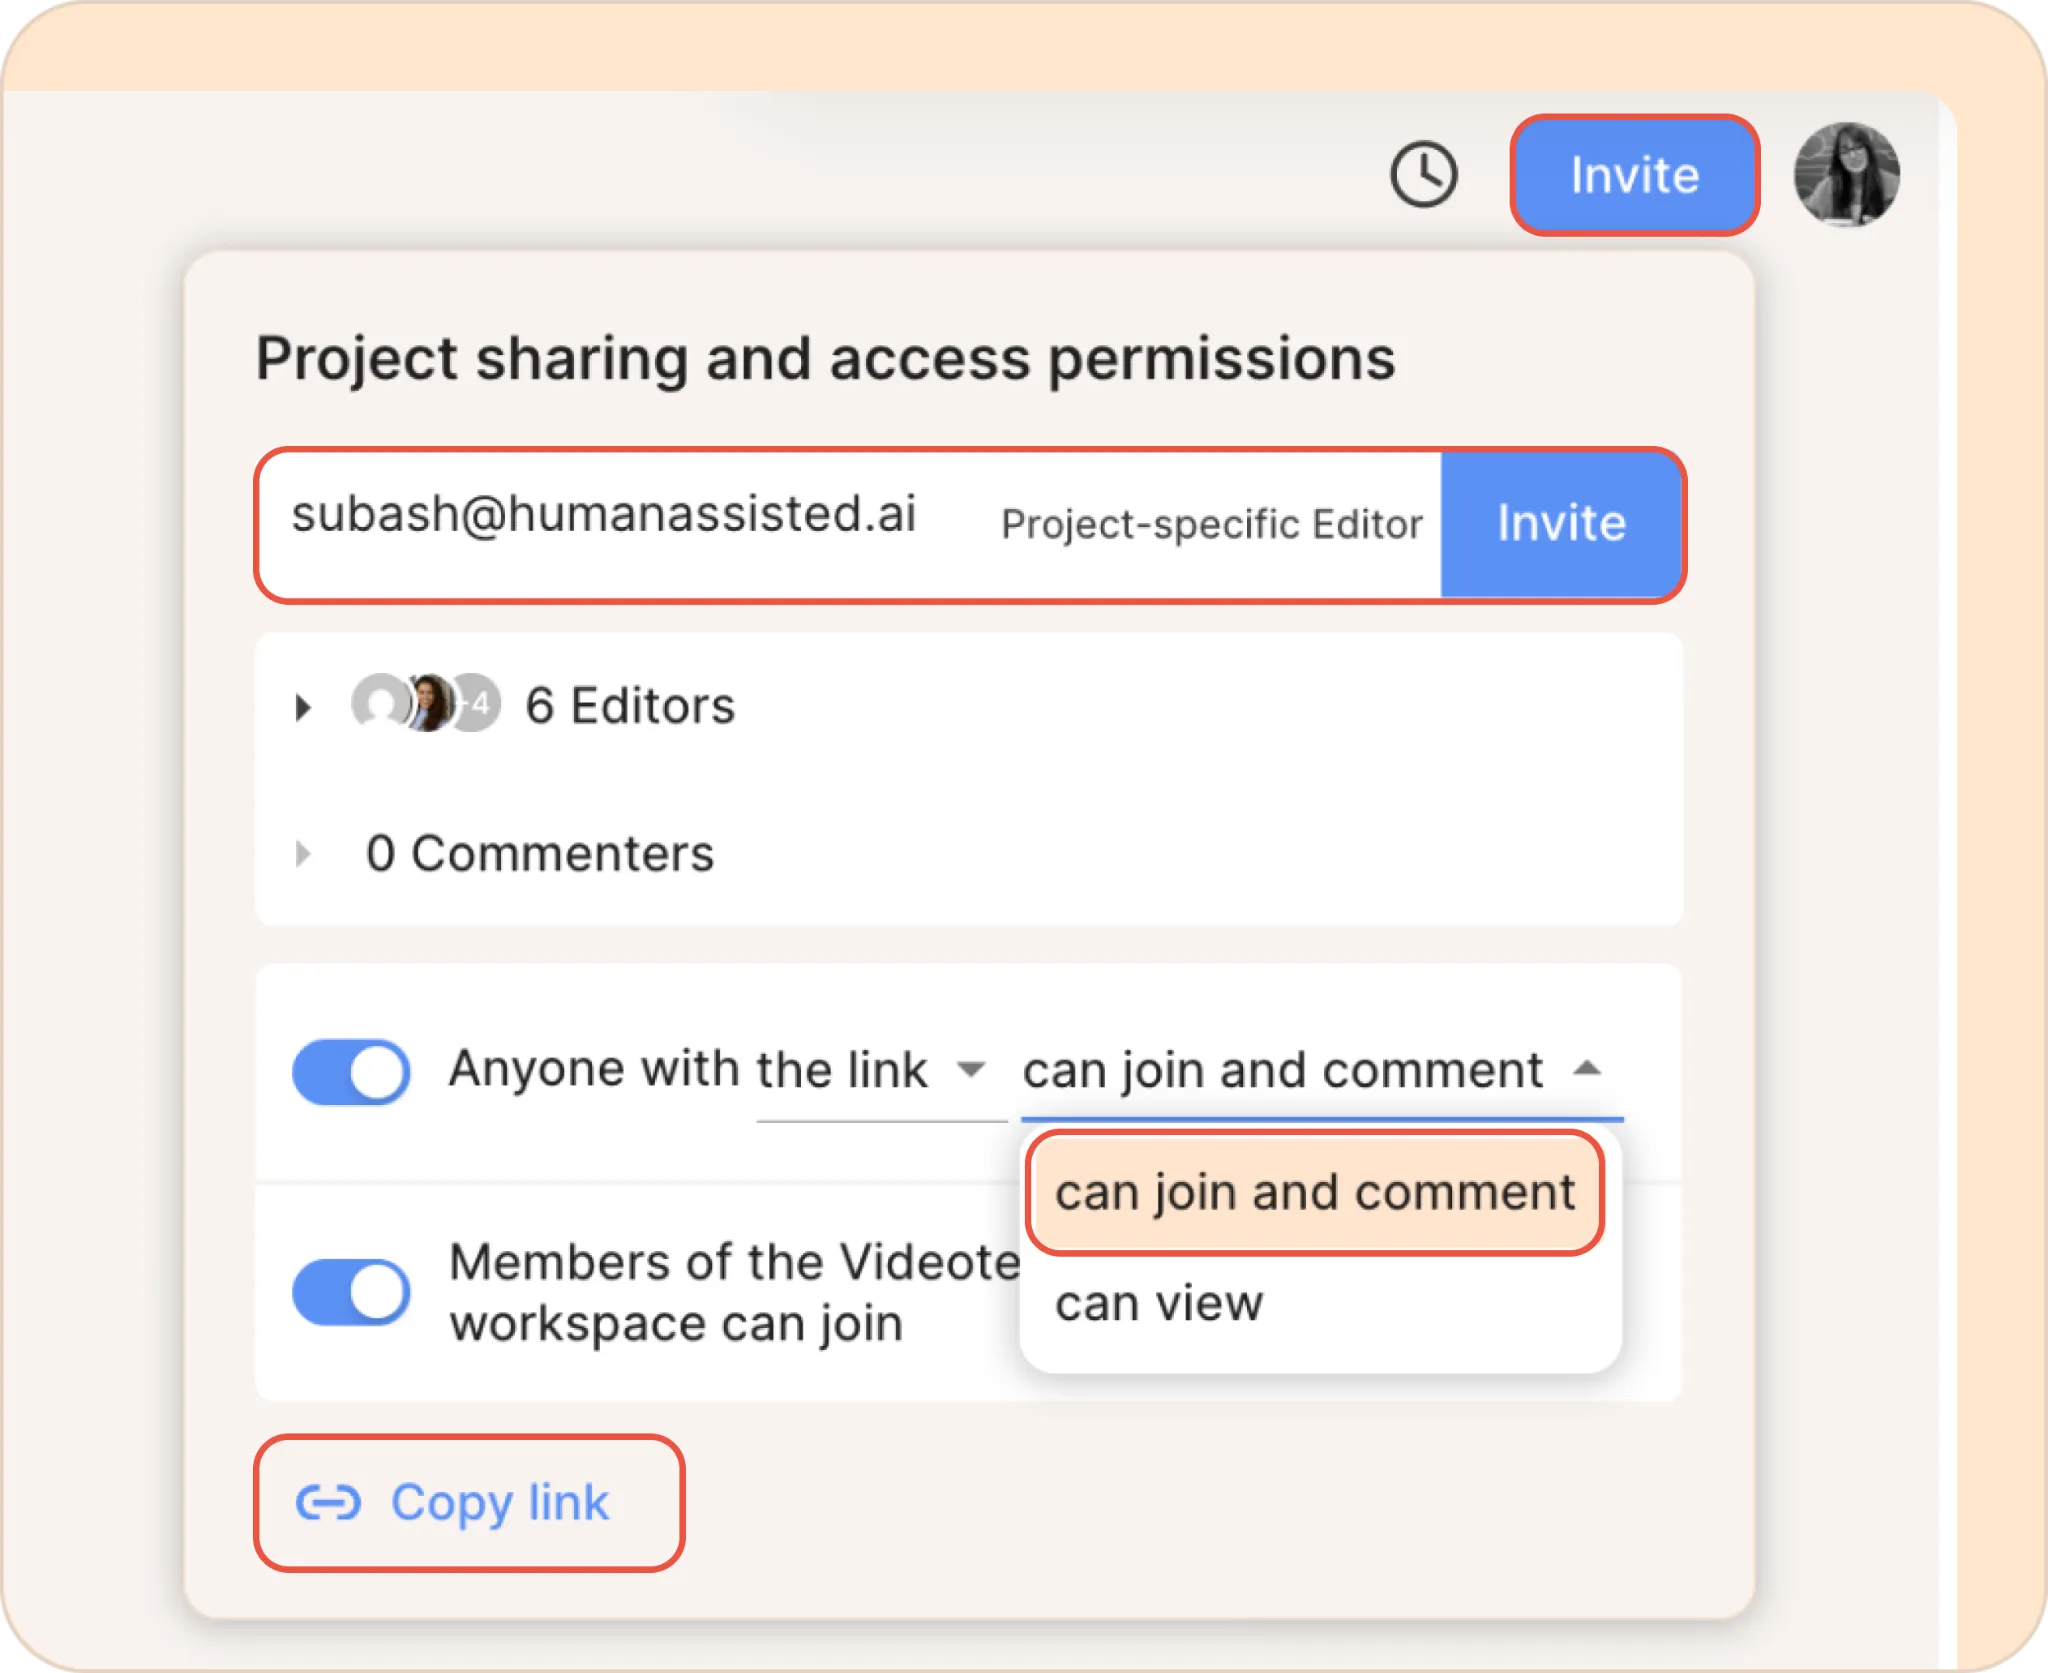
Once added, they'll have access to all documents, recordings, highlights, and labels in that project.
You can also enable link-based access from the same panel. Set it to ‘can view’ for read-only access, or ‘can join and comment’ if you want them to be able to leave comments without being a named collaborator.
Downloading documents
Your files are stored securely in the cloud and accessible from any device.
To download a document:
- Open the document in Reduct.
- Click the Download icon (↓) in the top-right corner of the document viewer (next to the page counter).
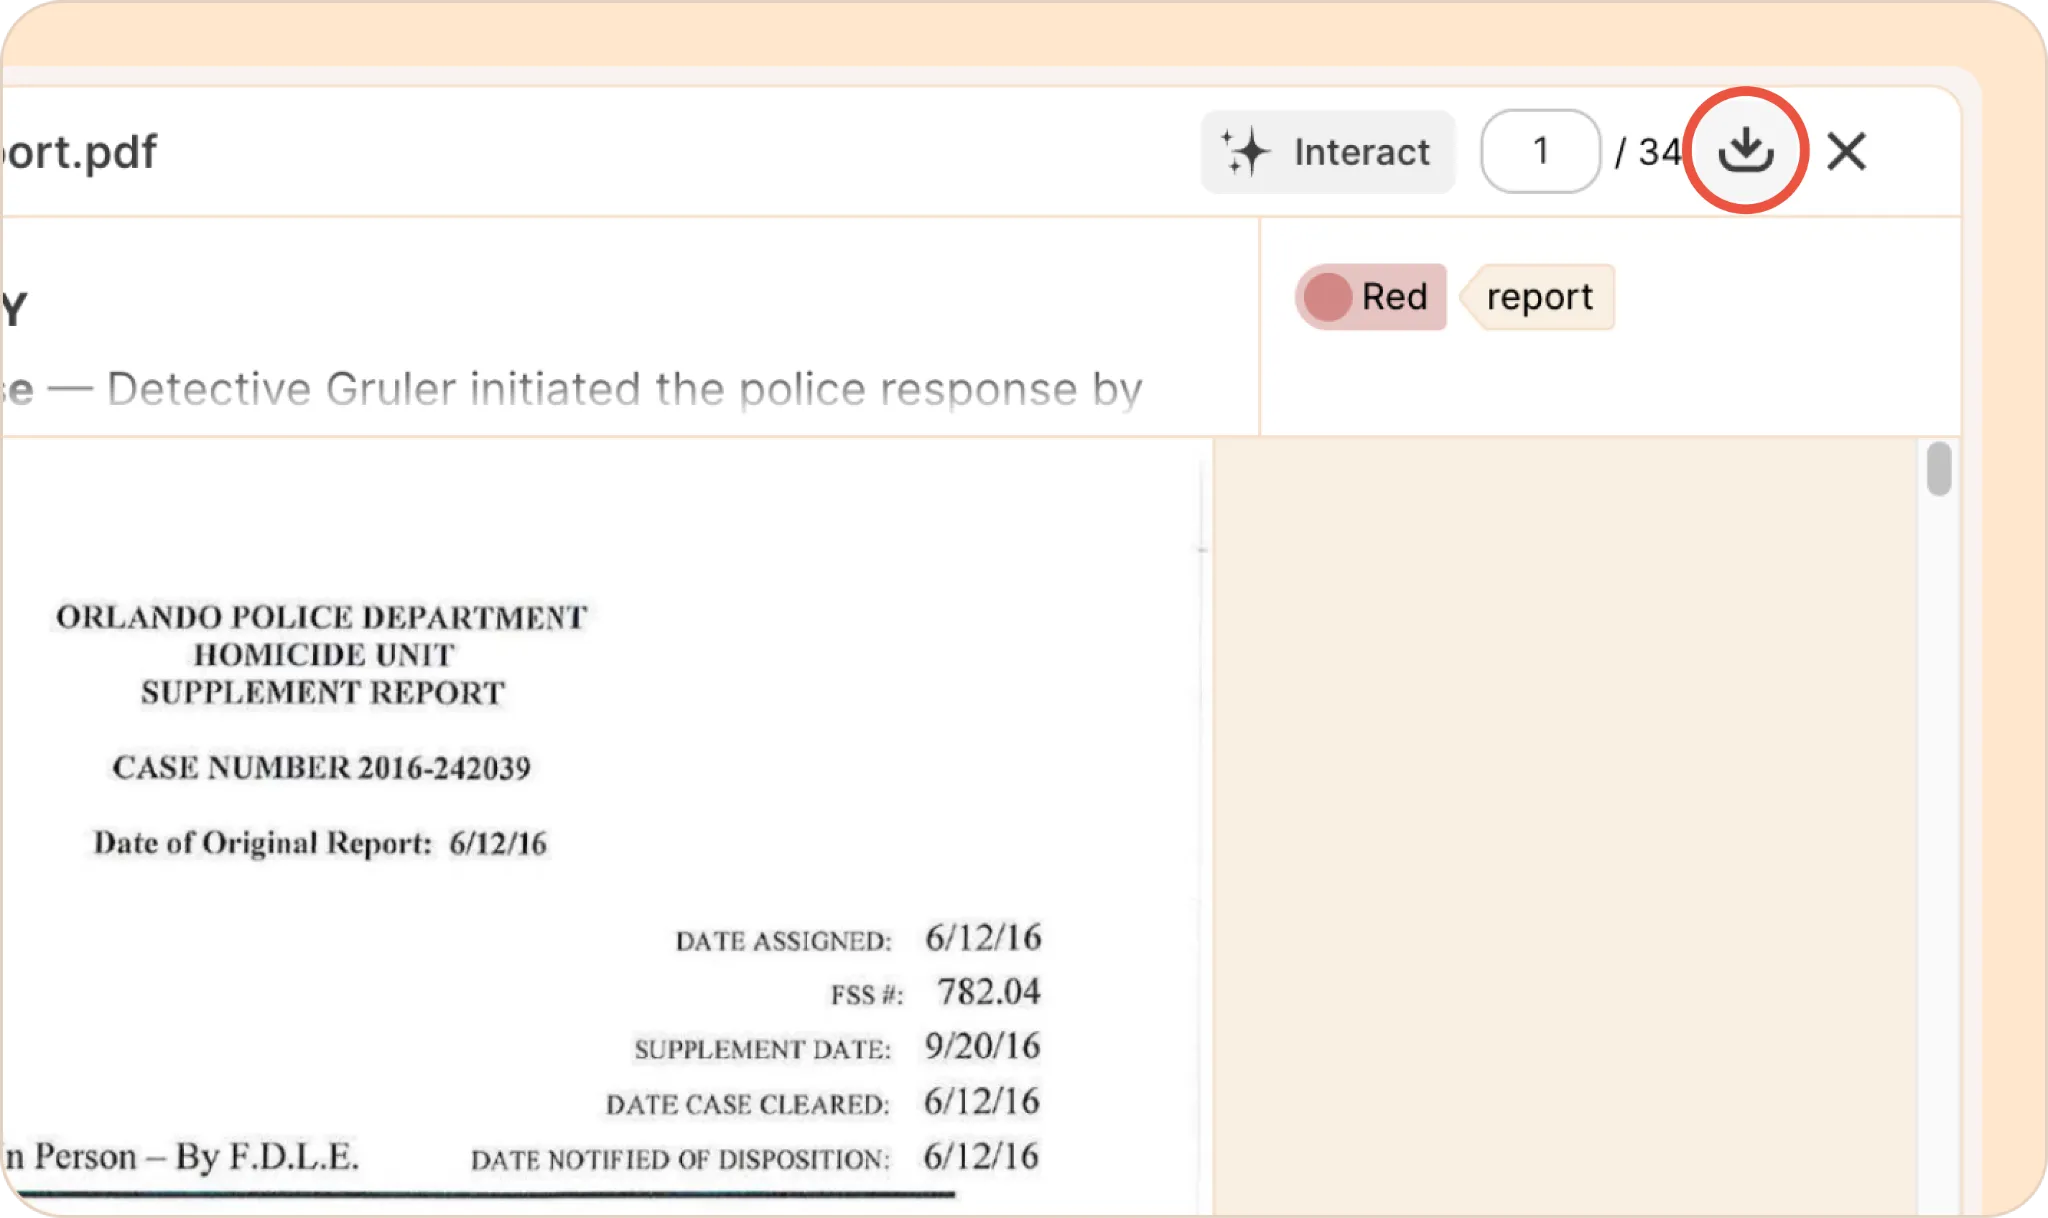
The original file downloads to your device. This is useful when you need to work on a file outside of Reduct or share it via another channel.